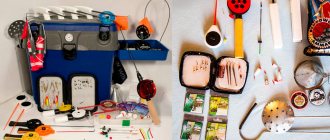
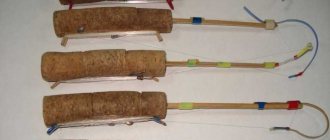
"kipp", American, nylon
The casting trap “Kipp” of the American type takes silver from medium-priced products. Let us indicate the technical features of the “parachute”:
- nylon is made in Russia;
- the lower double cord made of polypropylene, with high-quality hand stitching of each lead sinker, contributes to less tangling of the trap cells when throwing it;
- cell 20 mm;
- a double carabiner attached to an all-metal cord, which reduces the number of breaks and loss of gear;
- all dimensions are clearly maintained in relation to the declared ones;
- The frisbee is solid, which prevents its deformation during casting.
Technical indicators:
| Options | Characteristics |
| Brand | "Kipp" |
| Diameter | 4.0 m |
| Ring | Large plastic FRISBEE |
| Ring size | 29*6-22mm |
| Production | Russian |
| Material | Capron |
| Type | American |
"Kipp", American, nylon
Advantages:
- excellent quality of all parts of the product;
- the slings are located evenly around the entire perimeter;
- the trap does not get tangled.
Flaws:
"kippik", American, nylon
3rd place went to the “American”, which includes an additional cord for throwing a 10-meter long trap. This reliable, high-quality casting net made of nylon is ideal for beginners and experienced trophy hunters. “Kippik” is based on mesh fabric from Thailand.
Technical indicators:
| Options | Characteristics |
| Network type | American type casting network |
| network radius/network diameter, m | 2,0/4,0 |
| Cell size, mm | 28 |
| Mesh thread diameter, mm | 29tex*6(0.66) |
| Sling line diameter, mm | 0,8-1,0 |
| Cord at the base | Polypropylene with core |
| Throw cord | Polypropylene flat |
| Weight, kg | 3.9 |
| Package | Special container "Kippik" |
"Kippik", American, nylon
Advantages:
- additional cord included.
Flaws:
Casting net (cape or parachute).
1.Casting network.
A casting net (cape or parachute) is one of the most ancient methods of catching aquatic life with a net. You can fish with it from a boat from the shore or from a pier. Wherever there is a convenient place to throw it, and where there is a good bottom you can catch with this net.
Casting networks are divided into 2 groups: “Spanish Women” and “American Women”. This division means a difference in their design and functionality.
The main difference between the American ones is the presence of slings stretching to the center of the network fabric. These slings pass from a thick rope through a ring located in the center of the net and are tied to a rope with weights tied around the perimeter of the net. During the throw, the net opens due to centrifugal forces and falls onto the surface of the water in its entire plane. Then, due to the weight-weight, the net is quickly immersed in water around the perimeter, and in the center
Due to water resistance, a small dome of network is formed. This net can be used to fish both in the water column and from the bottom. If the bottom is good, then you can wait until the net falls to the bottom and immediately pull the rope. If the bottom is not very good, then without waiting for the net to fall to the bottom, you need to pull the rope tied to the slings in the center of the net. This will avoid unwanted snags. Further, continuing to pull, the slings will pull all the sinkers into one place - the net closes. At the same time, the middle of the net will lower and pockets will form on the sides where the caught fish will be clogged. When the sinkers begin to rise and press against the center of the net, the fish will not escape anywhere. Such nets are usually made from fishing line or nylon thread. The weight of a net with a diameter of ~3 m with weights is about 2.2 kg.
Spaniards do not have such slings. Closing the network is ensured by a cord stretched along the perimeter of the entire network, pulling which tightens the ring of the network - a circular drag is obtained.
Unlike Americans, due to these design features, the Spanish can reach up to 7 kg (D=3m) in weight! It all depends on the diameter of the network. They are usually made from nylon thread.
What type of network to buy or make for yourself is up to you! I advise you to go to the store, look and decide which one you need.
But for my region where there are silted ponds and small rivers, American is suitable for me. And it is easier to use. It’s easier to pull out the catch, easier to prepare for the throw, and it’s lighter. But for faster rivers the Spanish Flu would be more suitable.
The prices for casting networks in Russia are too high. You can buy a Chinese one with a diameter of 2.5 m in the store for 2-4 thousand rubles. And normal ones will cost even more. It would be cheaper to buy it in foreign online stores, but according to customs rules, all fishing equipment and their parts for catching animals are PROHIBITED for transportation! Therefore, it is more profitable to make such a network yourself. It will take a long time, but you will get the network you need.
To make a cape net (its fabric), a regular net fabric is not suitable, since such a net will have cells stretched diagonally in the four corners when thrown and pulled. Because of this, the canvas in the elongated state can have the same radius, and when it opens, it can become square-like (or vice versa). Because of this, it won’t be possible to throw and the canvas will get tangled. From ordinary fabric, you can sew a casting fabric from triangles, so as to prevent the cells from stretching diagonally. But such networks will have many seams and there may be problems with load balance, which will affect the quality of the network opening.
The fabric must be knitted by hand or ordered from craftsmen.
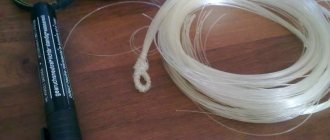
I made such a network myself with a diameter of 3 m. cell=1.7cm. The thickness of the fishing line is 0.24 in about 1 month, but I knitted it whenever I had to. As a result, 28,000 knots were tied, 900 m were spent. fishing line (250 rub.) +50 rub. 75m. fishing line 0.8 for slings +10 rubles swivel +35 rubles 20m. BRAIDED rope for body kit +20 rubles 10m. ropes for pulling (preferably also braided, but not essential) TOTAL = 415 rubles + lead from batteries. I used cheap “Klin” fishing line in reels, now I regret it. You need to take an inexpensive fishing line, but without memory! Klinskaya is a bit stiff, but it remembers the knitting position - then it springs back.
For knitting we will need:
- Make a shuttle and template
- Line for canvas. For cells from 15mm. up to 25mm, a fishing line D=0.20 (0.25) without memory is suitable. You can calculate the length of the fishing line and the expected amount of work in tablica seti
- Line for slings D=0.8. 100m coil is enough.
- Rope for body kit. Nylon, wicker!!! See the length in the same table. Select the diameter depending on the weight of the sinker. Usually they recommend 5mm, but for me it’s 3mm. went great.
- Rope for pulling the net. Nylon, thickness from 10mm (so as not to cut your hands) is also wicker.
- Sinkers calculated at 1.2 kg. at 1m of network radius.
- The swivel is stronger.
- PVC pipe (connection) 32”
- Plastic plate or bottle cap.
- more
Making a shuttle for knitting a net.
Shuttles for knitting nets come in different types.
Basically, for weaving nets with large meshes, plate shuttles with two or one pointed side are used. Such shuttles are now sold in almost every fishing store and cost about 50 rubles.
These shuttles can be made of wood, plastic, textolite, metal plate or wire. It’s your choice of what to make from and what materials are at hand.
First, a plate is cut out in the form of a rectangle, the length of which should be from 15 to 30 cm. There is no point in making it longer as it will be inconvenient to weave. Longer ones can be used when weaving strong nets with thread or rope for hammocks. The width of the workpiece should be less than the mesh size of the future network, but sufficient to ensure the strength of the shuttle. For example, when I knitted a 1.7 cm mesh net, I used a 1.4 cm wide shuttle.
1. I recommend using a duralumin plate to make the shuttle. It is easy to process, the material itself is quite elastic and light, and sharp edges can be smoothed to a mirror state, which makes weaving easier.
2. Next, on one side of the plate, you need to make two cuts with a hacksaw at the same distance from the edge (see the black dotted line on the left), and on the other side, cut off two triangles, giving the shuttle a pointed shape.
3. Next, use pliers to break out a piece between the slots as in the picture along the red line. You should get two horns. And at the other end, many holes are drilled in a “U” shape. For braiding with 0.24-0.35 fishing line, the optimal gap at the top of the “U” will be about 2-3 mm. If you do more, the line will spontaneously fall off the shuttle during weaving.
4. Carefully process the break point (on the left) with a file, smooth out all sharp edges and irregularities. At the right end, use a file or other tool to grind off the partitions between the drilling holes and also remove all irregularities.
5. Next, you need to process the entire resulting shuttle with sandpaper or a needle file. There should be no sharp edges or irregularities on it.
The line needs to be wound from one edge to the other. On the left, the fishing line is passed between the horns, then from the side where it comes out the fishing line is put in a loop on the remaining rod inside the “U”, then the fishing line is again led between the horns to the other side. etc.
The same shuttle is sometimes made pointed on both sides. But it seems to me that this will create more problems when making it and winding the fishing line.
In the next version of the shuttle, there is no core inside the “U”, but thin cuts are made on the edges for the passage of the fishing line. These shuttles can hold a lot of fishing line. The fishing line is wound by alternately threading it through thin cuts at the edges.
These same shuttles are sometimes made of elastic wire. The wire is bent in this shape, after which another thinner wire, thread or electrical tape is wrapped in the center to give the shuttle strength. The fishing line is wound in the same way as the first shuttle discussed. In fact, this is what it is, only made of wire.
For knitting with a thin thread or thin fishing line of a network with a mesh size of less than 10 mm. It is better not to use a regular plate shuttle. In this case, due to the small size of the mesh of the network, every millimeter of the mesh should be saved so that as much fishing line as possible can be wound on the shuttle, and then it can be easily pulled through the mesh when tying knots. A needle-shaped shuttle made of thin elastic steel wire is suitable. To make it, you need to cut two pieces of wire of the same length. Next, using a vice and pliers, bend both ends of the wire as follows:
Both wires must be bent at each end so that the edges and places of bends coincide along the axes indicated in the figures.
When both wires are prepared, they need to be connected by wrapping them with a ton of wire or in some other way to ensure their immobility relative to each other.
Now the ends of the wires (see left) need to be slightly bent so that they rest against each other (see right end). And additionally, the ends of each wire on the outside can be sharpened, giving them a pointed shape. And grind down the places where the ends of the wires come into contact so that planes are formed with which they will touch, but sharp edges of the wires must not be allowed to remain in these places!
Now the shuttle is ready for winding fishing line or nylon thread onto it. The fishing line must be wound from one end of the shuttle to the other, passing it between the touching ends of the wire. To make it easier to wind the wire at both ends of the shuttle, you can bend it slightly (only while winding the fishing line) - this will not only make it easier to thread the fishing line between the ends of the wire, but will also prevent unnecessary friction and damage to the fishing line on the remaining sharp edges.
To ensure that all network cells are the same size, a template plate is used. It can be made from anything. The main thing is that it is thin and durable. During the weaving process, you will repeatedly wind loops of fishing line around this template, which can lead to the appearance of cuts from the fishing line on its edges, to which it will cling. Therefore, in order not to make the template several times, it must be made of scratch-resistant material. For example, textolite, aluminum or some types of plastic. If you knit a little, you can use unnecessary plastic cards (bank cards, discount cards, etc.)
The length should be about 10-13 cm (this depends on the size of your palms). The length should be such that the template fits comfortably in your hand. The width of the template is equal to the cell size of your future network.
After you have cut the template to the required dimensions, carefully sand it with fine sandpaper to make it smooth. There should be no sharp edges or edges on it!
3.Knitting the net fabric.
I don't know exactly what this node is called. I have been knitting with it since childhood, as someone taught me. In principle, the knot is good, it does not stretch, but perhaps in comparison with the others it takes a little longer to knit, but when you learn how to knit it you will be able to knit very quickly.
I divided the knitting order shown in the picture into 6 stages using colors and numbers.
1. (necessary at the very beginning of knitting when we don’t have a single row yet) We tie a loop on a fishing line, the edge of which is fixed somewhere. See Fig.1 - Black
2. We already have a loop or loops from the previous row of the network. We thread the shuttle through the loop. See Fig.2 - Blue
3. Insert the template plate into the resulting new loop and pull the shuttle, pulling the fishing line and squeezing the template with it. See Fig.3 - Gray
4. While the fishing line is still stretched, press it with your finger to the template, thereby fixing it. Hold your finger. See Fig.4 - Orange
5. We hold our finger. And we draw the shuttle with fishing line around the previous loop (into which we threaded the black one in steps 1 and 2 ). We move the shuttle to the side. See Fig.5 - red
6. We hold our finger. And we pass the shuttle into the previous loop (into which we threaded the black one in steps 1 and 2 ) on the right. In this case, the loop from point 5 should also remain on top as in the figure. Then we pass the shuttle into the loop, which we still hold with our finger on the front side (closest to us).
Now, without releasing your finger, pull the shuttle and line down. at the same time, the loops of points 5. and 4 . And when you feel that the tension of the fishing line has reached your finger and there is no excess fishing line left on the loops, loosen your finger and continue to pull the shuttle until the loop under your finger is completely tightened.. See Fig. 6-Purple
You should start knitting the network with a set of primary loops. The knitting itself will be from the center of the network circle to its edge, so you can choose the diameter of the network yourself, the one you need or how much patience you have.
So, first you need to decide which way to knit in the round. There are two ways. The first is in a spiral from the center and the second in circles.
In any of the options, first we make a loop on the fishing line, see in Figure “1”, onto which we then cast on the required number of initial loops. I usually knit about 16 stitches. But it should be taken into account that the other end of the fishing line (not the one on the shuttle) should be left longer - approximately equal to the radius of the future net.
Now we knit the second third and fourth row. This way we get a rectangular network fabric. see figure “2 and 3”
For this fabric you need to tie the beginning and the end so that you get a ring of mesh. see figure "4"
Next, we knit the remaining rows of the future network to the ring from one of the edges, simultaneously increasing the number of loops in each subsequent row (this is necessary for your network to increase in radius).
see in figure "5"
Well, if you want to weave in a spiral, then when tying the edges of the network, make a shift by 1 row (i.e. tie the end of the 1st row to the beginning of the 2nd, the end of 2 to the 3rd), after which the end of the 4th row will remain free. Next, to the free end of the 4th row, we will begin to knit the remaining loops, gradually increasing their number in each subsequent row, thereby increasing the number of spirals of the network and increasing the radius of the network, and so on ad infinitum.
Now about adding loops. This is necessary so that your network increases in radius, but at the same time remains flat and not in the form of a pipe or cone. To do this, you can calculate for yourself that it is necessary to increase the number of cells of each row or spiral by the number = PI = 3.14 - this is ideal. But in fact, after you tie it, the net will be pulled into a cone due to the memory of the fishing line. Therefore, increase the number of loops by 4 or 5 cm
in Figure “6.”
Now about knitting methods. I would still advise weaving in rows (parallel rings). With this method, when casting, the net opens up better.
I also advise you to mark with some marks on the network canvas the places on the circles where you need to add the number of cells (for example, I use tapes with Velcro). This is necessary in order to remember to add cells exactly where needed. Naturally, they need to be removed and moved to the right places.
see in figure "7"
Also, in order to avoid curvature of the mesh circumference on each new weaving row, you should shift the place where cells are added by +1 cell!
For example, we started the network with 16 cells, we need to add 4 cells to each new row, which means that on the new row the places where +1 cells are added (four times) will be located through 4 cells of the previous row 16/4 = 4, etc. for the next row the number of cells is already 16+4=20, and the places where cells are added are 20/4=5 cells. Etc. But do not forget to shift the places where you add cells by +1 cell in the row.
see picture
If during knitting you forgot to add cells in any place, it’s okay to make another +1 cell in the next row - in the future this defect will be leveled out and will be invisible, but try not to make such mistakes. It’s better, of course, if you notice the omission of adding a cell before you finish the row and add the missing cell to the same row.
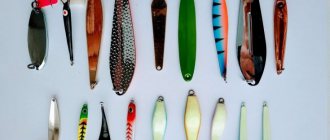
4. Casting sinkers.
There are many different options for casting sinkers with ready-made holes for the rope. Basically, they are based on one simple principle - lead is poured into a mold with a steel core (rod) in it, which is then removed. Believe me, drilling holes takes much longer, and due to the viscosity of lead, there is a chance of breaking a bunch of drills.
First I tried to carve the shape of the sinkers into two plaster plates. At the same time, it is very difficult to carve in the already hardened plaster the very shape of the future sinkers, a groove for placing a steel rod in it, and even so that it is all symmetrical on both plates!
Accordingly, due to these same difficulties, the resulting weights were very crooked, scary, and the injection molds did not always match.
After struggling with them, I found an easier and faster way to cast with a hole.
In the same plaster plates, using this device, I drilled several holes of the diameter I needed. And the knitting needle sticking out in the center additionally drilled a small recess into which I later inserted a steel rod to create a hole in the weight. This can also be done using drills and drills. And this thing just fell into my hands. This seems to be the former pointer of a pressure gauge or other pointer instrument.
During the casting process, I tried to drill such holes from the flat side of the plaster, but this greatly increases the overlay on top of the mold, which will have to be trimmed further in the future. Therefore, I advise you to make a gypsum plate 3-5 mm thick. larger holes (on the sides), which will ensure easy drainage of excess poured lead from the surface of the mold.
The casting process itself is very simple. Melt lead in an iron tin can. Insert the steel core into the center of the mold (exactly into the recess whose diameter should approximately coincide with the steel core rod). The diameter of this rod should be equal to or slightly larger than the diameter of the rope later used to hang the net.
Once all the lead has melted, take the jar with pliers and pour it into the mold. I advise you to tilt the mold a little so that excess lead flows to one side. While the lead is cooling in the mold, but has not yet hardened, rotate the steel rod along the axis - this will prevent the cooling lead from sticking. As soon as the lead begins to harden (it becomes like porridge, even grains are visible J), pull out the rod.
Next, fill in the remaining mold holes in a similar manner.
Having cooled a little in the mold, the lead shrinks and you can pull out the resulting sinker blank by lightly shaking it.
The plaster mold must be dry! You can’t cool it or the lead in it with water! In the first case, there is a chance that lead will splash on you and burn you, and in the second, the form will simply crack!
It should be noted that from my own experience I know that in order for the sinkers to be less confused with the net fabric, they need to be made of an elongated, cylindrical shape. It is desirable that their length be equal to two cell sizes.
When casting, you get these ready-made but not yet processed sinker blanks. Here you can clearly see that the excess lead has stacked on the side of the mold, and the buildup is very small.
Next, you need to cut off the entire overlap with wire cutters. Carefully collect the scraps and pour them into a jar for re-melting.
So that when using the sinkers they do not cling, scratch or cut the fishing line or rope, then it is necessary to smooth out the sharp edges remaining after trimming the excess. Although the metal is soft, there is a small chance of damaging the network fabric.
We will smooth the edges using the rolling method. To do this, pour all the finished, cut weights into a plastic bottle or canister (it all depends on the volume and size of your weights). According to the technology, you can also add several large balls from bearings, but special +
will not be. Now this bottle or canister needs to be shaken, kicked or whatever else you can think of, the main thing is that the weights inside shake, hit and rub against each other. They need to be taken out when ready. The edges should be rounded, without burrs or sharp edges. You can also add a little paraffin to the bottle when rolling, so that in the future the sinkers will get less dirty on your hands.
5.Assembling the body kit.
Finished weights with holes should be washed with water and dried.
To make a net kit, weights need to be placed on a nylon braided rope. A twisted rope is not suitable, as it may subsequently affect the opening of the net when throwing. Or simply, it will get tangled with slings and nets, twisting under the weight of the sinkers.
Since the net is nylon, and even braided, to make it easier to attach the sinkers, as well as to prevent the upper braid of the rope from moving relative to the inner one, one end of it must be melted over a fire and while it is hot, give an elongated, refined needle shape.
Having strung all the sinkers, they need to be secured on a rope at an equal distance, so that the weight is enough for your net (1.2 kg/1 m radius). This can be done in 3 ways:
- Simplest. You can squeeze the sinkers a little by holding the rope inside. But with this method there is a chance of crushing the rope. And if you make a mistake with the distance between the weights, it will be impossible to redo it, and the weights can only be cut off and melted down.
- Having placed the weight at the required distance from the previous one, secure it by tying knots with fishing line or nylon thread on both sides. In this case, it will be possible to redo the detected errors.
- Secure the sinkers with knots of the same rope. It will also be possible to correct the error without damaging the weights. But you will have to untie knots, a bunch of knots, or cut the rope.
6. Linking the body kit to the network.
You can tie the kit to the net using fishing line or nylon thread pre-wound on the shuttle - this is more convenient.
Before tying the body kit, you need to calculate how many net cells should be located between the weights and at what distance so that the net cells are neither compressed nor stretched. And monitor the uniformity of the number of cells while knitting. It is advisable to tie a suspension to each cell to more evenly distribute the load on the network fabric.
After the kit is completely tied to the network, you need to tie the ends of the rope with two ordinary knots and tighten them tightly with pliers. The knot can also be wrapped with nylon thread, giving it additional strength. Or, after tightening the knots, both ends can be cut off, melted over a fire and fused into one ball, which will also prevent the rope from coming undone. It would be enough.
If the loads are small, then they can be secured to the rope several at a time. For example, my loads turned out to be too small, 5-6 grams each. For my network with a radius of 1.6 m, 2 kg of weights are needed. At the base, the network had about 410 cells. Which means to hang 2 kg. Weights then need to be tied 1 to each loop. It would be long and tedious, so I grouped the loads in groups of 3 and secured them with knots of the same rope. In this version, the rope with weights gets even less tangled in the net and its mobility is not limited.
7.Attaching the slings
Before we start tying the slings, it is necessary to make and secure a pass-through ring. This ring is necessary so that when casting and pulling the net, the lines do not get tangled with the net itself, but pass freely through it.
For manufacturing you will need a PVC adapter tube with a diameter of 32-25 used for welding PVC water pipes.
On the wide part it is necessary to machine or melt a groove of small depth.
Next, string the center of the network fabric with a nylon thread (around the hole left during weaving). This hole in the center is where you started the first rows of your net when weaving
Then pull the hole with the nylon thread onto the prepared PVC tube and firmly fasten the net fabric to the tube by winding it with the remnants of the same nylon thread. It should look like in the photo:
The photo shows that I fused two wires in the center of the PVC tube. They are necessary to divide the slings into four groups - according to sectors of the network. This will provide additional separation between the lines so that they do not stick together when casting. Later I removed them, but it turned out in vain! Without these wires, wet slings began to stick together more strongly, which greatly interferes with the good opening of the net.
8.Manufacture and fastening of slings.
Slings for American-type casting nets are made from fishing line with a thickness of 0.8-1 mm. The fishing line must be without memory so that it does not get tangled. First you need to calculate how many slings you will need. Many casting network manuals offer this calculation option. Considering that the slings should be tied at least every 40cm. you need to divide the circumference of the straightened net by 40. Let’s say I have a net in the straightened state (flat circle) with a radius of 1.6 m. Then its length is L=2*P*R =10.048 m. number of lines = 10.048/0.4=25.12
It turns out that my network will require 25 lines. But there is a minus in this calculation! The number of weights tied to the net between the slings may be different, which will upset the balance of the net.
It is better to count the total number of sinkers (or groups of sinkers) connected to the network. measure approximately how many sinkers need to be placed so that the distance is within 40 cm and divide the total amount by the amount in the measured distance.
You may have to experiment a little with the distance between future sling attachments and the number of weights between them. It is necessary to select such a number of weights between the lines that when dividing the total number of weights by the number of them between the lines, the number closest to the whole is obtained.
Now cutting the slings:
The length of the sling differs from the radius of the circle of the straightened net! When you take the net by the ring in the center of the circle and lift it from the net, all the cells are stretched diagonally. This extended length should be used for slings. You can measure it with a meter, having stretched out the net in advance. Or a more accurate method is to count the number of rows of the network (the number of circles of the network) from the center to the edge (you can count the knots). Then multiply the calculated amount by the size of the side of the cell. This is exactly how long all slings should be + allowance for a loop and knot of about 15-20 cm for each sling.
On each cut sling, you need to tie a loop on one side with a single or double knot. The loops of all slings should be approximately the same.
To align, string all the slings in loops onto a hard object, such as a nail driven somewhere. Next, smooth out the slings, untangle them along their entire length and pull them out. Now measure the distance of the length of the sling from the knots of the loops (without the previously added margin) and add 1 cm to it. (The slings are still gathered together and extended) at this distance we will tie the rope with weights. This distance now needs to be marked with a marker on each line!
Now everything is ready for binding. Place the net with the inside facing up.
One sling at a time, alternately tie them to a rope with weights at the previously calculated distance. And don’t forget about the mark on the lines made with a marker! The knot must be located at this mark! I do not recommend using a regular knot tied twice as it ruins the fishing line. In the place where you pull the knot, the sling may break (as it already happened to me).
I tried this one (1)
knot and it hasn’t let me down yet (the line in this knot does not tighten, but wraps around the rope and has a self-tightening knot):
Having tied this knot, I advise you to tie the remaining short end to the rope with a double knot, just in case. (2)
, and then tie a single one next to it
(3).
All three knots must be knitted very close to each other. This line catch combination will last forever!
By the way, do not rush to cut off the remaining short pieces from the slings. In many methods of casting a casting net, the lower edge of the net (the rope itself with weights) is taken into the mouth, but since after the first cast it can already be dirty, it is better to take with your teeth not the rope, but just these remaining pieces of lines. The fishing line still retains less silt and dirt on its surface.
Now, so that the lines do not get tangled in the future when casting, take them one by one along the circumference of the net and string them on a thick rope. When all the slings are strung, tie all the loops of the slings with several knots and pull the entire resulting bundle through a ring of PVC tube tied in the center of the net.
Now the net can be turned over with the outer side up. Pull a plastic plate with a hole in the center with a radius of about 1.5-2 cm over the sling loops tied together; this will serve as a limiter for the slings. You can use a plastic bottle cap. The plate (plug) must be lowered below the nodes (on the slings themselves). Wrap the hinge nodes with several layers of electrical tape so that the nodes cannot slip back through the plastic plate.
Tie a strong swivel onto the same rope after the knots with loops. The swivel will prevent twisting of the pulling rope, slings and net web, since when casting the net rotates along its axis. A thick braided rope is tied to another ring of the swivel to pull the net out of the water.
To pull the net, you need to tie a small self-tightening loop at the free end of the rope, which will secure the rope to your hand when casting.
All! Now your casting net is ready to fish. Good luck with your fishing and fewer snags!
PS photo of my first catch:
You might be interested in:
- The printing subsystem is not available.
- Personal information in the properties of “My Computer”
- DIY spray gun.
- How to connect two computers with one cable (twisted…
- Restoring the view of the “Task Manager”
- How to unblock an account on social networks.
Crayfish, nylon
“Crayfish” becomes the gold winner among top-level products. It is made of thin nylon with double twisting, meets all modern requirements, and is manufactured using high-precision equipment. The Thai trap has a light gray color, the material is impregnated with a protective composition against ultraviolet rays.
A distinctive feature of “Crayfish” is the increased softness and elasticity of the fabric. Thermal fixation of all components ensures the safety of the configuration and size of the cells. The tensile strength of the threads is 110 den/2 (about 2.1 kg).
Mesh fabric is a universal material for the production of different types of gear; it has the conclusion of the special expert association “Soex-Neva”, the Chamber of Commerce and Industry of the Russian Federation No. 001-08200-19 dated December 23, 2020, indicating the legality of its use.
The network has various modifications and parameters:
- nylon thickness (determined by the structure, may consist of 1, 2, 3 primary threads);
- shape, pitch (distance between two adjacent nodes), cell size;
- height (calculated in meters or number of cells), length of the trap.
To mark the structure of nylon, 2 classifications are used - (tex) or (den), 9 tex = 1 den.
Technical indicators:
| Options | Characteristics |
| Color | Dark grey |
| Mesh, mm | 14-50 |
| Height, m | 1.8-6. |
| Number of cells in height, pcs | 75, 100 |
| Length, m | 4 |
| Thread structure | 110den/2 |
casting net Crayfish, nylon
Advantages:
- durable nylon;
- the cord does not get twisted;
Flaws:
In conclusion, it is important to note that casting traps do not require permits, however, according to Art. 8.37 of the Code of Administrative Offenses of the Russian Federation provides for administrative liability for violation of the regulations on catching objects of the animal world. Illegal use of aquatic biological resources, which may entail a large loss (over 100 thousand rubles), is punishable under Art. 256 of the Criminal Code of the Russian Federation.
Industrial fishing, including the use of nets, can be carried out by legal entities and individual businessmen; for this it is important to purchase a permit to hunt aquatic life, register the equipment purchased in the salon, in the manner prescribed by law.
Daiwa generation black twitching stick 661 mhfs
An interesting product from a well-known manufacturer. Weight 130 g with a length of 198 cm. The brand knows what it will focus on, and this wins over numerous customers. For a reasonable price, a person is guaranteed to buy a high-quality spinning rod with excellent characteristics. Belongs to the category of universal. Sensitivity is at an optimal level, so the device can be used for casting over long distances. The permissible weight of the dough is 28 g. Carbon fiber and carbon were used to manufacture the product. It fits comfortably in your hand.
READ MORE: How to choose an e-book in 2019-2020 using the example of PocketBook | E-books | Blog | DNS Club
The price of the set is 6000 rubles.
Daiwa Generation black Twitching Stick 661 MHFS
Advantages:
- build quality;
- acceptable weight;
- excellent characteristics;
- ease of use;
- successful design;
- high-quality materials were used in production;
- universal;
- decent value for money.
Flaws:
- weak rings;
- difficulty of transportation.
Fishtex (cast net) American type
One of the most popular gear, according to fishermen, which is in demand among buyers. Carries out its work according to the so-called. the jellyfish principle - when thrown into the water, the parachute opens, and as it dives, it begins to form a dome. During lifting to land using the lower lines, the lower cord is pulled up, after which the dome bowl is completely closed and does not allow the fish to get out of it.
Only high-quality materials are used to make this model. American Fishtex (Cast Net) is made of fishing line with a diameter of 0.28 mm. Additionally equipped with 110 weights. The mass of one load is 26 g. The diameter of this equipment is 4.8 m. The cell size is 20 mm.
casting net Fishtex (Cast Net) American type
Advantages:
- high quality product;
- good strength indicators;
- suitable for professional fishing;
- does not require special skills;
- easy to cast;
- suitable for catching carp;
- you can catch big fish.
Flaws:
- high cost (4500 rubles);
- not suitable for catching small fish.
Casting net with ring - casting technique
Such networks are called American and are considered more efficient than other types of networks. The highlight of this tackle is its special design, which allows for more accurate and reliable casts, guaranteeing success.
The process of throwing tackle with a ring:
- The pulling cord is gathered in rings in the left hand, after which the net is shaken so that it straightens out.
- The process must be monitored for loops formed both on the network and on the cord.
- Using the right hand, the net is intercepted at the top at a distance of 1/3 of its length, after which it is collected in skeins in the left hand.
- After this, the cargo cord is grabbed at the extreme points, and the net itself should be deployed as widely as possible.
- When throwing, you should assist the cast with a body movement that should turn 180 degrees.
- Just before the throw, the net can be swung, which will increase the throw range.
- The tackle is directed along a flat horizontal trajectory. As a result of this specificity of the flight, the network deploys almost right next to the water.
- The greater the force of the throw, the more reliable the operation of the tackle. Only a straightened net after entering the water can guarantee a catch.
Graphiteleader tiro prototype gotps-762l-t
You can’t call this fishing rod an inexpensive one, since it belongs to the premium class. The best gift for fishermen who have seen a lot in their lives and consider themselves true aesthetes. Goes jig fishing. Most buyers recommend this rod despite its price. Guarantees perfect casting at any distance.
The blank is made of high modulus graphite. The handle is made of polymer plastic and is marked EVA. The appearance is strikingly original. A catchy and beautiful accessory will appeal to those who are used to standing out in life. The guide rings are equipped with a titanium frame.
Cost – 40,000 rubles.
Graphiteleader Tiro Prototype GOTPS-762L-T
Advantages:
- the fishing line is prevented from getting caught;
- factory case;
- casting quality;
- high quality product;
- ease of use;
- unusual design;
- long service life;
- sensitivity indicator.
Flaws:
- cost, but the product is worth it;
- A rare model, not sold in all retail outlets.
Kippik (American, fishing line, no ring)
An easy-to-use product that allows you to fish straight out of the box. Strong fishing line was used to make the canvas. The cell size is 16 mm, the blade diameter is 0.3 mm. The cord is made of high quality polypropylene. The area of the dome when opened is 5.4 m.
This model is suitable for catching medium-sized fish from the shoreline of a reservoir. It is recommended to use in those areas of lakes or rivers where there are no snags or sharp stones at the bottom. It is light in weight and can be easily thrown into a section of the reservoir pre-marked by the fisherman.
casting network Kippik American
Advantages:
- compactness (light weight);
- convenient to use;
- high quality materials.
Flaws:
- high price (2400 rubles);
- Suitable for fishing in reservoirs with a clean bottom without snags and sharp stones.
American d-3.6 m
A feature of models of this type is that they are equipped with special veins that are capable of tightening the equipment while lifting it, thereby forming a closed dome or bag. For its manufacture, high-quality nylon thread with a diameter of 0.66 mm was used.
Thanks to this, it can be used in reservoirs whose bottom is strewn with snags or sharp stones. The mesh size of the parachute is 8 mm, so the net can be used both for catching live bait and for catching larger fish. The total weight of the product is 3.1 kg. The model is equipped with a throwing polyethylene cord (diameter - 7 mm), as well as a special weighting cord (diameter - 5 mm), with weights (the weight of one weight is 26 grams).
casting network American D-3.6 m
Advantages:
- high quality;
- excellent strength indicators;
- suitable for any reservoirs with difficult fishing conditions;
- can be used to catch fish of different sizes, including live bait;
- easy to cast.
READ MORE: Dental clinics in Voronezh.
Best dentistry - Voronezh, patient reviews, rating. Flaws:
- high price (5600 rubles);
- Some users point out the heavy weight of the product.
How to choose a casting network on Aliexpress
On Aliexpress, users can buy two main types of casting networks - American and Spanish. All other proposed varieties are combinations and modifications of the basic design.
When you select a product of a specific category on the trading platform, you can immediately specify its type in the search bar - American, American or Spanish, Spanish. With this approach to searching, there will be a lot of inappropriate products in the search results, so it is more rational to use the advanced search option.
To reduce the time for selecting a suitable model, you can use the specification option. To do this, after displaying the request information on the screen, you should apply filters that allow you to clarify the requests that the user is interested in:
- manufacturer;
- color;
- cell size;
- construction - glued, retractable, with or without changing position.
After placing the appropriate marks opposite the parameters of the casting network, the results of the user’s selection are automatically filtered, excluding positions that are unsuitable in terms of characteristics from the initially given positions. The advanced search option reduces the number of offers to a minimum. Each of the remaining results matches the user's queries.
Search results can be filtered to display in ascending or descending order. Aliexpress has the option of selecting sellers based on the largest number of orders and the highest ratings. Additionally, you can set the maximum and minimum price for which the user is willing to buy the product. You can customize the filter by product rating and, if possible, take advantage of free shipping.
Main parameters of spinning rod
The type of wiring determines the structure, dimensions, weight, material used, etc. Therefore, you should decide on these parameters in advance so as not to spend a lot of time in the store. Professionals already know the key features, so it is much easier for them to choose a specific model. Beginners need to study this issue in more detail.
To make it easier to make a choice, you need to know the wiring principle:
- The wobbler sinks to the bottom and begins to move in different directions, reminiscent of a zigzag;
- Most of the time the bait is located in the lower part;
- It is necessary to constantly adjust the tension of the fishing line, while the fisherman must not forget to constantly monitor the upper part of the rod.
Based on these features, choosing the appropriate option for a jig will not be difficult. The fishing rod must meet the following criteria:
- The rod should guarantee a quick response to a bite;
- Control must be carried out safely;
- High throwing range.
The jig spinning rod is designed for users who are able to provide good control, but at the same time have a great feel for the product. In a standard fishing rod, all these characteristics are achieved through the correct equipment; in casting models, only correct retention plays the main role. To better determine bites, it is necessary to test the fishing line; tactile perception, although more complex, is much more professional. In addition, casting makes it possible to carry out a clear fixation with fish of any size.
Selecting a rod for twitching is much more difficult, since it is almost impossible to predict the behavior of the bait. For this option, it is recommended to use special wobblers, as well as a fishing rod with a fast action. If a person prefers to fish from a boat, the optimal length is 2.1 m; in the case when hunting is carried out from the shore, the maximum value is 2.5 m.
Casting models are best suited for these purposes. Thanks to its light weight and high range, it is easier for a person to perform a high-quality cast and subsequent hooking.
The main parameters when choosing this option are:
- The form must be a complete structure without any signs of damage.
- Every connector, ring, spool holder, etc. have good quality. Therefore, it is best to buy models from well-known manufacturers.
- There should be no extraneous sounds when shaking the fishing rod.
- It is recommended to pay attention only to models with fast action. They will provide better wiring and will not fail during jerking.
- The optimal test is 21 g. If you plan to use massive wobblers, then options designed for 28 g are suitable.
Spanish type casting cape. Design.
The casting cape “Spanish woman” in the lower part of the canvas has pockets located along the cargo cord, thanks to which the caught animals are kept in the cape. The disadvantage of this design is that in the process of pulling out the cape, if it curls up, pets have the opportunity to escape from it. But at the same time, this cape does not collect everything that lies on the surface, so it is more often used in places with a contaminated surface. Our online store presents a Spanish type casting cape made of fishing line and nylon, made in China.
Casting fishing nets
Content
Fishing with a cast net, also called a parachute net, a cape net, etc., is one of the traditional fishing methods, typical for Asian and South American countries. In our area it is not very common, although many, looking at the high catchability of the gear and its apparent simplicity, would like to learn how to work with it. Learning to properly use such a network is a rather painstaking and time-consuming process, but anyone can master this art if they wish.
The essence of fishing is as follows:
- the net is wound around the hand in a special way and thrown to the chosen place;
- there it opens, covering a certain area of water;
- its loaded part sinks to the bottom, forming a dome;
- a few seconds after casting, pulling the rope tied to the base, the angler tightens the loop;
- the fish that was under the net ends up in a kind of bag or pocket, and the net is raised to the surface.
There are two main types of casting nets, differing in their design and technique of use - American and Spanish.
American and Spanish are the two main types of casting networks
Casting technique
The video of fishing with a casting net shows all the stages and steps of casting it. It is better to start training with a small diameter of 2-2.5 m. You can practice on a lawn or lawn.
- Straighten, untangle the slings, level the weights. If it is removed from the water, it is cleared of algae and branches
- The weight cord is straightened to avoid the formation of loops
- Gather the free end of the traction cord with rings in your left hand
- With your right hand, gather the tackle approximately in the middle and make one or two loops on your left hand. For the American, in this case, use a sleeve, which is located in the center of the tackle
- The loop is removed from the hand and held in the left hand so that it can be used to grab one end of the weight loop
- With your right hand, grab the second edge of the cargo loop with your arms outstretched as wide as possible. The rest of the network hangs freely
- The cast is carried out after two or three swings or a wide swing with the body turned 1800
- You should not throw your parachute high; it should fly along a gentle trajectory and open near the water.
- Be sure to secure the end of the pull cord with your left hand, otherwise the product will fly into the water.
- The tackle falls onto the water, covers the surface of the reservoir and sinks to the bottom.
- The weights sink to the bottom, this moment is felt by the weakening of the traction cord in the hand. The net at the bottom forms a dome in which the inhabitants remain.
- After a couple of seconds, you should pull the cord, which will collect the tackle into a bag. They do this with a sharp jerk. The jerk quickly collects it into a dome and also prevents snags at the bottom. Now, using a cord, we pull the resulting bag out of the water.
You can catch small fish from the shore, just determine its location. At the same time, it is effective to use fertilizing. Then the net can be thrown into one place at short intervals.
Large fish are very careful and if they notice the descending dome ahead of time, they will calmly go into the depths of the river.
The best time and best results are when fishing with a casting net is carried out during the passage of fish to spawn in the spring. First, they cover areas located near the shore, and then cast them further as far as the length of the draft cord allows. It is advisable to move downstream.
It is used during the day, but its effectiveness does not decrease at night. It is suitable for catching small peaceful fish, and is also used for tracking large and predatory ones. Then fishing turns into real hunting.
Features and purpose
Standard spinning rods have been popular for several years. Their practicality and functionality make them easy to use in various conditions. But recently, professionals have been using casting rods. They are increasingly appearing on TV screens and in educational videos. The reason for this preference is simple - ergonomics and quality work.
The main difference between a casting spinning rod is the availability of space for using a multiplier reel. This solution increases convenience; in addition, it is suitable not only for professionals, but also for novice users. Often such models are called “trigger”. Another feature of the device is its high bait throwing range, which is also an important point in any fishing.
READ MORE: 10 thoughts from Stephen Fry on the meaning of life, love and depression
For convenient holding of the spinning rod, there is a special protrusion on the holder, which in appearance resembles a weapon trigger. This is where the second name of this product comes from. The main purpose of this element is ergonomics and it copes with this task 100%.
There are no significant differences between the casting models. The structure of this device is the same as that of most standard spinning rods. But still, a small advantage in comfort and throwing range plays an important role.
Today, manufacturers produce dozens of different models that differ in price and functionality. To better understand the main features of this product, it is necessary to consider its advantages, which are significant:
- There is a special protrusion on the handle. Therefore, the product is easier to hold, even in cases where the fish makes a sharp and strong jerk. The clamps are designed in such a way that they prevent strong impact on the hands, since most of them are absorbed by the structure itself.
- Another positive point is the small diameter of the passage rings and the presence of a good leg with an amplifier. They are mounted at the top of the spinning rod.
- The spool holder is located higher than standard models. This solution helps to increase sensitivity, even in cases where the user plans to use heavy and powerful equipment. The fishing rod becomes easier to control, and landing fish becomes easier than in standard models.
All these advantages contribute to high-quality fishing and good ergonomics. Although such positive aspects may seem insignificant, professionals understand that every advantage is important in fishing.
However, the device has a number of disadvantages that are important to consider when purchasing:
- To cast to the maximum distance, it is necessary to use large sinkers, or a person must use large baits. Using medium and light weights, the range becomes worse.
- A quality product costs several times more than ordinary fishing rods. Often the price of professional devices starts from 40,000 rubles.
How to cast a casting net correctly
Before you go fishing, it is better to practice how to properly cast the tackle at home, in the yard or on the asphalt in front of a high-rise building. When the net is cast, it must be cleared of mud, algae, old leaves or small branches, otherwise they will interfere with the correct casting of the gear. So, in order to cast a casting net correctly, you must sequentially perform the following steps:
- The main cord must be gathered into rings in one hand, preferably in the left, however it is more convenient for you. With the other hand, the net is lifted and shaken so that it unfurls.
- In this case, you need to make sure that there are no loops and that the tackle itself is not twisted.
- After it is discovered that there are no loops, the net is assembled into rings in the same hand where the cord is located. The weight cord unfolds to the maximum and is grasped at two points.
- The net is ready to be thrown. It is thrown with one movement of the left hand or swung from side to side and only then is it thrown.
- When throwing, the body must be rotated 180 degrees. This will increase the power of the throw.
- The net must be directed along such a trajectory that it can open without reaching the surface of the water.
- The stronger the throw, the more likely it is that the net will open on time. If this does not happen, then this is evidence that too little training was done.
- Before throwing, the loop can be attached to your belt so that the net does not slip out of your hand. This happens because your hands are wet and therefore slippery.
Every angler who has such gear is fluent in the technique of casting a casting net. The details of the technique may not differ significantly, but the whole principle of using such equipment is almost the same.
First way
This method is suitable when the diameter of the gear does not exceed 2 meters. At the same time, it can be thrown without collecting the top into loops.
Throwing process:
- Hands should be free and relaxed. First of all, you need to pick up the weight cord.
- Whatever doesn’t fit in your hand is gathered into loops, several loops in each hand.
- The mesh is wound until its bottom is 40 cm above the ground.
- After this, the net can be cast in one but precise movement. The throwing technique is approximately the same as the technique of throwing a sheet on a bed.
- The technique, although simple, requires training, since it requires a certain accuracy and throwing range.
Second way
As mentioned above, each angler develops his own casting technique. The second method does not require the traction cord to be gathered into rings and wound around the hand. You don't have to touch the cord at all, leaving it on the ground. The main thing is that when casting it unwinds correctly. If he gets caught on something, the throw will not work.
This method is quite practical because it saves a lot of precious time. You can make 30 percent more throws, which means you can fish a much larger area of the reservoir, catching more fish.
Examples of casting rods
Nowadays, in good stores selling fishing accessories, you can choose a casting spinning rod of any class and purpose. Let's imagine two fishing rods from different price categories:
- Rod KOSADAKA Jet Jerk 180 H. This is a budget casting spinning rod made of carbon fiber. It has a fast action, length 180 mm, test 20 - 60 g. A fairly high-quality and durable blank for quite reasonable money.
- Rod SHIMANO EXPRIDE 173 XH. This is perhaps the best medium-fast casting spinning rod from a well-known manufacturer. It is made of high-quality composite material, has a length of 2.21 m, test 14 - 56 grams. Its weight is only 137 grams. A very high quality form for fans of casting fishing.
Casting Network Comparison Chart
| Title, description | Cell size (mm) | Material of manufacture | Price (in rubles) |
| KIPPIK (American type) | 20 | nylon | 900 |
| American woman with a small thread ring “Best catch of fish” | 20 | nylon | 1600 |
| Spanish type casting net (IM40) | 20 | fishing line (0.35) | 1980 |
| FindFish Original | 12 | depending on the model: fishing line (0.3 mm) or nylon (0.535 mm) | 2490 |
| KALUGA D4.4 m | 20 | nylon thread | 2250 |
| Kippik | 16 | fishing line (0.3) | 2400 |
| Fishtex (Cast Net) American type | 20 | fishing line (0.28) | 4500 |
| American D-3.6 m | 8 | nylon thread (0.66 mm) | 5600 |
To use casting nets, the user does not need to take out a special permit or permit, however, the use of such equipment requires the fisherman to strictly comply with special regulations for catching various objects in water bodies. When choosing casting nets, it is recommended to pay attention to the material from which they are made, as well as their sinking ability.
Similar articles:
- OSAGO rating - TOP insurance companies by reliability 2020
- 10 amazing wild cats. Encyclopedia. Material for the abstract
- “Axe porridge”: dietary economy recipes for every day |
- 22 reasons to go to Greece | GQ Russia
How to find a casting network on Aliexpress
You can find a casting network on Aliexpress through the “Categories” menu or using the search option. To select a product through the category menu, you must:
- Display the portal drop-down menu by clicking on its activation button.
- In the proposed list, hover the cursor over the “Sports and Entertainment” section and in the window that opens, click on the “Everything for Fishing” subsection.
- In the window that opens on the left side of the screen, click on the “Fishing Accessories” link.
- In the activated hidden request specification window, follow the “Fishing nets” link.
- View the search results in the main portal screen.
It is convenient to search for the desired product through the search bar of the trading platform website. To do this, just enter the request “Casting network” into it. As you write a phrase, hints are displayed. If they are relevant, the user can click on their name.
You can enter the product name in English “Casting network” into the search. The search results for each phrase will be different. If the information provided is not relevant, the user should click on one of the suggestions in the “Related Queries” section.