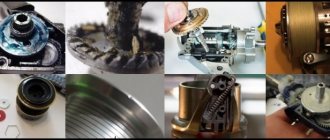
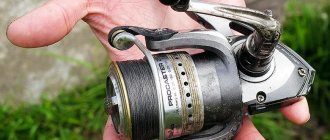
How does a spinning reel work?
The reel on a spinning rod is a disk with a handle and fishing line. When the handle is rotated, the following actions are performed:
- The bite is held and tends to go deeper into the river.
- The load on the fishing rod is reduced.
- The line fits perfectly onto the spool. The opening of the line laying arc is accompanied by the free movement of the main cord.
- Turning the lever by hand helps to wind the line.
- The choke moves back and forth and lays the line perfectly.
Reels come in the following types:
- Inertialess
- Inertial.
- Multiplier.
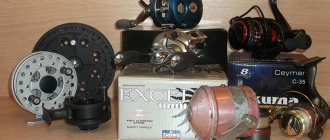
Anglers prefer to buy the following high-quality spinning reels:
- Cobra CB140.
- "Cobra" Spinning SV 440.
- "Cobra" SV 540.
- Daiwa Crest 4000.
- Stinger Predator.
- Ryobi.
- Shimano Katana 3000 FD.
- Linnhue.
- "Phishing" ROI Anaconda.
Attention! For spinning, you can also choose a multiplier reel (for example, Shimano (“Shimano”), “Daiwa” Kohga).
Scheme of an inertia-free reel
A multiplier reel for a spinning rod works due to the centrifugal force of the drum. Its design allows you to catch fish with massive baits designed for jerking. A casting bait is great for catching large specimens.
Which fishing line to choose
Before stocking up on this material for refilling the trimmer, you need to decide on your choice. After all, the ordinary so-called round fishing line is far from the only type available. How to choose the most suitable one? First you need to find working conditions.
Select by type. Line with a round cross-section is the most common. It will fit any reel with rare exceptions. This type of consumable is suitable for mowing the freshest, juiciest grass. But this species may no longer be able to cope with mowing the so-called dead wood. It is stupid to even mention attempts to mow bushes with this thread.
In addition to the ordinary type, there are others that have sharp edges. Usually they are made with an “asterisk” or “square”. The presence of sharp edges is the main feature and main difference between these threads.
It is precisely thanks to this particular feature that threads of these types are able to mow dry weeds. But sharp-edged threads are not without shortcomings, the main of which can be called rapid wear and strength, which is noticeably inferior to the round type.
In addition to the types of fishing lines already mentioned, there are still noteworthy and common varieties. Particularly among them can be noted the fishing lines, inside of which an iron wire is stretched. Threads of this type are often used in tools that run on gasoline and have an engine stronger than one and a half horsepower.
Threads with an iron core come with both a round cross-section and sharpened edges. Regardless of the type of section, such threads are ideally suited for overcoming difficult-to-mow plants. Threads of this type easily mow not only dry grass, but even small bushes.
Threads with wire inside differ from other types of consumables due to their indescribable wear resistance. But unfortunately, this feature has a more than noticeable impact on the cost of this type. The price of threads with a core is significantly higher than the price of other types of threads.
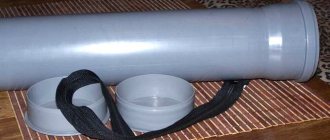
Second winding method
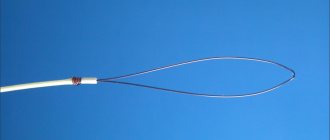
- A previously prepared piece of 6 meters in length needs to be bent exactly in the center and cut. This way you get two segments of similar length.
- At one end of each segment you need to make a small “hook”. To do this, you need to bend a couple of centimeters from the edge and quickly fix it so that the “hook” does not unbend.
- Then one segment is taken. The “hook” is inserted into the through hole in the upper part of the bobbin.
- Now you can proceed to the main step - winding. The direction in which to wind is indicated by an arrow on the bobbin. It is important to ensure that the fishing line is wound strictly within the boundaries of the upper part of the reel. There is no need to wind the thread to the very tip - approximately fifteen cm should remain free from the end.
- At the top edge of the reel there are small recesses (so-called grooves) for fixing consumables. The free “tail” of the thread must be inserted into one of these recesses.
- The upper part of the coil is loaded. Now we need to do the same function with the bottom part. The second piece of thread is taken. The “hook” is threaded through the through hole at the bottom of the bobbin.
- After which you can begin to wind the fishing line (within the boundaries of the lower compartment). And this segment also needs to be free about fifteen cm from the end. This remaining “tail” needs to be inserted into the recess opposite the one into which the end of the first segment is inserted.
READ Trimmer Stalls and Won't Start Reasons
The following steps for this type of coil are exactly the same as those described for the previous type in paragraphs 5 to 9.
This is how the line in the trimmer reel changes. There is nothing complicated in the process. And after just a few refuelings, all actions will become automatic.
To clearly study the process described a little higher, you can turn to the Internet for help. The popular YouTube portal has a huge number of different ones with demonstrations of winding fishing line onto a trimmer reel.
Want to save this?
What materials are used to make the case?
When making a spinning reel, two materials are most often used - plastic and metal. Its body can be made of the following alloys:
- Polymer - for cheap products.
- Aluminum alloys + carbon fiber - at an average price.
- Titanium + magnesium - for premium reels.
Important! Expensive reels are made of durable light alloys (titanium, aluminum, brass, bronze). As a result, the fishing rods last a long time, and the operation of the mechanism is uniform, silent and easy.
Coil characteristics
When purchasing, you should pay attention to the following technical characteristics of a spinning reel:
- spool size;
- rotor rotation speed;
- weight.
The spinning reel is designed as follows:
- handle;
- anti-reverse;
- spool;
- friction clutch (brake);
- line layer (line holder).
Attention! The operation of the line layer directly determines the distance to which the line can be cast.
Rotor speed and mechanism
The reel is equipped with a rotor. Its rotation mechanism consists of 2 elements:
- Bobbin feed devices.
- The main pair (transmits rotation from the handle to the rotor).
The rotor contains the following parts:
- Driven gear.
- Drive wheel.
The wheel shaft has a 4-sided hole for the reel handle. When the handle rotates, the drive wheel also rotates. As a result, the driven gear rotates the rotor.
The main pair is a gearbox with a gear ratio (for example, 4.6:1, 6.5:1, etc.). The ratio of the first and second numbers is the ratio of the number of teeth on the driven gear to the number of teeth on the drive gear.
Inertia-free reel mechanisms
Reference! By the value of the gear ratio you can determine how many times the rotor will rotate with 1 revolution of the coil. So, the fraction 6:1 means that with 1 rotation of the handle 360 degrees, the rotor winds 6 revolutions.
The more powerful the rotor, the larger the diameter of the gear in the gearbox (main pair).
The bobbin feeder is a carriage and other elements that periodically return to their original position. There are 2 types of device:
- Crank gear.
- Screw feed (reduces backlash).
The device with a crank link has the following parts:
- small gear (on the wheel shaft);
- parasitic gear;
- carriage + guides;
- stock.
The rotation from the handle is first transmitted to the small gear, and then to the “parasite”. As a result, the gear moves the carriage.
Important! When moving, the carriage and spool periodically return to their original position. This ensures smooth laying of the line during winding.
Handle
The handle rotates the spinning reel mechanism. However, sometimes you have to move it to a comfortable position (under your right or left hand).
Spinning reel handle
To rearrange the handle, you must perform the following steps:
- Remove the nut on the clutch and spool (or press the release button).
- Remove the washers. Moreover, you also need to remove the gears located under the spool.
- Unscrew the handle.
- Reposition the handle. Moreover, the handle must be moved to the opposite side of the reel body.
- Screw the screw into the hole.
- Place the washers and gears located under the spool.
- Place the nut on the clutch and spool (or reinstall the lock with the button).
High-speed fishing reels are equipped with a double handle. They also have one handle with a compensator. The compensating device prevents vibration caused by unbalanced spinning reel handles.
Anti-reverse
The reverse stroke of the reel on a spinning rod means the rotation of the handle and rotor, which is directed towards winding the line onto the spool. The overrunning clutch is responsible for blocking the movement of the handle towards itself. Thus, during fishing, anti-reverse does not allow the rotor to turn in the opposite direction, and the line does not “get stuck” and form unnecessary knots.
Anti-reverse is installed inside the coil. A lever is installed outside its body to disable the reverse rotation stopper or activate it.
Attention! Thanks to anti-reverse, the fisherman can make a hook with one right or left hand. Also, the reverse stopper prevents heavy loads on the line. After all, it often breaks when fishing in jerks when catching large prey or when there are blind hooks.
Modern reels are equipped with instant anti-reverse. It is also ideal when using low-stretch braided scaffolding.
Friction clutch
The drag adjusts the tension force required to pull the line from the spool. As a result, it reduces the impact force and reduces jerks both when playing and when hooking.
The friction clutch also protects the rod from heavy loads. This prevents the fishing rod from breaking and the line from breaking.
Spinning reel clutch
When adjusting the clutch, the braking force must be adjusted so that it is 1/3 less than the tension force of the fishing line used. Thus, for fishing, fishing lines are used with a breaking load of 6.0 kg. As a result, the clutch should produce such a force that a fishing line of 4.0 kg is released (released).
As a result, the life of the fishing rod is extended. After all, after adjusting the friction, the fishing rod is subjected to less load.
To successfully adjust the clutch, you need to bring the fishing tackle into working condition. The algorithm of actions looks like this:
- A bait hook is placed on the line.
- The fishing line clings to the tree.
- When moving away from the tree, the position is taken as when playing.
- The fishing rod is bent, and the line is stretched as much as possible.
- The clutch is released to the ratchet.
The clutch adjustment has been successfully completed.
Spool dimensions
Another important parameter of a spinning reel is the size of the spool. Each figure of a fishing rod is the product of the length of the line and its diameter. This determines the capacity of the spool.
Example! The spool size is 5000. This means that 100 or 200 m of fishing line with a diameter of 0.5 mm or 0.25 mm, respectively, will fit into it.
For catching small fish, spools up to 2500 are suitable (with a weight of up to 5-20, 7-21 and 5-25 g). For medium-sized fish, products from 2500 to 3500 (max) are used. For catching large fish, spools of 4000 and above are used.
How to wind line on a trimmer reel: key points
A gasoline or electronic trimmer is an indispensable assistant in the arsenal of a modern summer resident or owner of his own home.
Thanks to these garden devices, you can easily mow even a large garden plot. After purchasing this tool and doing several mowings, many people think about how to correctly wind the fishing line onto the trimmer reel. For an inexperienced user, the first operation to replace it will seem problematic and labor-intensive, since developers often do not fully reflect the instructions for replacing fishing line in the instruction manual.
READ How to Change Brushes on a Makita Rotary Hammer
Step 2 - remove the coil from the trimmer
To perform this operation, the trimmer must be disconnected from the mains and turned upside down. The upcoming course of action depends on the trimmer model and the design of the reel itself:
- for small trimmers with a bottom-mounted motor, press the buttons located on the sides of the coil and remove its upper part from the head;
- on trimmers with a bent rod, we clamp the coil body with one hand, immediately turning the thumb located on the body counterclockwise;
- For trimmers with a straight shaft and gearbox, insert a screwdriver into the hole located under the coil, and then turn the coil body counterclockwise.
How to replace, remove the mowing head of the BlackDecker GL716 electric trimmer
How to change or remove the mowing head of the BlackDecker GL716 electronic trimmer for repair or replacement.
Trimmer head with automatic line threading
Types of trimmer heads
Some models on the market have a reel with an automatic winding mechanism. It is quite easy for the owner to thread and fix the ends in the head, and the winding operation will be performed by the tool itself when switched on in operating mode. It is virtually impossible to mistakenly wind a line into a trimmer with such a head, because the reel independently determines the position of the antennae. The advantages of an automatic trimmer head include the ease of threading the fishing line, but the disadvantages include frequent breakdowns of the mechanism due to the complexity of the design and the highest price.
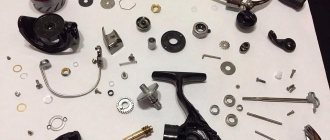
How to clean a spinning reel
To carry out a preventive inspection and cleaning of a spinning reel, you must perform the following steps:
- Loosen and unscrew the clutch screw (or press the lock button).
- Remove the bobbin.
- Remove dirt, dust, grains of sand from the surface of the reel and spool.
- Remove sand grains from the spool.
- Wipe the inside of the bobbin.
- Unscrew the line roller and carefully remove it.
- Remove the handle.
- Remove grains of sand and dirt.
- Lubricate the 2 bearings on which the handle and other disassembled parts are mounted.
After lubricating the coil, you need to reassemble it in the reverse order. It can only be cleaned with a soft cloth.
Attention! In the first 2 fishing seasons, it is better not to disassemble the reel at all. If the movement of the spool is very difficult, it is recommended to lubricate its axis with machine oil (1-2 drops). Then you need to rotate the coil 3-5 times so that the lubricant gets inside the rotor.
Your question to the expert
Mikhail Konovalov
Amateur fisherman with 20 years of experience
Ask a Question
How to assemble
In order to successfully assemble a spinning reel after cleaning, you need to adhere to the following scheme:
- Place the coil wall on the slider and 2 gears.
- Screw in the anti-reverse bolt and put on the switch.
- Screw the plug bolt and insert it back.
- Reinstall the line guide bar
- Reinstall the mechanism that locks the line guide arc.
- Assemble the roller with the scaffolding.
- Assemble the spinning reel in part of its mechanism. Assembly is carried out by screwing in the clamping nut with a wrench or pliers.
- Place the rotor in its original place.
- Screw the handle.
- Put on the washers and install the gears.
- Place the nut on the clutch and on the spool (or return the lock with the button to its original place).
Assembly is complete. On the next fishing trip, the spinning reel works as it should.
How to fix a reel yourself
A spinning reel is designed in such a way that before repairing it at home, you first need to remove the spool from it.
Ryobi Ecusima reel
After repair, all parts must be returned to their original places.
How to remove the spool
Before repairing a spinning reel with your own hands, you should first remove the spool from it. The part can be dismantled in 2 ways:
- When you press the button on the latch.
- After unscrewing the clutch.
To remove the spool with the rear brake, you need to press the release button. To remove the spool from a reel equipped with a front drag, you need to unscrew and remove it.
Handle replacement
If the handle of a spinning reel often falls off, it must be constantly replaced. Moreover, the handles are lost due to improper transportation or use of the fishing rod.
To replace the handle, you need to do the following:
- Remove the nut on the clutch and the spool.
- Remove the gears and washers located under the spool.
- Unscrew the handle.
- Screw in the new handle.
- Install washers and gears.
- Place the nut on the friction brake and on the spool.
To prevent the handle from quickly falling off the reel, it is recommended to buy models with additional fasteners in the form of bushings or washers.
How to adjust the spool
Spools come with 2 types of friction:
- front (for spinning);
- rear (feeder).
The front clutch is more sensitive. It reacts even to barely noticeable resistance from the scaffolding. As a result, you can catch even the smallest fish with a fishing rod.
The rear clutch is less sensitive. It is used when catching large fish with thick tackle on a feeder, trolling or when using a powerful spinning rod.
The friction brake mechanism is adjusted using an adjusting screw located behind or in front of the reel. To adjust the clutch, you need to perform the following algorithm:
- Pass the line through the line guide.
- Thread the line through the rod rings.
- Secure the end of the scaffold.
- Enable anti-reverse.
- Place the fishing rod at an angle of 45 degrees.
Important! If the clutch response threshold has reached its limit, you need to turn the brake adjuster 1/4 turn back (counterclockwise).
With front clutch
To adjust the front drag spool, you must first remove it. To remove the coil element, you need to remove the regulator handle and unscrew the clutch.
To adjust the spool, you must perform the following steps:
- Move the spool along the reel rod.
- If the spool moves forward, then a large number of turns are wound at the wall.
- Place 3-5 metal (plastic) washers on the axis under the drum on top of the clutch ratchet sprocket. In total, their height should not exceed 5 mm.
By adding washers, you can change the winding taper. If there are no washers included with the reel, you can use any stainless ones (plastic and polyethylene).
How to wind fishing line onto a trimmer reel: winding methods and
Any owner of a garden plot knows how quickly weeds can flood the area. A trimmer will help you defeat them without any extra effort. This incredibly useful device is an indispensable assistant in trimming and mowing the grass.
READ What types of trimmer reels are there?
It is no secret that an ordinary lawn mower cannot be used everywhere. In contrast, the trimmer can handle even very complex areas. This is especially true for those tools in which the cutting element is not a knife, but a fishing line.