It's no secret that a worm as bait is suitable for almost any fishing conditions. Residents of villages and villages often get bait without going far from home. It is a little more difficult for city dwellers to get their hands on this amazing bait. Not all fishing stores sell live worms. And the price for a small box with sliders is often overpriced. To provide yourself with worms for the entire fishing season, you can grow them at home.
Even novice fishermen can grow worms for fishing at home.
A worm like a bait - what is the power of creeping creatures?
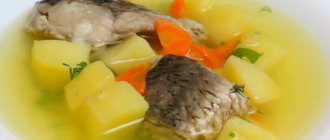
The worm is considered a universal bait, which most peaceful fish will happily bite on. Predators such as catfish, rotan, perch, burbot and even pike are also not averse to snacking on worms. The appetizing smell and natural play attracts fish. For small fish, you can bait the worm in pieces, but it is better to lure trophy specimens in bunches.
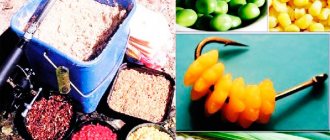
Please note that worms can be used as independent bait, or as part of groundbait and all kinds of sandwiches.
Maggot and worm sandwich
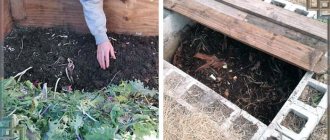
It is difficult to refuse a bait that crawls literally under your feet. To dig for worms, you only need a shovel and a suitable place.
Common habitats include dung heaps, roadsides, and lake or river banks. But what to do if you don’t have the time or desire to look for bait. In this case, you should think about your own breeding of worms. At home, it is enough to simply dilute the required amount of bait. The advantages of self-breeding are accessibility and cost-effectiveness. The main thing is that the right amount of delicious worms will always be at hand.
Breeding worms is quite an exciting and profitable activity. With the right approach, you can not only provide yourself with high-quality bait, but also make money. Both the worms themselves and the high-quality vermicompost that is formed when they are kept can be sold. In urban apartments and private houses, it is quite easy to set up your own production of delicious bait.
Worms and vermicompost - two in one, both useful and profitable for fishermen
Benefits of Dung Worms
Every year there are more and more difficulties with finding dung beetles. This does not please anglers who know about the benefits of this bait. Earthworms are fairly easy to find, but they are not as attractive to fish. This is due to certain characteristics of the inhabitants of manure heaps:
- Dung beetles are able to tolerate hot weather. They do not die even when the air temperature rises above 30 degrees. This feature is very pleasing to fans of summer fishing.
- Earthworms die within an hour after being hooked, and accordingly their attractiveness to fish decreases. Dung beetles attract a lot of fish.
- The inhabitants of dung heaps emit a pungent odor that is liked by different types of fish. Individuals are able to find bait even in the dark or in a layer of silt.
What you need to know before you start breeding worms at home
Before you start breeding worms at home, you need to understand the intricacies and differences between the species. There are many earthly inhabitants, but only 5–6 species are deservedly popular. Beginners need to read all available information before getting started. After all, certain species require different conditions for reproduction, nutrition and maintenance.
Important fact! Not all worms are suitable for some fish. Some inhabitants of the depths prefer only dung worms, while others prefer earthworms. It is worth considering what kind of fish you will be hunting and breeding the necessary subspecies of bait.
Although worm colonies are very quiet and do not have their own specific smell, it is necessary to obtain the permission of the entire family. For some people, such a neighborhood is unacceptable. If you breed worms in the garage at the dacha or on the street, then there will be no problems. But if the colonies will live in an apartment, it is worth paying increased attention to the issue of coexistence.
Verikomposter installed directly in the apartment
What types of worms can be bred at home?
All types of worms are hermaphrodites. But one individual cannot become fertilized on its own. Therefore, any species needs a mate. The more individuals participate in breeding, the faster they will multiply to the required number.
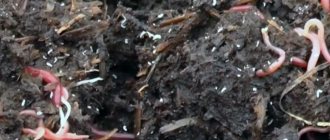
How worms reproduce in nature
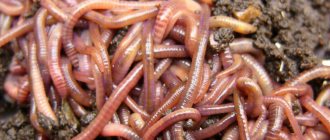
Dung worms
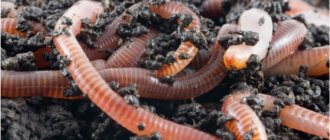
The habitat of this species is compost and manure heaps, rotted leaves and places rich in organic compounds. The most active species of all presented. When danger arises, it immediately goes to depth. Quite suitable for propagation at home. The downside can be considered restlessness in the drawers. In case of any violation of housing and feeding conditions, it will migrate en masse. The rather large species is perfect for catching trophy specimens. Life expectancy is 4 to 5 years.
The dung worm is the most popular worm among anglers.
Breeding red dung worms for fishing, how to grow/store at home/apartment:
California worms
This is a type of earthworm. Californians differ from their wild counterparts in their longevity. An adult does not lose reproductive functions for more than 16 years. It reproduces quite quickly and can produce from 500 to 1500 individuals per season. The downside is the complete lack of self-preservation instinct. With sharp drops in temperature, it does not go to depth, but dies. But short-term increases in temperature are tolerated well.
Caring for California worms at home is quite difficult.
Does not run away from boxes with substrate. When breeding a species, it is advisable to check the colonies for the presence of tangles. If a dense ball of worms is found, it must be untangled and the individuals distributed over the substrate. Inside the balls, the temperature rises greatly and the worms die from overheating. With a lack of nutrition, it continues to actively reproduce, the population becomes smaller and degenerates.
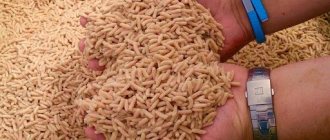
Prospector
This type of worm reproduces well at home and is suitable for beginners. Quite unpretentious. Developed by crossing northern and southern dung worms. Easily switches from one type of food to another. Reproduces at temperatures from +8 to +26 °C. It rarely gets sick and can live in high-density colonies.
It differs from other species in its good perseverance in the substrate and a developed instinct of self-preservation. When the temperature drops sharply, it hides in depth and hibernates. It begins to reproduce at the age of three months and brings from 500 to 1 thousand individuals per season. Life expectancy is 14–16 years. If fed poorly, it goes into hibernation and stops reproducing.
The prospector is not the most popular species, but it is very unpretentious in reproduction, cultivation and storage
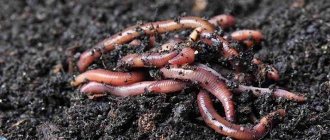
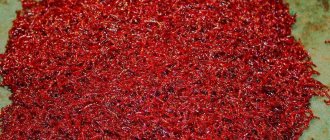
Earthworms
Earthworms (earthworms) grow from 15 to 30 cm. They are not persistent in the substrate. If there is no power, they run away from the boxes. The body is cylindrical, consisting of ring-shaped segments. The underside is flat, the back has a convex shape. There is a thickening (girdle) on the front part. During mating and reproduction, mucus is secreted from the girdle, which envelops the cocoon with the egg. Life expectancy is from 3 to 4 years.
The earthworm is a well-known bait when fishing for carp and catfish.
Simple methods of breeding worms - suitable for beginner fishermen
At home, you can use several methods to reproduce and breed worms. The difference lies in the final amount of bait received. For personal purposes, you can get by with an aquarium, a bucket or other suitable container. If worms are raised for sale, you can raise them in special mini-farms or in large outdoor worm hutches.
Breeding in containers (vermicomposter)
With the help of such boxes you can not only get the required amount of worms for fishing, but also provide yourself with high-quality vermicompost.
Important! The container method is only suitable for breeding California worm and gold miner. Other species, as the colony grows, begin to crawl out of the boxes.
A vermicomposter is a plastic matryoshka tank, rectangular or cylindrical in shape with lids and a double bottom. There are holes in the inner bottom to drain excess liquid. A drain tap is installed in the lower compartment. The containers are placed on top of each other and closed with a tight lid. This device does not allow unpleasant odors to pass through and is capable of processing various kitchen wastes.
The vermicomposter allows you to breed prospector and Californian worms
Growing stages:
- For each box, you need to prepare a substrate and a colony of worms of 250 mature individuals.
- Worm sampling can be done as early as 60 days after settlement.
- To do this, it is advisable not to feed the colony for several days.
- Place a sieve (3–5 mm mesh) filled with fresh substrate in the top box and leave for two days.
- Then the contents of the sieve along with the worms are placed in a separate container, and the catching procedure is repeated.
- With this method of trapping, it is possible to separate the entire adult population in three or four steps.
- The old substrate will contain enough young shoots and cocoons for further propagation.
Worms and kokanami
You can populate the boxes gradually, but this is a longer process. With this method, the colony from the bottom box gradually rises to the top in search of food. The bottom box, free of adults, can be moved to another container until the juveniles grow up. This cycle requires more free space and additional mini-farms.
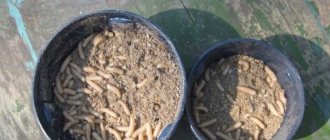
Breeding in a bucket
To grow worms, it is better to take poor soil that is not enriched with nutrients. It is necessary to clear the ground of grass and fallen leaves. The colony should be placed in the prepared soil. 100–150 individuals are quite enough for breeding.
When keeping colonies in a limited volume, it is necessary to regularly mix the substrate. If a ball of worms is detected, it is necessary to untangle the individuals and distribute them evenly over the substrate. Do not add drainage from stones or sand to the ground. Sand harms the worms, and stones will interfere with the mixing of the layers.
Humidity should be monitored closely. Do not overdry the substrate. You need to feed the colony 1-2 times a week. It is better to set a small volume so that the worms have time to process all the organic matter. Dung, rain, California and prospector varieties are excellent for growing in a bucket.
Breeding in special worm hutches
You can breed colonies of worms in your summer cottage or garden. It is necessary to dig a hole approximately 2*2 meters. The walls and floor must be strengthened with a layer of clay or concrete. Chernozem is poured into the resulting hole. Add humus, straw, fallen leaves to it and mix thoroughly. If you plan to breed dung worms, you can add burnt manure to the substrate. Composted organic matter is better suited for earthworms.
In this way, you can breed dung and prospector even in winter conditions. When cold weather sets in, in order for the worms to remain active, the pit must be insulated with hay or bags.
Special worm trap - a classic of worm farming
Breeding in the basement
You can breed worms in any container. It is important that the colonies are protected from the cold and rodents. It is necessary to make holes in the bottom and sides of the box for the drainage of excess liquid and ventilation. The room temperature should be between 18–23 °C. Acidity level 6.6-7.5 pH.
Boxes are installed on the floor or on shelves. Sometimes the mound method is used. A pile of fertile soil is poured onto the concrete floor and the breeding stock is planted in it.
Worm boxes
What to feed worms at home
The nutrient substrate is prepared from any food waste, sawdust, paper, leftover tea leaves, straw and other organic compounds. If dry mixtures are used for feeding, the soil must be additionally moistened.
Worms feed only on crushed waste. They will not be able to process solid food until it begins to decompose.
When breeding worms outside the home, you can prepare a substrate based on manure and straw. All ingredients must be mixed and moistened. Only after the “burning” processes have subsided will the substrate be suitable for feeding.
Worms should be fed no more than once a week. The substrate should be spread in an even layer throughout the box. The height of the feeding layer is 5–7 cm. You can mix the food with the soil.
You cannot use kefir, potato peelings, citrus fruits and other organic products that have similar acidity.
Profitability calculation
From 1 cubic meter of nursery you can get up to 10 thousand worms and about 0.5 tons of vermicompost per year. When selling 1 worm for 2 rubles, you can get 20 thousand from the sale of worms alone, not taking into account the profit from vermicompost and vermicelli. Calculating the profitability of the business, we get 150%. As you can see, the revenue is quite decent.
Is it possible to make money in a business like growing strawberries all year round in a greenhouse? Let's try to answer this question in a separate article. Champignons lend themselves well to cultivation under artificial conditions. The demand for champignons in the food market makes them attractive for entrepreneurship.
Storing worms
If there are only a few worms, you can place them in any suitable container. The container size should be 5–6 times the volume of the worms. You can use sawdust, sand, leaves or grass as filler. The soil from which the worms were dug out is best suited. If long-term storage is required, the soil needs to be moistened and the worms fed.
It is important not to let the soil dry out.
The easiest option for storing a large number of worms in a country house or garden is a pit. You need to dig a hole of a suitable size in a shaded place. Place a fine mesh box in the hole and fill it with soil. The cells should be smaller than the diameter of the worms so that they do not scatter. In summer you need to water and feed the colony. After 1-1.5 months, the soil is completely replaced. If winter storage is ahead, you can insulate the burial place with straw or other covering materials.
In an apartment, you can store excess in wooden boxes. Wet moss is placed in boxes in layers, alternating with worms. With this method, you need to replace or wash the moss at least once every two weeks. You can feed the worms with broth or milk. You should watch out for leftover food, as excess will spoil very quickly and can destroy the colony.
What benefits do worms bring?
Earthworms are soil animals that feed on rotting plant debris and animal excretions. They absorb bacteria, algae, protozoa, nematodes, fungi and their spores. Passing food through their intestines, the worms destroy it and mix it with the soil.
By processing compost heaps, they leave in the soil the most valuable forms of humus with high microbiological activity. Processes occur in the intestines of the worm, as a result of which the breakdown products of organic substances are converted into molecules of humic acids. The molecules combine with the mineral components of the soil, forming calcium humates. These substances give the soil structure.
The soil processed by worms contains a wide variety of enzymes, amino acids, vitamins, antibiotics, and biologically active substances that disinfect microflora. And worms play a dominant component in this process. In addition, these animals take an active part in loosening the soil, which makes it water- and breathable.
Earthworms are an indicator of the health and fertility of garden soil. If they feel good on your site, then the harvest will be good. Their normal density should be no less than five large worms per 1 square meter of dug area. If this amount is less, then the land needs organic fertilizer.
You should know that worms help neutralize the acidity of the soil, since they prefer a neutral environment. They eat straw, loosen the soil, and reduce the number of nematodes.
Is it possible to make money from worms?
When starting a business, you should not buy expensive substrates, mini-farms or other devices. You can completely make do with available tools and materials. For a test colony, you can use a wooden or plastic box.
It is important to find a stable sales market. If there is no demand, then the worms will have to be dissolved or used for their own needs.
Worms can be sold not only to fishermen and fishing stores. Poultry farmers are happy to purchase inexpensive protein feed to enrich the poultry diet. Also, do not forget about the secondary production of vermicompost. Nutrient substrate is widely used for growing various crops and flowers.
You can expand your assortment by selling vermicha. This is a good fertilizer for flower and garden crops. Produced by passing water through the substrate or mixing vermicompost with water. For better reproduction of beneficial bacteria, you can saturate the solution with oxygen using an aquarium compressor.
Once it has been decided where to sell the worms, you can begin to expand your mini-farm. You can achieve excellent results with virtually no investment. The main costs are for the purchase of the first colonies for breeding. It is recommended to add new individuals at least once every two to three years.
In order for products to sell well, they must have a normal presentation. Worms for sale should be packaged in individual plastic containers with holes for ventilation.
Family colonies can be packed in cardboard boxes before sale. The colony should contain both adults and young animals with cocoons.
Profitability with good sales will quickly cover all initial costs. If you have the space and time, you can turn your hobby into a profitable venture.
Rules for feeding vermicultures
In order for worms to tirelessly produce vermicompost and reproduce well, it is necessary to provide them with a sufficient food supply. If there is a lack of food, Prospectors will stop reproducing and reduce activity, which can lead to losses.
There is no cost involved in providing the worms with food. Prospectors will recycle and turn almost any waste into valuable fertilizer.
Rules that must be followed when preparing the food supply:
Every few days you need to carefully inspect the worm nests, as a failure may occur in the mini ecosystem. This simple measure will help avoid mass death of livestock.
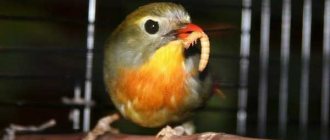
The next step is to give the worms the desired smell and aroma. In my practice, I use anise drops, sunflower aromatic oil, and garlic. I add one of these components literally a few hours before fishing, while the can of worms needs to be covered, not forgetting, of course, the ventilation holes so that the worms do not suffocate.
The next step is to give the worms the desired smell and aroma. In my practice, I use anise drops, sunflower aromatic oil, and garlic. I add one of these components literally a few hours before fishing, while the can of worms needs to be covered, not forgetting, of course, the ventilation holes so that the worms do not suffocate.
If necessary, the soil with worms can be either moistened or, conversely, dried a little. You can store worms at home in a fishing jar either in the hallway (1-2 days), or on the bottom shelf of the refrigerator. If a longer storage period is planned, then you need to prepare more thoroughly: you need more capacious containers, more land and other conditions, read in more detail here.
Growing worms