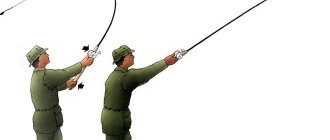
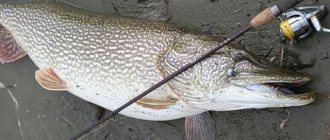
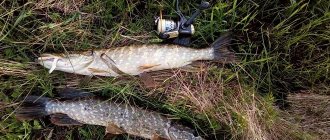
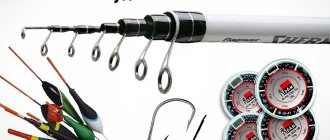
These instructions for equipping a spinning rod are suitable for all types of spinning rods - jig, ultralight, microjig and jig. All elements are identical, you just need to choose the gear that suits your purposes. Using the example of a spinning rod shown below, you can catch pike, perch and pike perch.
In order to equip (put together all the elements of gear and equipment) a spinning rod for your first fishing trip you will need:
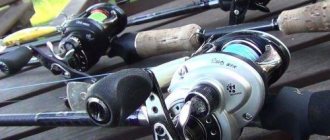
- spinning rod
- spinning reel
- braided fishing line
- swivel
- bait (for example, a spinner or wobbler).
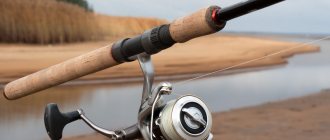
Assembling the rod
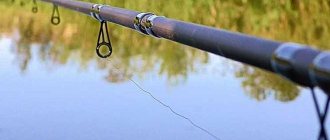
There are two types of spinning rods: plug-in and telescopic. If we are talking about a plug rod, you just need to insert the thinner part of the plug into the thicker one. Make sure that all the rings are on the same straight line. If you have a telescopic spinning rod, then simply unfold it starting from the tip (the smallest throughput ring), gradually moving towards thicker legs with large rings. Also make sure that all the rings are lined up in an even row.
Reel mount
Any spinning rod has a special lock, which you first need to unscrew, insert the reel handle, and then tighten it. Do not tighten it too tightly so that you can then easily unscrew the lock and remove the reel after fishing. If you apply too much pressure, you can strip the threads.
How to adjust the drag on the reel
So, how to properly adjust the clutch on a spinning reel. Many anglers completely tighten the clutch and release it back three to five clicks; this adjustment method is not correct. Since all the reels are different, some have three clicks, others have eight clicks, and others have a clutch without a ratchet and no clicks at all. What should I do? The friction is not adjusted simply on the reel, but is adjusted on a fully assembled spinning rod, so that the tackle works as one whole.
Attaching the fishing line to the reel
In order to secure the line to the reel, you need to secure it to the spool. This is done as follows.
- Open the packaging with fishing line.
- Find the end of the fishing line and thread it through all the rings, starting with the smallest (at the tip) and ending with the largest.
- Tie the line to the reel with a self-tightening loop, to do this: remove the spool by pressing the button at the top of it, and then tie the loop as shown in the image below.
Please note that the loop tightens if you pull the line in one direction and stretches if you pull it in the opposite direction. Observe which way your line guide turns when you turn the reel handle, and position the loop on the reel in the correct way so that it tightens as the reel turns.
Open the line guide on the reel. Insert the bobbin back into its place. Now you can close this bow. The line is secured.
Proceed to wind the line onto the reel, but take care that the line reel does not unwind too freely. It can be placed between the knees and lightly support her rotation. Thus, when winding the fishing line onto the spool, it will lie in a dense layer and will not create unnecessarily large turns, which could deform over time under more densely laid turns on top. But also do not wind the fishing line too tightly; such deformation can also cause it to deteriorate over time.
Wind the line onto the spool until the distance from the limiting edge of the spool to the line of the last layer of line remains slightly less than 0.5 mm. It may seem to you that you need too much fishing line for this, but this is a necessary measure if the ability to make long casts with light baits is important to you. If the line is wound almost to the edge, nothing will interfere with it as it flies off the reel; during casting, it flies freely off the reel and does not experience excessive friction against the edges of the spool.
Insufficient braid winding. The bait will fly close.
Sufficient winding. Lures will easily fly over long distances.
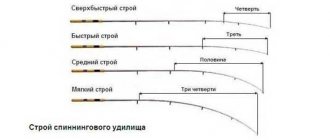
Its structure and important parameters
In order to better understand how to use a fishing reel, it is useful to know what it consists of, its structure and the main differences from other types of reels. You need to know that they come in three main types:
- Inertial (the simplest and most reliable mechanism).
- Multiplier. This is a more complex mechanism that has much in common with inertial coils, but stands apart.
- Inertialess.
At the same time, it is important to understand that if you know well, for example, how to properly use a multiplier reel, or a standard inertial reel, this does not mean that you will work just as well with a spinning reel.
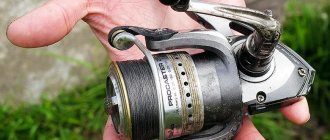
Each inertia-free unit consists of the following main parts:
- The body is made in one piece with the mounting tab. It is usually made of aluminum alloys or high-quality plastic. It contains the elements of the main mechanism.
- A rotor with a line-laying arm and an automatic folding mechanism. The main function is to wind the fishing line onto the spool.
- Spool , where the volume of fishing line is located. They are also made from aluminum alloys or high-quality abrasion-resistant plastic.
- Rotating handle. With its help, the angler sets the entire reel mechanism in motion. Thanks to her, this type of reel is often popularly called “meat grinder”. They actually have a vague resemblance in appearance.
In addition, a separate friction brake , which serves to regulate the load sufficient to rotate the rotor when hooking large fish or when hooking. The adjusting screw of this mechanism on a spinning reel can be located in front - at the end of the spool, or at the back.
The main difference between this type of coil and inertial coils is that:
- The main axis , on which the drum is fixed, in working condition is located parallel to the axis of the fishing rod. For inertial coils and multipliers - perpendicular.
- When casting the bait, the line comes off freely from the end of the stationary spool. No rotation of the drum occurs, which means there is no inertia force that usually arises during rotation.
In addition to understanding the structure and principle of operation of the coil, it is important to know its main quality parameters, by which the consumer features of each model are assessed. They need to be taken into account both when purchasing it in a store, and directly when equipping and fishing with it. These options include the following:
- Gear ratio of the mechanism. This parameter indicates the number of rotor revolutions for one full revolution of the handle. It is applied in the form of a ratio of certain numbers on the body, for example: 4.6:1, 5.3:1.
- The number of bearings involved in the mechanism. The more there are, the smoother and more stable the reel operates.
- Bobbin capacity. This characteristic is also indicated on the body and shows the amount of fishing line of a certain section for which it is designed. For example, the number 1500 shows that this reel will place 100 m of fishing line with a cross-section of 1.5 mm on its spool.
- The material from which the spool is made. In more expensive, professional models, these are usually more durable and practical aluminum alloys.
- Dimensions and weight of the reel.
It is important to know that by the number indicating the capacity of the spool, you can compare the power of different mechanisms . Thus, a reel designated 3500 is more powerful than a reel designated 3000, which means it is designed for heavier tackle and catching stronger fish.
When fishing with a spinning rod, this characteristic determines which rod it should be placed on for greater efficiency and harmony of gear, a light one or a heavier one, and how to use the spinning reel.
Friction Brake Setting
The friction brake is an important part of a spinning reel. It allows the fishing line not to break under too heavy loads: when fishing for large fish and jerking them, as well as if the angler hooks the bait on a snag.
In most spindles it is located on the front and looks like a round nut that can be turned clockwise or counterclockwise. When twisting clockwise, you tighten the friction brake, which means that an increased load on the line will be required for it to start being released from the spool. You can release the friction brake completely by turning the knob counterclockwise. Having done this, you will notice that you just need to slightly pull the line coming out of the reel, and it easily begins to twist.
You have to find a balance between keeping the drag drag tight enough and putting enough pressure between the bait and the rod tip to get the line off the reel.
Correct adjustment of the friction brake occurs when pulling the line not from the reel itself, but from the last ring (rod tip) at an angle of 90 degrees to it. This is necessary in order to take into account the friction of the guide ring, which is present in real spinning fishing.
Ask your friend to hold a pencil or pen in his hands and wrap 10-15 turns of fishing line around it, so as not to cut your fingers while holding onto the bare fishing line. Step back a few meters and begin to pull the spinning rod very hard perpendicular to the direction of the fishing line. If, under critical load, it is the clutch that allows the fishing line to rewind, and the fishing line does not break, then the clutch is configured correctly.
How to adjust the reel clutch
By properly setting up the reel, you will minimize the possibility of line breakage and will be able to catch large fish. All models of spinning reels are equipped with a friction brake that allows you to adjust the force.
When loaded, the reel spool rotates and the line is gradually released, which allows you to “extinguish” sharp and strong jerks of the fish. The clutch can be front (located on top of the spool) and rear (at the bottom of the reel).
When setting the friction brake, you need to focus on the breaking load parameter of the fishing line. So, if the latter is about 7-8 kg, then the clutch is adjusted to 4-5 kg. If the fish jerks, the friction brake mechanism will work and the reel will “release” a certain amount of fishing line, protecting you from the gear breaking.
In order to adjust the clutch, ordinary weights with a certain weight are most often used, which are attached to the end of the fishing line. Although many fishermen practice adjusting the clutch in a different way, right before fishing. To do this, the spinning rod is fully equipped and put into working condition, and then the bait with a hook is hooked onto a tree or other static object.
Next, you need to step back a little and tighten the spinning rod as if fishing for a potential catch, and, having reached the maximum tension at which the rod bends into an arc, release the friction brake until the ratchet operates. Do not overdo it, otherwise, instead of a adjusted drag, you will only get a broken rod.
There are two types of friction brake: front and rear. The front clutch is more accurate and reliable, the rear clutch is more convenient to set up. Read more about friction clutches in the article - friction brakes.
How to tie bait to fishing line
The rod and reel are fully equipped. All that remains is to attach the bait. For beginners, I recommend using a swivel with a carabiner. This is a small fishing accessory that allows you to quickly change baits from one to another. And the main purpose of the swivel is to prevent the line from twisting during casting, retrieving and winding the reel onto the spool. This will greatly extend the life of your fishing gear.
Grinner knot
The most suitable knots for tying a bait or swivel with a carabiner are the double clinch, grinder and American knot. The double clinch is the simplest of these knots, however I do not recommend using it when tying line on winding guides. Many wobblers and some spinners, for example Kastmaster, are equipped with winding rings, and this unit does not hold well on double wires or holes that are located in the body of the bait. In these cases, use the American knot.
Double Clinch Knot
If you are using braid rather than monofilament line, which is more appropriate for a spinning rod, you can try a knotless fastener for braid. This is a small fishing element that allows you not to tie any knots and very firmly attach baits to the braid.
What kind of bait to equip a spinning rod with?
Here is a simple table that will help you easily make a choice between baits for catching pike, perch, pike perch and asp. The information in the table is a recommendation. Of course, you can catch any fish with any bait, but the question of expediency arises. The table will help you choose the most suitable bait for the fish you need.
| Bait/Predator | Pike | Perch | Zander | Asp |
| Turntables | Large | Small | – | Large |
| Oscillators | Large | Small | – | Large |
| Castmaster | – | Small | – | + |
| Twisters | With a long tail | Short | Long with short ponytail | – |
| Wobblers | Large | Small | Narrow | – |
| Poppers | + | – | – | – |
| Croatian egg | + | – | – | – |
If you liked the article, then read the guide to spinning for beginner anglers. I'm sure you will find a lot of useful information for yourself.