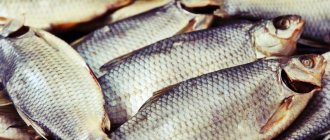
Salting and drying bream
We will salt the bream whole without removing the entrails - this way the fish will turn out fatty and as tasty as possible.
The whole process will consist of several stages:
- Fish cooling;
- Pickling;
- Soaking;
- Drying.
The main difficulty in salting large fish without gutting is maintaining its freshness throughout the entire salting and drying process.
Cooling
In order for the fish to turn out without the slightest flavor, it must be properly cooled before salting. To do this, the fish is placed in the freezer for 1-2 hours, depending on the size and quantity of the fish. It is important to prevent it from freezing.
You can cool the bream in the refrigerator, but it will take more time.
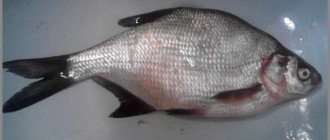
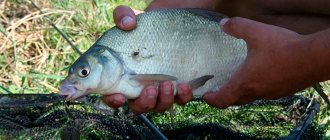
Fresh bream
Fresh bream
Salting bream for smoking
Many people ask about how to pickle bream for smoking? There are several ways to cook fish. We will look at the most popular and simplest.
Gut the fish and wash it.
If the bream is large, remove the head and make cuts on the sides. Now rub each carcass with coarse salt, including the inside.
The processed fish is placed in a deep container (tails and heads should alternate).
Cover the top with a lid and put pressure on it. Salting time is 12-16 hours - depending on the size of the fish.
Here is another way to pickle bream for smoking. It will require:
- water;
- salt;
- Bay leaf;
- red pepper.
Gutted fish should be filled with salt brine. To do this, pour water into the pan and dilute salt in it (80 grams per 1 liter of water). Add a little pepper and 2 bay leaves. Pour brine over the breams, cover with a lid and leave to brine for 7-12 hours, depending on the size of the carcasses.
After this, soak the fish in running water (30 minutes), dry it and smoke it for good health.
Cooking features
There are several recipes for salting bream. When gutted, the carcasses are salted faster, but in whole fish the fat content is retained as much as possible. The second method is also used when it is necessary to salt bream with caviar. To get a tasty product, you need to know the cooking features:
- it is better to salt fresh, just caught bream, since the flesh of frozen and then thawed fish will be dehydrated and with a changed structure;
- when salting large bream, it is recommended to inject brine into the back and belly with a syringe so that the flesh does not begin to rot from the inside;
- to quickly air out the carcass, it is good to direct a fan jet at it for 2-3 hours;
- To prevent drying out, it is better to store small breams in 3-liter jars with rolled-up lids, having previously removed the air from them (dip a cotton swab moistened with alcohol into the container with the fish, set it on fire and roll it up).
Knowing some tricks and secrets, you can start pickling.
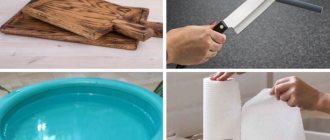
Selection of containers
You can salt bream at home using any container of the required volume, except for dishes made of aluminum, galvanized steel and non-food plastic. For example, they use enamel buckets, tanks, wooden barrels, boxes, etc.
If containers made of wood are used, then the fishy smell cannot be eliminated. It is no longer suitable for pickling cabbage or cucumbers - this should be taken into account when choosing.
What kind of fish to use
With any catch, carcasses are usually found of different sizes. Therefore, it needs to be sorted immediately:
- bream up to 500 g (trifles);
- fish up to 1.5 kg (medium);
- bream over 1.5 kg (large).
Fold the caviar specimens separately. Before dry salting, it is better not to wash or wipe carcasses with a rag; it should not be wet or dry to ensure the best contact with the salt. Large specimens can be beheaded and cut lengthwise into 2 parts.
Dried bream: salting at home - a recipe for salting and drying large fish without gutting
To get delicious dried bream at home, you need to go through several steps:
- Preparing bream for salting,
- Salting fish using dry salting method,
- Soaking the fish after salting
- Drying and drying bream
How to properly prepare bream before salting
First of all, after bringing your catch home, all the fish must be cooled. Put it in the freezer for a couple of hours.
This way your fish will be reliably preserved and odorless. And with this cooling we will get rid of some parasites if they are present in the fish.
How to properly salt bream for drying at home
Salting bream is not difficult. It is necessary to start salting with large individuals.
Next, we proceed to salting the bream. To do this, you first need to select the container size you need.
Ikea and other mega-superstores sell plastic boxes with handles. They are just perfect for salting bream - large and deep.
First of all, pour some salt into the bottom of the box. Then we fill the gills with salt, since it is from the head that the fish begins to spoil (as you and I know well).
Some immediately remove the gills and make an incision in the abdominal part so that the fish is better salted. But I assure you that it will be salted just fine anyway.
For 1 kg of fish you need 150-200 grams of salt.
Next, we lay all the fish in layers “jack” (that is, head to tail, tail to head). Don't forget to sprinkle each layer with a little salt.
When all the bream is laid, take a piece of plywood or a board of the required size and place it on top of the salted fish. We press down with our weight and place pressure on top (load - the more fish, the heavier the load).
The load should be exactly half the weight of all the salted fish.
We put it in the refrigerator for a week - no less, or even 10 days. You can spend the first two days so that the fish gives juice without putting pressure on it. But every day you need to take the fish out of the refrigerator and press it again. This is necessary so that all the air inside comes out.
I don’t do quick salting, because it seems like the fish will pick up salt in a couple of days, but fermentation of the meat will not occur and it won’t be the same dried bream like store-bought.
If there is a lot of fish, then some can be left for drying and drying, and the rest can be packed in bags and placed in the freezer. And if necessary, deliver several fish.
How to properly soak bream after salting
After salting, any fish must be thoroughly soaked. This is done so that the excess salt is removed and we do not end up with over-salted bream.
To soak bream you will need a larger container than for salting. You can set aside a bathroom in your apartment for this (if your spouse and all household members do not mind).
First, we wash each bream under the tap. Then we place it on the bottom of the bath and fill it with cold water.
The water needs to be changed every hour. Soaking is enough for 20-24 hours.
In the summer, when it is very hot, you should put a few pieces of ice in the fish bath.
The easiest way to dry and cure bream without gutting at home in summer and winter
You can dry bream in an apartment, but the best place, of course, is in a private house, where there is somewhere to hang all the fish.
Drying should be done in a cool and well-ventilated area. Small bream should be hung by the head, and large bream by the tail.
It is advisable for the fish to be dried (dried) in a room where the temperature is 10-15 degrees.
For a quick effect, especially in isolated places, such as an apartment, it is better to dry and dry the bream under a fan.
After drying, dried bream turns out to be very tasty without any odor, and when cut, the meat has an amber transparent color.
Salting methods
There are several ways to salt fish. It is important not only to know how to pickle bream at home, but also to understand how to choose the right specimens for pickling. It is not advisable to buy fish for this purpose that is on supermarket shelves. It is recommended to salt only freshly caught fish. And it is practically impossible to determine the time when the bream was caught and placed on ice. Therefore, you need to understand that the specimen used for cooking must be caught independently or purchased live.
You can salt bream at home in gutted or ungutted form. In the first case, the fish is salted better. The technology for salting uneviscerated fish is fully justified if it contains caviar, which significantly improves the taste of the product. Either way you can cook fish of different sizes.
Wet salting method
Salting bream for drying is often done using a special water salt brine, which is sometimes called brine. Knowing how to salt bream for drying in this way, you can prepare delicious fish at home that has excellent taste. As a rule, this method is suitable for salting small fish. To prepare brine, you need to take approximately 400 g of salt per liter of water. Dried fish will taste better if a teaspoon of sugar is also added to the brine. As for other spices, they are added to taste.
In this case, only freshly caught fish is used, which is not recommended to be washed before salting, but simply wiped with a damp cloth. But it is certainly better to wash fish purchased at a fish store or market and then dry it thoroughly with paper towels.
Brine is prepared in the specified proportion in a deep container. The prepared fish is threaded through the eye sockets using a large needle onto a thick and strong thread. Each bunch should consist of 4-5 small fish. Alternately, the tied carcasses are lowered into the brine so that it completely covers the fish. The fish must be placed very tightly in the container with their bellies facing up. The top of the fish is covered with a special holey circle on which a weight is placed. The container is taken to a cool place.
Almost within a day, the volume of brine will increase due to the fish secreting its own juice. It is important that the brine remains transparent. As soon as it becomes cloudy, it needs to be drained and the carcasses to be salted filled with the newly prepared solution in the same volume. Small bream should be salted in brine for 2-3 days. Larger specimens up to 1 kg must be kept in brine for 5-7 days. If large bream is salted without gutting, it is recommended to pump a saturated salt solution into its belly using a syringe.
The salted fish is removed from the brine and washed very thoroughly in running water for at least half an hour. There is no need to remove it from the twine. After this, the bundles are hung in a dry, windy place to dry. To protect the fish from flies, you need to cover it with gauze or a net.
There is a very quick wet method for salting bream. Typically, it is used for fish cut into pieces. This method involves the use of hot brine. Moreover, an aqueous solution of salt can be prepared to your own taste. In this case, the bream pieces are ready for consumption by the time the brine has cooled. If you additionally add vinegar or lemon to the brine, you can prepare very tasty pickled bream.
Recipe for dry salting bream in “diapers”
To salt bream with dry salting we need:
- Bream.
- Coarse salt.
- A towel or other fabric with a large area and the ability to absorb moisture.
- Twine.
I would like to note right away that it is advisable to take fish that you are confident in.
Opisthorchiasis
and another infection does not sleep. There is confidence that the concentration of salt will kill the pathogen, however, it is better not to take risks.
The fish does not need to be gutted. Wash it with a stream of water, dry it with a rag - that's enough.
As an example, I took the largest white bream from a fresh catch.
A layer of coarse salt about a centimeter high and an area larger than the size of the bream was poured onto a large piece of fabric.
I filled the bream with salt under the gill covers. I laid the fish on a salt “feather bed” and completely covered it with salt.
Since I’m cooking white bream, I was a little greedy with salt. If you are going to salt a large bream using dry salting, then do not skimp on the salt. There will be no excess or redundancy.
We wrap the bream tightly in a “diaper” and tie it with prepared twine.
In this form, place the fish in the refrigerator for 2 - 3 weeks, depending on the size. We do not use any oppression. We just turn it over daily from one side to the other.
Of course, the fish will begin to release juice. However, a carcass wrapped in several layers of cloth and a larger amount of salt prevent the brine from leaking out.
After two weeks, the bream has such a respectable appearance.
All that remains is to shake off the stuck salt and send the fish to the cutting board.
The meat has acquired a pleasant density and has a reddish tint.
There is no oversalting to the taste. Bream can be consumed as a separate dish or with chilled beer.
This recipe for dry salting bream can be considered correct. Moreover, the method is suitable for cooking other types of river fish - large sorog, grayling, whitefish, crucian carp, pike.
Dried bream at home: how to salt and dry bream safely, efficiently and tasty
Cooking dried fish (in particular bream) at home is akin to making wine. You need to approach it with feeling, sense, and alignment.)))
But in fact, in order to salt and dry bream safely, efficiently and tasty, you need to follow several rules.
There are a couple of points in salting and drying bream, or any other fish. Some people salt and dry the whole fish, while others gut it and take out the entrails.
Ungutted bream, that is, whole bream, has special gastronomic advantages. Especially if the bream is spring and with caviar.
But the gutted fish is guaranteed not to spoil during salting and is salted efficiently. But it loses fat, juiciness and all the taste of real fish.
Today I want to offer you to salt and dry the whole bream.
What kind of fish is suitable for salting?
Not every carcass can be used for the salting procedure; the prerequisite is fresh, unspoiled fish. However, you should not salt it immediately after catching; the bream should lie down for a while in a ventilated place. It is customary to dry whole, gutted or chopped freshwater fish. The simplest method is to take specimens about 20-30 cm and salt them without removing the insides. Only the gills of such fish are cut off and they are dried entirely. A slightly more labor-intensive method is salting gutted carcasses. It requires cutting the bream, ripping open the belly and removing all the internal organs; the gills and fins are also carefully cut off. Very large carcasses must be gutted and cut into pieces up to 8 cm thick. The product is stored longer without entrails; when preparing fish for drying in a special installation, you need to be careful not to damage the skin.
Salty
There are two methods used for salting: wet and dry salting.
Below are instructions on how to dry salt.
Ingredients:
- 1 kg of fresh bream;
- 250 grams of coarse salt.
Step by step execution:
- The fish are cleaned of mucus and internal organs, and the gills are trimmed.
- Pour a third of the salt (a little more than 83 grams) into a spacious bowl, and salt the rest of the workpieces inside and out.
- Place them entirely in a bowl, compacting them tightly and sprinkling each layer with salt, placing flat plates or cutting boards between the layers.
- Place the oppression on the top layer, not forgetting to also sprinkle the last level with salt and a small amount of sugar (it will help enhance the taste characteristics).
- Place the basin in a cool place for two days, during which time the workpiece will marinate in its own brine.
The time to prepare the dish will be from 30 minutes. Cooking time: 2 days. Number of servings: 10. KBJU per 100 g: 128 kcal/23g/3.2g/1.9g.
Drying bream
After the fish have been salted, they should be dried. For this:
- carcasses or half-carcasses are cleaned with a brush or cloth from the remains of brine and mucus;
- hang it on a strong string and take it out into the draft for 4 hours or turn on the fan for 2 hours so that the bream dries well on the outside; with the second method, the air flow will prevent flies from appearing;
- The best time to prepare dried bream is autumn, when the process can be organized on the balcony at a suitable temperature.
On a note! Since air humidity increases at night, it is better to bring the fish indoors after sunset, and again put it on the balcony in the morning.
Fillet can be dried in fruit dryers. To do this, the carcasses need to be cut into fillets, salted under pressure, washed for 1 hour, wiped with napkins, cut into strips and dried on mode 1 for 10-11 hours. Caviar is also dried.
How to Cook Dried Bream Safely
To make the product tasty, aromatic and safe for health, you should listen to the following tips:
- if the gills are not removed, then using the dry method, stuff the spice into the mouth and gills so that maggots do not appear;
- for the same purpose, the brine must be made strong, and the fish must be kept for at least 4 days;
- At all stages of cooking, flies should be prevented from appearing, for which purpose carefully cover the dishes during salting and make boxes from mosquito nets when drying and drying;
- for the same thing, after washing, the carcasses are dipped in a weak solution of vinegar and hung out to dry - the smell will evaporate after 2 hours, the scales will shine beautifully, be sure to dry completely;
- you can also mix vinegar with vegetable oil and rub the fish with it after chapping, before drying the bream;
- To avoid a musty smell, carcasses should be salted and dried in a cool place.
To improve the taste, the fish should be wrapped in paper and kept in the refrigerator for several hours.
How to dry bream without gutting
Whole fish should be dried head down, gutted or longitudinal halves should be dried up. In the first case, if the gallbladder is damaged, then only the head will be bitter; in the second, more fat is retained in the pulp, and it acquires a beautiful amber hue.
Recipe for dried bream with soy sauce and honey
For 1.5-2 kg boneless fillet you will need:
- 3 tbsp. l. soy sauce;
- 1 tbsp. l. mustard;
- 1 tbsp. l. honey;
- khmeli-suneli;
- red hot pepper;
- coriander;
- 3 buds of cloves.
First, pour coarse salt onto a baking sheet, place the fillet and generously sprinkle it with spice (about 1 tbsp) and sugar (1 tbsp). After 1.5 hours, remove the remaining salt with a knife. Then mix all the ingredients, dip the fillets in the mixture, pour in the remaining marinade, and put in the refrigerator for 6 hours. Then wipe with a cloth and hang to dry. When the product has reduced by 2 times in volume, cut and serve with beer.
Changes in the properties of frozen fish during storage
Physicochemical characteristics
Physicochemical changes include shrinkage, changes in color and histological structure.
When storing frozen fish, there is always a difference in water vapor pressure above the surface of the fish and the surrounding air environment of the refrigeration room. The pressure difference causes the evaporation of moisture from the surface of the fish and, as a consequence, its movement from the inner layers of the fish to the surface, i.e. internal diffusion. This difference can be reduced by lowering the storage temperature and increasing the relative humidity.
As a result of the evaporation of moisture, the fish shrinks, which depends on its type and chemical composition, properties and size, type of packaging, temperature and duration of storage, method of stowage and location in the chamber or hold, cooling system, refrigeration room, degree of loading, amount of heat inflow etc. The surface of the fish and nearby layers of muscle tissue are mainly subjected to shrinkage.
The color of fish meat dehydrated during refrigerated storage changes. It becomes spongy, and after thawing and cooking it becomes dry and fibrous.
The degree of shrinkage and quality changes depends on the storage temperature and the range of its fluctuations. As the storage temperature decreases, the shrinkage of frozen fish decreases: when storing frozen fish at a temperature of -30°C, the shrinkage is 3 times less than at -18°C. A decrease in storage temperature from -30 to -40°C is accompanied by a decrease in shrinkage by 0.013% each month of storage.
The amount of shrinkage depends on the chemical composition of the fish: the more moisture the fish contains, the more it can evaporate, so shrinkage is greater for lean fish than for fatty fish.
The drying of frozen fish also depends on the method of cooling the refrigeration chamber and hold. With a panel cooling system, shrinkage is less than with air cooling. Dense stacking of frozen fish helps reduce product shrinkage.
Factors such as glaze thickness, storage time, relative humidity and air circulation speed also play an important role. When storing frozen fish packed in polymer film, dehydration occurs during storage, but the moisture evaporating from the product remains inside the package in the form of frost.
One of the most effective ways to reduce the shrinkage of frozen Ufi fish during long-term storage, along with lowering the storage temperature, is its glazing using water-soluble polymer materials, as well as packaging in gas-vapor-proof films.
With prolonged storage, as well as with temperature fluctuations in the refrigeration room, chamber or hold, structural changes occur in the muscle tissue of frozen fish, which are caused by recrystallization of moisture: the number of large ice crystals increases; the fine-crystalline structure turns into a coarse-crystalline structure.
The longer the storage of frozen fish and the more unstable the temperature, the larger the size of the ice crystals in its tissues. In this case, the integrity of the muscle fibers is disrupted, which leads to large losses of tissue juice during thawing and, consequently, to a deterioration in the quality of the fish. After heat treatment, fish meat becomes drier and tougher, and its nutritional value decreases.
Recrystallization of ice in fish tissue causes a change in the color of the product due to unequal refraction of light at different sizes of ice crystals. The color of the fish may also change due to the formation of a dehydrated surface layer due to shrinkage.
Biochemical properties
During refrigerated storage, biochemical processes occur in frozen fish, leading to fat oxidation and protein denaturation, and for frozen fish with a high fat content, changes as a result of oxidative processes in fat are more typical, and for lean fish, denaturation changes in the protein system of the raw material are more typical.
The degree of these changes largely depends on the chemical composition and properties of frozen fish, temperature, duration of refrigerated storage, etc. The lower the storage temperature, the slower the denaturation and enzymatic processes in frozen fish. Fat oxidation in fish occurs even at very low temperatures (below -30°C).
Oxidative deterioration of fat is accompanied by yellowing and the formation of rusty spots on the surface of the fish. At the same time, fat oxidation products accumulate in the fish, worsening its taste and giving it an unpleasant odor.
However, subcutaneous yellowing is not always a sign of oxidative deterioration of fat. The skin of some marine fish contains fat-soluble substances - yellow and red carotenoids. During storage of frozen fish, protein-carotenoid complexes are destroyed, carotenoids pass into the subcutaneous layer of fat, causing subcutaneous yellowing in frozen fish. Subcutaneous yellowing, unlike oxidative spoilage of fat, is not a defect, since it does not impair the taste and nutritional value of the fish.
Drying fish during storage has a direct effect on fat oxidation and denaturation changes in proteins. With excessive shrinkage, not only weight loss is observed, but also accelerated fat oxidation as a result of the evaporation of ice from the surface layers of frozen fish, which facilitates the access of air oxygen to muscle tissue.
During long-term storage of fish, fat hydrolysis occurs, which is accompanied by oxidation, resulting in rancidity. To slow down the oxidative deterioration of fat, rapid freezing of fish to low temperatures, glazing, packaging of frozen fish in gas-vapor-proof polymer materials, as well as various antioxidants and low-temperature storage are used.
We recommend reading: Harvesting Pears of Unripe Fallen Pears
Conditions and periods of storage of frozen fish
One of the most important factors determining the optimal conditions for long-term preservation of the quality of frozen fish during storage is the temperature and humidity conditions of the air in holds and refrigerated storage chambers. During storage, the optimal temperature and humidity must be maintained constant. In accordance with the technological instructions, the fluctuation in air temperature should be no more than ±0.5°C, and the relative humidity should not be more than ±1%. When loading and unloading chambers at 50% of their capacity, the air temperature is allowed to increase by 3°C, and above 50% by 4°C.
Frozen fish, the average final freezing temperature of which differs by more than 2°C from the air temperature of the refrigeration room, cannot be loaded into chambers or holds.
To equalize the temperature and humidity in the storage rooms of frozen fish, natural air circulation of 0.01-0.08%) must be maintained.
During the entire period of storage of frozen products in holds or storage chambers, the air temperature is systematically, 2 times a day, measured with remote temperature sensors or conventional mercury thermometers, and relative air humidity is measured once a week using a psychrometer. Temperature and humidity conditions for refrigerated storage of frozen products are recorded in a special log.
Boxes with frozen fish are stacked flat (lids up) with slats or floor gratings placed under the bottom row (Fig. 55), which are necessary to ensure free air circulation between the boxes and the floor of the refrigeration room. The height of the stack depends on the strength of the boxes and the height of the refrigerator chambers.
Rice. 55. Frozen fish storage room: I - stacking of boxes with frozen fish; II - laying in plan
When stacking boxes, there is no need to make spacers for each row: the denser the frozen products are stacked, the better they are preserved and the less shrinkage.
The packing density of frozen products per 1 m 3 of cargo volume depends on the type of fish, freezing method, type of container or packaging, as well as on the stacking method. Existing norms for the specific loading of frozen fish products per unit of cargo volume of storage chambers are given in Table. 29.
Table 29
Frozen sturgeon fish (glazed and unglazed) are stacked unpacked on racks covered with matting. A stack of frozen fish is covered on top and sides with matting, on top of which an ice crust (glaze) is frozen. Glazing of the stack is carried out evenly by irrigating the matting with cold water at a temperature of 2-3°C.
For better use of refrigeration space, it is recommended to place frozen fish at a distance: from walls without cooling devices - 0.3 m, from ceiling without cooling devices - 0.2 m, from cooling devices (wall and ceiling) - 0.4 m, from air ducts (bottom surface) - 0.3 m. In chambers with a heat-protective casing, no indents are made. The presence of indentations (gaps) promotes free air circulation between the walls to stacks of frozen fish products, as well as cleaning cooling devices from frost.
For cargo trolleys in the chambers, one passage 1.2 m wide is left for every 10 m of the width of the refrigerating chamber.
On a ship, boxes with frozen fish products are stacked from side to side evenly across the entire area of the hold to avoid the formation of a list. Each type of frozen product is placed separately.
To mechanize loading and unloading operations, a batch method of storing frozen fish products on pallets is used. To form packages, two types of pallets are used: standard international pallet 2P-04 (800 X 1200 X 150 mm) and 2P-04 (1200 X 800 X 150 mm).
The shelf life of frozen fish depends on its type and chemical composition, initial state, type of cutting, method and modes of freezing, type of packaging, storage temperature and other factors.
In table Table 30 shows the shelf life of some types of fish at different temperatures.
Table 30
Packing frozen fish in gas-vapor-tight films, especially when vacuum sealed, allows you to increase the shelf life of both lean and fatty fish. Thus, when packing frozen fish in bags made of polyethylene-cellophane, lavsan-polyethylene without vacuuming, the shelf life increases 2 times (with vacuuming - 3-4 times compared to packing frozen fish in bags with paraffin and silicone coating). The use of Saran-type shrink wrap helps extend the shelf life of frozen fish by 3-4 months compared to storage in parchment.
Evils of frozen fish
Dehydration (shrinkage) of the surface layer
- a defect in which, due to shrinkage of the surface layer, a thin white coating appears in the form of a “cold burn”, completely or partially covering the surface of frozen fish. The fish meat becomes discolored and acquires a dry, hard consistency. With excessive shrinkage, not only a loss of fish weight is observed, but also a deterioration in the hydrophilic properties of meat, as well as an acceleration of oxidative deterioration of fat.
Oxidative deterioration of fat
occurs during long-term storage of frozen fish under the influence of atmospheric oxygen and oxygen contained in the tissues of the fish. As a result of oxidation, the odor of the product deteriorates.
Subcutaneous yellowing of fat
unlike oxidative spoilage, it does not impair the taste and nutritional value of frozen fish.
Subcutaneous yellowing of fat is caused by the transition into the subcutaneous layer of fat of carotenoids - fat-soluble substances of yellow or red color, contained in the skin of fish in the form of protein-carotenoid complexes, which are destroyed during storage. Subcutaneous yellowing occurs only in fish that have a subcutaneous layer of fat and whose skin contains at least 0.8 mg% of carotenoids.
Old smells
are a sign of denaturation changes in the protein system of frozen fish, especially manifested during long-term storage in fish with a high moisture content. With the appearance of the “old smell,” a change in the consistency of fish meat is observed, which after cooking becomes fibrous and tough.
During refrigerated storage, biochemical processes occur in frozen fish, leading to fat oxidation and protein denaturation, and for frozen fish with a high fat content, changes as a result of oxidative processes in fat are more typical, and for lean fish, denaturation changes in the protein system of the raw material are more typical.
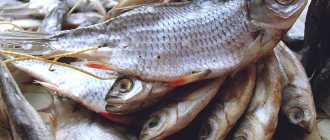
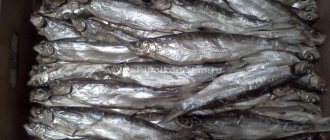
Drying bream
After soaking, the fish is strung on hooks and hung to dry in a cool, ventilated place. It is best to hang large bream by the tail so that excess fat can drain off.
To make the fish air out faster, it is better to use a household fan. The fan allows you to significantly speed up the process of drying bream!
How to salt bream for wet smoking
Compound:
- bream – 2.5-3 kg;
- salt – 0.25 kg;
- water – 3 l;
- bay leaf – 5-6 pcs.;
- ground red pepper - to taste.
Cooking method:
- Wash the bream, gut it, dry it. Rub them inside and out with salt mixed with pepper and bay leaves crushed using a coffee grinder.
- Boil water and add the remaining salt to it. Stir until the salt dissolves.
- Remove the container with the brine from the heat and let it cool to room temperature.
- Place the prepared bream in a container or in a sufficiently capacious enamel pan. Fill with brine.
- Leave in a cool place, covered, for 7 to 14 hours, depending on the size of the carcasses.
- Rinse the carcasses, soak them for 30-60 minutes in cool water.
The fish will be ready for consumption only after smoking. For greater safety, it is better to smoke river fish using a hot method.
How to salt bream using the wet method?
This method is characterized by the fact that at the final stage of cooking the fish does not need to be dried (therefore, this method of salting is also relevant in winter). This means that it can be consumed after the salting process is completed.
Before cooking, select small fish. Gut it, rinse thoroughly. Take a deep container where you will lay out the fish in layers. Each of them is generously sprinkled with salt. To improve the taste, you can add a little red pepper, bay leaf and coriander.
Cover the container with the fish with a lid and place pressure on top. Place the bream in a cool place for a week. After this, rinse the carcasses thoroughly under running water (until the water in the bowl becomes clear).
The salting process is not finished yet. The fish needs to be dried and hung in a dry place for several hours. That's it, the bream is ready to eat.
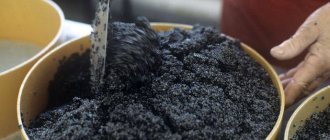
How to salt bream caviar at home?
So, prepare the following products:
- Caviar of one large bream.
- Sunflower oil – 4 tbsp. l.
- Salt.
- Pepper.
Cut the fish by cutting the belly and very carefully, without damaging the gall bladder, remove the caviar. Free it from the film by placing it in water and kneading thoroughly with a spoon or fork. Repeat the procedure several times. After this, put the caviar in a bowl, add salt.
Take a mixer and start beating at low speed. Continue the process until a white foam forms. Now add the oil and beat again.
Sterilize the jars, place the caviar, pour in oil so that the caviar is covered (by 5 mm). Place in a cool place for 7 days.
We hope that the question of how to pickle bream will no longer arise for you. Bon appetit!
The best recipes for salting bream at home
Surely every fisherman knows how to pickle bream. Any of them will say that this process is simple, it does not take much time and effort, and it does not involve hard-to-find products or special equipment. But the result is simply amazing and everyone, without exception, likes it. Well, if you don’t know how to pickle bream at home, then we will offer you several simple recipes. Read how to salt herring!
Service in European style
The fishing and hunting recreation center "Uglyanskoe" invites everyone to catch bream in summer and winter. We have a school for beginner fisherman, where experienced specialists will teach you the basics of this exciting activity. We have created the best conditions for fishing lovers to spend time, we guarantee our clients comfortable accommodation, a menu of Russian and European cuisine, and the best service. The territory of the Uglyanskoye recreation center is under 24-hour security surveillance.
Quick salting
Method No. 1
- Boil the brine (1 liter of water + 40 g of salt) and immerse the carcass of cleaned, gutted and washed fish in it for a minute. Then dip it in vinegar diluted with water for a couple of minutes.
- Add another 100 g of salt to the brine, mix and place the fish in it for half an hour.
- Remove the fish from the brine and hang it in a draft under a canopy, on a balcony or loggia.
- When salt appears on the carcasses, this will mean that the fish is ready.
Method number 2
- Divide the gutted bream into halves (fillets).
- Mix 4 tablespoons of salt and two tablespoons of sugar. Rub the fish thoroughly with this mixture.
- Place the fillet in a container: the first piece skin side down, the second piece skin side up. Place a bay leaf between them.
- Cover with a cloth and leave at room temperature for a day. Then place the fish in a cool place under a light weight.
In two days the bream will be ready.
( 1 rating, average 5 out of 5 )
Dry method of salting bream
Moreover, an aqueous solution of salt can be prepared to your own taste. In this case, the bream pieces are ready for consumption by the time the brine has cooled. Large dried bream is very tasty. Salted bream, the recipe for which is quite simple, is prepared in a wide, not very deep container.
Bream should be dried hanging in a well-ventilated room. Using the method described above, dried bream turns out to be very tasty and fatty. At home, the best place to store dried bream may be the freezer.
Several dried bream can be stored very successfully in the refrigerator, first wrapped in parchment paper. During the cold season, you can store dried or dried bream on the balcony.
Before salting bream at home, the fish itself must be carefully prepared for this process. You will need to spend a larger amount of table salt on the last row, then press it with a lid and put some weight on it so that the salting of the bream for drying is successful.