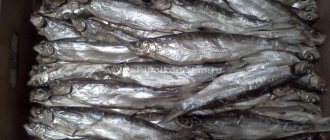
Dried bream - the most delicious dried fish
The processes of drying and drying fish are in many ways similar, almost identical.
Differences between drying and drying:
- The fish dries slowly at low air temperatures.
- The process is not allowed to dry completely: the fish remain soft.
When dried, the fish is not very dry, tasty and aromatic.
Features of the drying process
As you know, not all types of fish can be dried.
It is recommended to use only those that acquire a unique taste during processing in this way. This is precisely the property that is characteristic of bream. It is important to know how to dry bream correctly in order to avoid possible poisoning due to non-compliance with the technology. The essence of the process is that the fish must be well salted, after which it must be thoroughly soaked and dried. As a result, bream can be stored for a long time and eaten without any additional heat treatment. If you are interested in how many calories are in dried bream, then we can say that it is approximately 221 kcal per 100 g of product. Salting bream for drying is a mandatory step. But it should be understood that it is intended to remove excess moisture from the fish, and not to improve its taste. Various methods can be used for the salting process: wet or dry. It is very important to know how to salt bream for drying, as this stage is considered one of the main ones and guarantees the preparation of delicious fish.
Dried bream: benefits and harms
Fish has a number of beneficial properties:
- — Contains a large amount of fatty acids that have a beneficial effect on the heart and blood vessels. By eating this tasty product, you can reduce the risk of hypertension, coronary artery disease, stroke and heart attack by at least 20%.
- “Due to the huge content of calcium, fluorine and phosphorus in bream, it is very beneficial for our teeth and bones.
- — Useful microelements contained in fish affect the human digestive system, improve the functioning of the gastrointestinal tract, and improve metabolism.
- — Regular consumption of bream meat prevents diseases of the mucous membranes and skin.
- — Experts have proven that constant consumption of bream serves as a prevention of thyroid diseases. Those people who constantly have this fish in their diet have practically no problems with the thyroid gland.
Meanwhile, dried bream is additional salt that enters the body, and therefore, in order not to harm yourself, you do not need to consume too much of this product.
Well, also, improperly salted and dried fish is a breeding ground for various bacteria, and therefore, after eating such a delicacy, you can get intestinal upset and even serious poisoning.
By the way, read more on this topic: Bream fish: photo
Types of fish for drying
Drying or drying is an ancient way to preserve food. Most often it is used on fish and meat. By slowly drying in a ventilated area or in the fresh air, the product acquires a piquant taste. Can all types of fish be subjected to similar processing?
According to experts, it is better to use the following types for drying:
- vobla;
- ram;
- saberfish;
- silver bream;
- carp;
- perch;
- chebak;
- bream;
- rudd;
- crucian carp
Generally speaking, small-sized specimens are best suited for drying. Among professional fishermen, such fish are called low-value. But larger “brothers”, for example, catfish, bream or pike perch, may also be suitable.
All listed species are freshwater. They are the ones most often used for drying. But experts recommend not to give up seafood. You can use frozen fish for this. Flounder, herring, halibut and mackerel are also used.
It turns out better dried, which contains a large amount of fat. Therefore, for drying, it is better to take spring or winter catch before spawning. To get the best results, caught fish should be salted immediately.
In the northern regions, the bear-style drying method is often used. In this case, raw materials with a scent are used. But due to its taste specificity, this option may not appeal to everyone.
How to increase your fish catch?
Over 7 years of active fishing, I have found dozens of ways to improve the bite. Here are the most effective ones:
- Bite activator . This pheromone additive attracts fish most strongly in cold and warm water. Discussion of the bite activator “Hungry Fish”.
- Increased gear sensitivity. Read the appropriate manuals for your specific type of gear.
- Pheromone -based lures .
Read also: Quail egg sauce
But the bait will serve as:
You can stick a small hook into the top of the head, but this will lead to small fish biting.
Well, you need to carefully monitor the condition of the prepared bait. If it was not used as soon as possible, then it is better to throw it away and prepare a new one, rather than mar your fishing with failure. After all, any product spoils, and natural products spoil faster. The fish will not go to the spoiled product.
Conclusion
Making boilies yourself is an interesting activity. It may sound strange, but cooking makukha is fun, especially after realizing that there is a homemade bait hanging on the hook. But this can not only be bait, but also complementary food. It doesn’t matter what you use to catch fish, it’s important to lure it, and here Makukha has no equal.
The process is not that complicated if you follow the steps described above. Makukha has been tested by more than one generation of fishermen.
And although the bite depends on many conditions:
- air pressure;
- wind;
- internal state of the reservoir.
Rating: 4.7 3 votes
Making Makukha bait for fishing with your own hands - methods, instructions and tips Link to main publication
- About fish
- Fishing Features
- Carp
- Perch
- Zander
- Pike
- crucian carp
- Chub
- Bream
- Roach
- Som
- Equipment
- Lures
- Spinning
- Feeder
- fishing line
- Float rod
- Winter fishing rod
- Fisherman's equipment
- Boats
- Cameras
- Echo sounders
- Tents
- Fishing clothing
- Fishing technique
- Reviews of reservoirs
- Winter fishing
- Fishing secrets
- Note to the fisherman
- Cooking fish
- Fishing calendar
Dry salting method
Most often, drying bream at home involves using the dry salting method. For this, you need to first weigh the prepared fish to determine the amount of salt needed. Dried bream, the recipe for which calls for dry salting, is salted at the rate of 250 g of salt per kilogram of fresh product. It is recommended to use coarse salt, as it removes moisture from the carcass better.
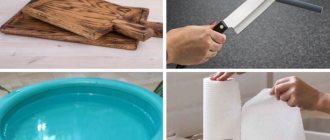
The dry method of salting fish involves the use of a deep enamel container, which should first be scalded with boiling water. Next, the following actions are performed:
- A layer of salt approximately 1 cm thick is poured onto the bottom;
- The prepared fish is rubbed with salt and placed tightly in a container in layers, which are also sprinkled with salt;
- The last layer of laid fish is again covered with salt, to which a little sugar is added to enhance the taste of the product;
- A lid is placed on top and a weight is placed.
Any recipe requires the use of pressure; in this case, dried bream turns out to be more dense. But more importantly, the use of weights eliminates the formation of air cavities in the fish, in which harmful microorganisms can develop. The described process is the full answer to the question of how to salt bream for drying. Next, the container with salted fish is placed in a cool place. At home, this could be a refrigerator or cellar. But if you salt bream for further drying in camping conditions, then it is better to lower the container with bream into a hole previously dug in the ground in a shaded place, which should be reliably protected from insects.
After 4-5 hours, the bream, sprinkled with salt, releases its juice and begins to salt in its own juice. The salting process, as a rule, lasts for no more than 3 days. A distinctive feature of properly salted fish is its firm, elastic back. There are other characteristic features of determining the correct salting, for example, fish meat should acquire a grayish tint, and caviar should become yellowish-red.
How to dry bream without gutting
For lovers of dried fish with caviar, you can suggest drying the bream without gutting, as a whole carcass.
For these purposes, only the freshest fish (less than 24 hours from the time of catch) is suitable. You need to immediately remove the gills from the bream, wash it and salt it. The salting process is the same as for gutted specimens. The only difference is the severity of the oppression. It is better to take something more massive, about half the weight of the entire fish.
After two days, the bream should be washed and then hung in a cool place (not higher than 10 degrees Celsius). A gauze canopy or mesh frame is required to protect against flies.
As for the benefits of dried bream for the body, it should be borne in mind that they contain a lot of fatty acids, calcium, and phosphorus. But there are also a lot of calories in such fish, as well as salt. Therefore, you should not go to extremes and eat exclusively dried fish. Everything is good in moderation.
Fishing is fun, which is why most anglers take it seriously. In its course, excitement appears, which creates an impetus for self-development in this area.
Read also: The most unusual exotic fruits
A group of fishermen revealed the name of the secret bait during interrogation.
Category: regional news.
For successful fishing, knowledge and the ability to apply it are important, so there are a lot of fishing techniques and methods of fishing. The question is especially important: “how can you attract fish?” One of the bait options is makukha.
IT IS IMPORTANT TO KNOW! Fishermen caught 25 kg of fish using the Fish XXL ! Read more.
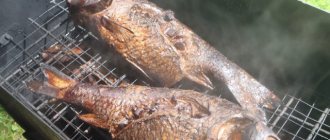
Salting bream for smoking
Many people ask about how to pickle bream for smoking? There are several ways to cook fish. We will look at the most popular and simplest.
Gut the fish and wash it.
If the bream is large, remove the head and make cuts on the sides. Now rub each carcass with coarse salt, including the inside.
The processed fish is placed in a deep container (tails and heads should alternate).
Cover the top with a lid and put pressure on it. Salting time is 12-16 hours - depending on the size of the fish.
Here is another way to pickle bream for smoking. It will require:
- water;
- salt;
- Bay leaf;
- red pepper.
Gutted fish should be filled with salt brine. To do this, pour water into the pan and dilute salt in it (80 grams per 1 liter of water). Add a little pepper and 2 bay leaves. Pour brine over the breams, cover with a lid and leave to brine for 7-12 hours, depending on the size of the carcasses.
After this, soak the fish in running water (30 minutes), dry it and smoke it for good health.
Salting for drying
If you don’t know how to pickle bream for drying, here’s a simple recipe. To prepare you will need to prepare:
- salt;
- fresh, unfrozen bream.
If the fish has just been caught, then it must be soaked in a basin of water for several hours to remove mucus from the surface.
Now gut the fish and rinse thoroughly under running water. Dry the carcasses and rub them with salt (preferably coarse).
If the bream weighs more than 1 kg, then before salting it you must first cut off the head and pierce the belly with a knife.
Now take a deep container and fill the bottom with salt (1 cm layer). Then place the carcass belly up. Sprinkle with salt again.
Next, cover the container with the bream with gauze and place it in a cool place to brine for 12 hours. After that, turn it over, cover it with a lid and put pressure on it. Keep the fish in a cool place for at least 3 days. Be sure to turn it over every 12 hours (otherwise it will go rotten).
After the specified time has passed, rinse the fish thoroughly, dry and hang. Be sure to leave space between the carcasses. If the fish is salted in the summer, cover it with gauze. Bream should dry for at least 3 weeks. If the fish is large – 4 weeks. When the bream is ready, it will acquire a pleasant amber color.
Secrets and tips for drying bream
- Bream should be dried in months that have the letter “P” in their names. This is March, for example, September, April and others, that is, the period when the weather outside is not too hot and there are no flies - the main pests of fish.
- You need to dry only fresh, recently caught fish. If the specimens have already been dead for several days or were previously frozen, then it is better to fry them.
- When salting the product, use only non-oxidizing basins and plates, for example, made of plastic or enameled.
- Dried bream will be tasty only if all drying conditions are met, and this is a temperature not higher than 25 degrees, exclusion of sunlight and good ventilation.
- When salting the fish, you need to turn it over so that it is well salted on all sides.
- Be sure to soak the fish after the salting process; the salt concentration will decrease significantly, and the bream itself will become softer.
- To salt a fish delicacy, you don’t need to skimp on salt and only use coarse salt. If you do not salt the product enough, it will spoil during the drying process.
- When the bream is ready for drying, it will rise to the top in the water in which it is soaked.
- It is better to salt small and large individuals separately from each other, so that some are not under-salted, while others, on the contrary, are over-salted.
- During the cooking process, fish must be protected from flies and other insects, which can deposit their larvae in the product and make it unfit for food in the future.
Ask the chef! Didn't manage to cook the dish? Don't be shy, ask me personally.Go
Salting stage
At the next stage, they begin salting. It is very important to make the correct calculations. For one kilogram of fish you need to prepare 250 grams of salt. For salting, coarse salt is usually used. The prepared carcasses are salted in an enamel container. First, pour boiling water over the container. The salting process looks like this:
- Place a centimeter layer of salt on the bottom of the container;
- The fish is rubbed with salt and placed in layers in a container;
- The last layer on top is sprinkled with salt;
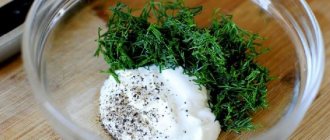
- To give a brighter taste, you can add a pinch of sugar;
- The container is closed with a lid and pressure is placed on top.
Oppression will help get rid of the formation of air cavities, where microorganisms harmful to health usually grow. Large Astrakhan bream may not be salted; to prevent this from happening, a saline solution is drawn into a syringe and injected into the carcass. Salted fish is left for three days in a cool place.
Salted fish is characterized by the following characteristics: it has an elastic back, the flesh is grayish in color, and the caviar acquires a yellow-red hue. Larger fish will require a longer salting period. How to dry large bream? The salting and drying procedure will require more time.
Soaking stage
The next stage is soaking. After salting, excess salt will need to be soaked in water. Thus, the bream will acquire a natural taste. For soaking, 10 hours are enough, the water is changed up to three times. Some experts recommend soaking fish for the same number of days as it was salted. You can also pay attention to the following sign: when the carcasses begin to float to the surface, the salting procedure is completed.
Salting for drying
Before cooking, fish should be thoroughly prepared. To do this, rinse the bream under running water and gut it by cutting the belly and carefully removing the internal organs and gills.
You can salt fish in its untouched form. However, gutted bream is salted much faster, and the likelihood that it will spoil is very small. Salting bream at home without gutting is only relevant if caviar is present. It is with it that the taste of fish becomes rich and unforgettable.
So, take a deep pan, bowl, plate or wooden box. Add salt to the bottom. The layer should be approximately 1 cm thick. Place the previously gutted and dried bream on top, belly up. Place the fish in a row and sprinkle plenty of salt on top again. Then the next row and salt again. And so on until the fish runs out. The top layer should be generously covered with salt.
Place the lid on top and put pressure on it. Place the container with fish in a cool place for 7-10 days.
If the back is a little hard, this indicates that the fish has been well salted.
At the end of the specified time, the carcasses should be thoroughly rinsed to remove salt and left in a bowl of water for 2 hours to remove excess salt. Now the bream can be hung to dry in a dry, ventilated area. Preparation time – 7-10 days.
If you are interested in the question of how to salt large bream at home, then the cooking process is practically no different from the previous one. The fish should be gutted, washed, dried and generously rubbed with salt. Now take a bowl, add salt to the bottom and place the fish.
To salt bream, you need to take only live fish.
Be sure to cover it completely with salt. Press down with pressure and leave for 6 days in a cool place. After this, soak the bream in running water for 2-3 hours. Then repeat the procedure. Drying large bream takes 7-10 days.
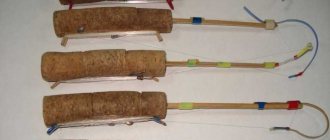
Fishing tackle "bulda"
Baldu fishing is now rapidly gaining more and more popularity among professional fishermen, and this is not surprising. For more than two decades, this method of catching fish has been called vertical jig. Now this interesting and effective tackle is widespread due to the fact that it does not require additional bait and can be made at home. What kind of universal device is this for catching different types of fish? How to properly fish using such a device? What characteristics does the bulldozer have?
- What is a bulldozer, general characteristics and scope of application
- Making the bulldozer yourself
- Game with the help of a bulldozer
- Catching fish on a bulldozer
What is a bulldozer, general characteristics and scope of application
The spinner for a variety of fishing is a spinner in a vertical direction, which is equipped with additional hooks hanging on a loop. Initially, only 1 hook was provided, but then more and more often they began to produce elements with 2 catching mechanisms on both sides. If we talk about further stages of development, then the bulldozer completely lost the main hook, which so often clung, and additional hooks helped to catch the entire catch. The last stage of the transformation was that the spoon was replaced with a sinker, which knocks on the bottom and makes mud.
If we talk about characteristics, then the modern fishing bulldozer is characterized by:
- various dimensions. Here you can usually find cylindrical, spherical, truncated, cone-shaped and many other types. All of them are used both for fishing from the shore and from a boat;
- various weights. Fishing on a bulldozer can be done using devices weighing from 3 to 9 grams. The choice varies only depending on the depth of fishing and the speed of the current;
- material of manufacture. You can fish on a balda made of lead, copper and bronze. To give your gear a bright look, you should resort to coloring, which will be carried out after 2-3 procedures;
- time for fishing. If we talk about the time of application, then fishing on the Balda can take place all year round. The only exception is very hot weather, when the fish tends to eat natural food. Here you can only find predatory species.
It is worth remembering that Balda fishing tackle is used for both predatory fish and “white” fish. The main fishing option is perch. In spring and winter you can find crucian carp and crucian carp.
Making the bulldozer yourself
If you were wondering how to make a bulldozer with your own hands, then you should study the procedure:
- Stock up on necessary materials. Among them should be hooks of various sizes and a sinker with holes at the top.
- The length of the hook should be less than the size of the sinker.
- If we talk about the classic version, then a hook is strung on a fishing line, a sinker, and then a hook again. After this you need to tie a loop. If it is very small, then during fishing there will be a restriction of free actions and an increase in the number of hooks.
- If we talk about the universal option, then first 2 hooks are put on the fishing line, after which the sinker is installed.
If you prepare several options for equipment with your own hands, this will allow you to quickly replace it in the winter. If we talk about the material for the sinker, it can be bronze, brass or copper.
Read also: Parthenogenesis in bees is what kind of reproduction?
Game with the help of a bulldozer
How to play the ballad correctly on summer evenings? Here are some simple tips:
- make smooth swings. This can be done by lifting the bait off the bottom, pausing and tapping it so that the mud rises to the top;
- The main part of the equipment should not be torn off from the bottom. If it is made on the basis of fishing line, then only the hooks will move;
- If we are talking about the bottom, then you can use a jig for the game.
Catching fish on a bulldozer
Fishing for bullfish in the summer requires active play. Here it is necessary to constantly change the dimensions and weight of the sinker, the color and options of the beads.
For fishing to be successful, you must adhere to the following rules:
- If you catch bream, then it is worth knowing about its sites.
- The best bead color combination is yellow-red.
- It is better to feed fish with bloodworms.
- The leash should be done slowly and smoothly.
- Fishing will be better if you use a spinner along with the bait.
- A large number of bites occur at the moment when the equipment is lowered.
- If we are talking about catching bream or perch, then in order for the fish to freeze in place, you should throw small bloodworms, jigs and chopped worms into the holes.
If we talk about the balda as a means for good fishing in general, then the tackle is quite simple to do with your own hands, and is also inexpensive. You can catch any type of fish with it; it does not require any special knowledge in fishing.
Cooking dried fish (in particular bream) at home is akin to making wine. You need to approach it with feeling, sense, and alignment.)))
But in fact, in order to salt and dry bream safely, efficiently and tasty, you need to follow several rules.
There are a couple of points in salting and drying bream, or any other fish. Some people salt and dry the whole fish, while others gut it and take out the entrails.
Ungutted bream, that is, whole bream, has special gastronomic advantages. Especially if the bream is spring and with caviar.
But the gutted fish is guaranteed not to spoil during salting and is salted efficiently. But it loses fat, juiciness and all the taste of real fish.
Today I want to offer you to salt and dry the whole bream.
Main stages
Drying or drying fish, like any other work, is carried out in a certain sequence:
- The first stage is salting. The fish should be placed in any suitable container and sprinkled with salt. Next, it is placed in a cool place.
- The next stage is soaking. The fish is first washed and then placed in fresh water.
- The last stage is direct drying. The process can occur in natural conditions or with the use of any devices, it all depends on the chosen method.
But before proceeding with the sequential implementation of all stages, the fish should be prepared. It is cleared of mucus and washed in running water. The insides of large specimens are removed; small ones can be left as is. There is no need to clean off the scales.
Fish salting methods
Dried fish is a favorite product of many peoples. Therefore, there are many methods of initial salting. This process is the first stage of drying. Depending on your preferences, you can use the following methods:
- Dry . Large specimens are salted in this way. After washing, the fish is gutted, and it is advisable to make the cut from the back. After wiping with a dry cloth, salt is poured inside, but without excess. Next, the fish are placed in a container. In this case, the carcasses should lie tightly to each other. Sprinkle more salt on top, place a flat lid and set the pressure. For the container you need to choose a basket or box. During the salting process, juice will be released, which will escape through the cracks below. You also need to place a piece of fabric on the bottom.
- Wet . This method is most often used when salting small specimens. In this case, there is no need to clean the insides. The fish are placed in a pan or basin, having previously sprinkled salt on the bottom. The carcasses are laid out head to tail and back to belly. Sprinkle each layer with salt. Next, close the lid and set the pressure. In a day, juice will appear, which will quickly cover the entire styling.
- Tuzluchny . In this case, each fish is strung with its head on a rope, creating a kind of beads. Next, the bundle is dipped into a solution - brine. It is prepared at the rate of 350 grams of salt per liter of water. The fish must be completely immersed in the solution.
Preparatory stage
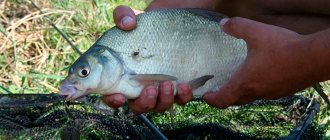
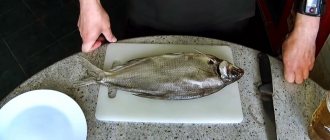
Having familiarized yourself with how to salt and dry bream, you can get down to business. Before you start directly drying at home, you should choose the right product. Fish caught no more than 10 hours ago is ideal for drying. Otherwise it may turn out stinky. Carcasses must be fresh. They will need to be gutted first. How to prepare fish for drying:
- Mucus is removed from the surface; to do this, you need to rinse it well;
- Take out the insides;
- The gills are removed;
- All carcasses are thoroughly washed again;
- There is no need to cut off the head.
After the fish is prepared, proceed to salting it.
Drying
Proceeding to the next stage, you should familiarize yourself with how to properly dry bream. The fish is dried in well-ventilated dry places. It is advisable that the room be darkened. In an apartment, drying can be done over a hot stove; for this, the fish is placed at a distance of 80 cm from it. To ensure that the heat is distributed evenly, the air is dispersed by a fan. How long to dry the bream depends on its size.
Fish are usually hung with their heads up, strung on wire or twine. The wire is threaded through the eye or the fish is hooked onto the lower lip. Insects can damage carcasses, causing harm to them. To prevent this from happening, you need to prepare a special solution and mix three parts unrefined sunflower oil and one part vinegar.
- The bottom of the oven is lined with foil;
- The fish are laid out in the same direction;
- Heat the oven and open the door 5 cm to allow air to circulate;
- After two hours, the heads of the carcasses are covered with foil, and the process is continued for another 4 hours.
Drying in the fresh air will be required. This can be done on the balcony. The fish will be ready in two days. The easiest option is drying using an electric dryer or convection oven. After 4 hours, a dried product is obtained, but drying will require a longer time.
If the carcass contained caviar, it will also dry out. Dried bream caviar is a real delicacy. Dried bream in particular is very tasty. Knowing how to dry bream, you can get a tasty and aromatic snack. Drying will take several days, but the process itself is not difficult to perform.
Dried bream: salting at home - a recipe for salting and drying large fish without gutting
To get delicious dried bream at home, you need to go through several steps:
- Preparing bream for salting,
- Salting fish using dry salting method,
- Soaking the fish after salting
- Drying and drying bream
How to properly prepare bream before salting
First of all, after bringing your catch home, all the fish must be cooled. Put it in the freezer for a couple of hours.
This way your fish will be reliably preserved and odorless. And with this cooling we will get rid of some parasites if they are present in the fish.
How to properly salt bream for drying at home
Salting bream is not difficult. It is necessary to start salting with large individuals.
Next, we proceed to salting the bream. To do this, you first need to select the container size you need.
Ikea and other mega-superstores sell plastic boxes with handles. They are just perfect for salting bream - large and deep.
First of all, pour some salt into the bottom of the box. Then we fill the gills with salt, since it is from the head that the fish begins to spoil (as you and I know well).
Some immediately remove the gills and make an incision in the abdominal part so that the fish is better salted. But I assure you that it will be salted just fine anyway.
For 1 kg of fish you need 150-200 grams of salt.
Next, we lay all the fish in layers “jack” (that is, head to tail, tail to head). Don't forget to sprinkle each layer with a little salt.
When all the bream is laid, take a piece of plywood or a board of the required size and place it on top of the salted fish. We press down with our weight and place pressure on top (load - the more fish, the heavier the load).
The load should be exactly half the weight of all the salted fish.
We put it in the refrigerator for a week - no less, or even 10 days. You can spend the first two days so that the fish gives juice without putting pressure on it. But every day you need to take the fish out of the refrigerator and press it again. This is necessary so that all the air inside comes out.
I don’t do quick salting, because it seems like the fish will pick up salt in a couple of days, but fermentation of the meat will not occur and it won’t be the same dried bream like store-bought.
If there is a lot of fish, then some can be left for drying and drying, and the rest can be packed in bags and placed in the freezer. And if necessary, deliver several fish.
I advise: How to salt red pink salmon fish at home?
How to properly soak bream after salting
After salting, any fish must be thoroughly soaked. This is done so that the excess salt is removed and we do not end up with over-salted bream.
To soak bream you will need a larger container than for salting. You can set aside a bathroom in your apartment for this (if your spouse and all household members do not mind).
First, we wash each bream under the tap. Then we place it on the bottom of the bath and fill it with cold water.
The water needs to be changed every hour. Soaking is enough for 20-24 hours.
In the summer, when it is very hot, you should put a few pieces of ice in the fish bath.
Interesting: How to cook fatty salted fish on a camping trip and at home?
The easiest way to dry and cure bream without gutting at home in summer and winter
You can dry bream in an apartment, but the best place, of course, is in a private house, where there is somewhere to hang all the fish.
Drying should be done in a cool and well-ventilated area. Small bream should be hung by the head, and large bream by the tail.
It is advisable for the fish to be dried (dried) in a room where the temperature is 10-15 degrees.
For a quick effect, especially in isolated places, such as an apartment, it is better to dry and dry the bream under a fan.
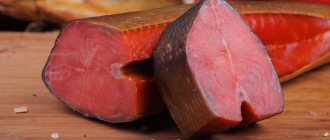
After drying, dried bream turns out to be very tasty without any odor, and when cut, the meat has an amber transparent color.
Useful: An interesting way to smoke fish on the go.
Cooking features
Even a novice cook can prepare dried bream with his own hands if he knows and takes into account several important points.
- The most delicious are dried bream caught in spring or autumn, as they contain more fat, and individuals with caviar can also be caught.
- It is not customary to dry frozen fish; only fresh bream is used for this. However, you should not dry them immediately after removing them from the water. You need to let them lie for some time in a cool but well-ventilated place, dry, then you can proceed to cooking.
- The process of drying fish consists of several stages. First, it is prepared: washed, gutted if necessary. Then the fish is salted, and after salting it is soaked. Then they hang it up and dry it, that is, they dry it.
- Regardless of the size of the fish, before salting it must be cleared of mucus and washed. Bream larger than 30 cm are gutted. When gutting, the cut is made carefully, trying not to damage the gall bladder, otherwise the fish may taste bitter. After gutting, the bream is washed again. Ungutted fish is fattier and tastier. Many people like bream caviar. Therefore, bream up to 30 cm in size, especially if there is a suspicion that it contains caviar, are salted and dried whole, without gutting. It is customary to leave the heads of breams, but the gills must be removed, as they are poisonous.
- Bream can be salted dry or wet. The dry method is the most popular, but some housewives prefer wet salting. The choice depends on the preferences of the cook.
- Bream are kept in salt or brine for 3 to 5 days, depending on their size. Small breams can salt even faster – in two days.
- After salting, the fish must be soaked in clean water to remove excess salt. Some cooks believe that the duration of soaking should coincide with the duration of salting, others believe that 10 hours is enough. Most often, bream are soaked for a day, but changing the water at least three times during this time.
- For drying, bream are hung on ropes by their tails or heads. To protect against insects, it doesn’t hurt to make a blanket of gauze. Drying should take place in a well-ventilated cool place. The optimal temperature is from 10 to 15 degrees. Often fish are hung out to dry on the balcony.
- Bream should dry for 7 to 28 days, depending on their size. Ready dried bream has a uniform structure that can be seen in the light. Under the skin there is a dry layer of yellowish fat. Bream meat should be soft and elastic, but not wet. By these signs you can determine that he is ready.