Fishing as a great way to relax in nature from the bustle of the city and everyday work is becoming an increasingly popular hobby. Every weekend you can see busloads of fishermen rushing to their favorite reservoir in the hope of catching the coveted fish.
But fishing tackle is becoming more expensive, it is often made of poor materials and does not last long.
In this article we will tell you how this can be done both efficiently and inexpensively.
Why do you need homemade fishing rods?
You really want to brag to your friends about your winning catch, take a selfie with the fish you caught, or post a photo of a fishing rod you made with your own hands from scrap materials. After all, such a fishing rod will make you a professional in the eyes of your fishing colleagues.
In addition, the materials for making such a fishing rod can be made from natural materials and can be found in any store or market.
In ancient times, they used a horse's tail to make a fishing line, a goose feather as a float, and now modern components are used for fishing gear. But you shouldn’t forget about the gifts of nature when making a fishing rod.
How to make a fishing rod for winter and summer fishing
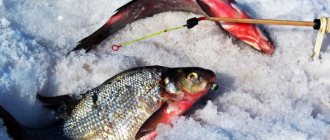
All the above instructions are only suitable for making a fishing rod for summer fishing. Winter gear is slightly different from that used in summer. First of all, they look completely different. Secondly, it doesn’t make sense to cast such a fishing rod too hard, since in most cases in the cold season, fish are caught directly under the ice (Figure 7).
In general, the equipment of a fishing rod for summer and winter fishing is practically no different. The only difference is that winter tackle has a shorter rod, but the hook, float, line and sinker remain in place.
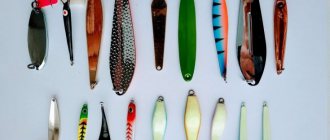
Unfortunately, making a good winter fishing rod from scrap materials with your own hands is much more difficult than making a summer fishing rod. For fishing to be successful, you will have to use spoons, jigs and jigs. Experienced fishermen also use fishing rods with feeders that attract aquatic life to the fishing spot.
Figure 7. Ice fishing rod is much smaller in size
But, if you need to quickly make a winter fishing rod, you can use the instructions for making a reelless fishing rod.
You can make such fishing gear without a fly or other bait like this:
- Take a regular wine or champagne cork, pierce it and insert any plastic rod (for example, an umbrella knitting needle) into the hole.
- The cork handle will act as a reel. It needs to be wrapped with thread or fishing line. To prevent the cord from slipping, it should be wound strictly in the recess of the plug. If it doesn't exist, you'll have to make it manually.
- Now you need to nod. It should bend, but not too much, so it is usually made of very thick film. You need to cut a strip out of it, and make a hole in one of its edges for the fishing line.
- Next, we simply connect the homemade nod with the whip. This is usually done using a cambric, but if such gear is not at hand, you can simply tie the gear with a slip knot.
All that remains is to pass the fishing line through all the components and tie a jig or hook with bait to its edge.
Homemade fishing rod at home
From the simplest materials that can be found in any home or bought at a market or flea market, we make a fishing rod with our own hands.
First we need to choose the type of wood from which we will make the fishing rod.
Willow, birch, maple, bird cherry are suitable. The rods made from these trees do not break, are not brittle, and remain elastic after drying.
Children and teenagers love to use such fishing rods, and they catch the same large fish as adult fishermen using expensive factory fishing rods.
And before, when buying a fishing rod in a store was in short supply, they used only wooden fishing rods and caught good trophy fish.
Correct loading of float equipment
Correct loading of the float (at the very beginning of the tip)
Read: Fishing with homemade maggots
Some people call this a float load, although in fact it is actually called a load. You need to attach lead pellets to the fishing line so that only the upper part of the float (its tip) remains above the water. This type of gear setup allows you to improve sensitivity to bites from small and medium-sized fish.
If you have previously seen large floats with most of their body sticking out of the water, and anglers are trying to catch something on them, this is the wrong approach, unless the angler is catching pike with live bait (or any other fish, in which case the sensitivity of the equipment does not play a role at all and it is important that the live bait does not greatly distort the movement of the float with its presence)
Loading at home
At home, you can set the correct float load in a large bottle (from 1.5 to 5 l). Simply add weights, clamping them with pliers (lastly with your teeth) 30 cm from the end of the fishing line and lower the equipment into the water. As soon as you notice that the entire body of the float is submerged under the water, and most of the top remains above the water, then you have completely submerged the float.
How to load a float on a pond
The principle is similar to checking the load at home, but here you can throw directly into the water. Keep the float close to the weights and cast it 2-3 meters from the shore. If the body of the float is still visible above the water, you need to add more weights.
Load the line with lead pellets until only the tip of the float appears above the water, preferably so that the body is completely under water. This will provide the best sensitivity. Although it is acceptable to have a small portion of the body visible above the surface in windy conditions, this will reduce visual deception as the float passes through the waves.
Making a wooden fishing rod
So, having found a suitable tree or bush, use a knife to cut a stick 3 to 5 meters long. Then carefully peel the bark.
The future fishing rod for summer fishing and the winter fishing rod with your own hands must dry. After all, they say: prepare a sleigh in the summer, and a cart in the winter.
And a fisherman can also make a winter fishing rod out of wood as a reserve in the summer. In the coastal willow or bird cherry thickets you can find suitable wood material for this.
You need to carefully clean the stick from knots and make the surface smooth. After sanding and drying, you can make guide rings for the fishing line, but this is not necessary, depending on what is more convenient for you.
If you do not make guide rings, then at the tip of the rod you need to make a slot through which you need to pass the fishing line.
How to make antiseptic with your own hands: the best instructions for making antiseptic at home + photo reviewsDIY medical mask - TOP 100 photos and step-by-step instructions with diagrams of the best ways to create
- What are paintings by numbers?
How to make a float rod
The modern fishing tackle market offers a huge selection of fishing rods: feeder, float, bottom and winter. The easiest way to make a float rod without a reel using available tools is to make it without even needing drawings (Figure 3).
Figure 3. A homemade float rod, made correctly, can also give a rich catch
First you need to collect all the necessary materials and structural elements. To make a fishing rod, select a branch of birch, willow, bird cherry or maple. It is these trees that have sufficient flexibility and will not break even after drying.
Since the rod plays a key role in successful fishing, let’s look at how to make a wooden rod in more detail:
- Find a suitable tree or bush and cut a stick 3-5 meters long. Next, you need to carefully remove the bark from the surface of the future fishing rod.
- Now you need to let the wood dry a little. If you have chosen the right breed, the process of drying in the sun will benefit your homemade instrument. As a result, the rod will become more durable, although it will not lose flexibility.
- When the wood dries, it is advisable to sand it. But, if you need to make a fishing rod quickly, you can skip this step.
- Passage rings for fishing line are also made upon request. Of course, using a homemade tool with them will be more convenient, but if you don’t have time to improve the design, you can simply make a hole in the edge of the rod. The fishing line will be passed through it in the future.
At this point, the manufacture of a wooden fishing rod can be considered complete. Now we need to move on to a more important stage - equipping the future product.
Attaching the hook and line
Once the rod is ready, you can focus on rigging it. You not only need to make a strong fishing rod from a stick, but also tie a strong fishing line and a sharp hook to it. They are the ones who will help get food (Figure 4).
First, we attach the fishing line or cord that replaces it. There are two ways to do this. The first is to simply tie the line to the tip of the rod in a pre-prepared slot. If you managed to make a donk of a more advanced design (with rings), use the second option. In this case, the cord is threaded through rings and wound around a reel installed at the bottom of the fishing rod.
Regardless of the chosen type of fastening, it is advisable to knit the fishing line with a strong blind knot that cannot come undone on its own.
A homemade hook also needs to be secured, especially if you are going to fish with live bait. For tying, you can use any knot, but the place where the eyelet connects with the fishing line must be secured against untying with an ordinary connection. If you have glue on hand, you can drop a little onto the joint to make it stronger.
Figure 4. Proper hook attachment guarantees a rich catch
In addition, survival experts advise making a fishing rod with not one, but two hooks. This will significantly increase the likelihood of getting a catch in extreme conditions.
Assembling the reel and sinker
It is advisable to equip a homemade float fishing rod for crucian carp or other fish with a reel. But, if you don’t have suitable materials for its manufacture at hand, you can get by with an ordinary fly rod of the simplest design (Figure 5).
Figure 5. The sinker will allow the bait to sink to the bottom, and the reel will help pull out the prey
Much more attention will have to be paid to attaching the sinker to a bamboo or willow fishing rod made independently. It is the quality of installation of the sinker that will determine how quickly the bait will sink to the bottom and attract the attention of the fish. It is advisable to tie it to the fishing line using a running knot, but if you do not know the technique of tying such a connection, you can tie the weight tightly, stepping back about 20 cm from the hook.
Making a float and a fishing rod
We discussed the technology for making a fishing rod from a branch above. By the way, in the past, a fishing rod was made from wood: bamboo, willow, birch or hazel.
Figure 6. Float and rod - those gears that you can make yourself
Now, to cast the fishing rod far, you need to equip it with a float. It can also be made from almost any available material: a bottle cap, a piece of bark, a small stick or a feather. The main function of the float is to signal the fisherman about the bite so that he can hook the fish in time (Figure 6).
If you have managed to make a float, all that remains is to properly attach it to the fishing rod. There are several ways to do this. The simplest one is to simply tie it to a fishing line using an elastic band, thin wire or thread. If you want to make a fishing rod with a sliding float, the technology for attaching it will be slightly different.
In this case, the float must be threaded directly into the fishing line. To do this, a through hole is made in the body of the product through which the cord is threaded. In order for you to be able to adjust the immersion depth of the float, you need to limit its free movement along the fishing line. This can be done using a small sliver inserted into the hole. It will act as a wedge that regulates the depth of immersion.
If you don't have time to build complex structures, you can simply tie the float directly to the fishing line. However, be prepared for the fact that if you need to change the immersion depth of the float, its attachment point will have to be constantly bandaged.
Rod equipment: fishing line
Proper rigging of a homemade fishing rod will allow you to see the contact of the fish with the bait, hook the fish, help pull the caught fish out of the reservoir; knowledge of how to make a fishing rod with your own hands and classically equip it helps us with this.
Ordinary fabric, nylon cord, laces, braided fishing line will serve as material for making fishing line, the length of which should be about half a meter longer than the length of the rod.
The main feature of the main cord should be its length, which exceeds the size of the fishing rod by half a meter.
Using scrap materials
Let's remember the times when there were no shops within walking distance and people tried to make do with the means at hand.
- We make the handle. To do this, take a suitable wooden block and use a knife to cut out a convenient design from it.
- We make a whip. We cut off a juniper branch, peel it from the bark, and remove the knots. Under natural conditions, we dry it in a not too heated room. We sand its surface with sandpaper, and then saturate it with heated drying oil. We make a hole in the handle, where we attach the thick end of the whip with glue.
- The nod is made from boar bristles, after which it is fixed on the thin edge of the whip.
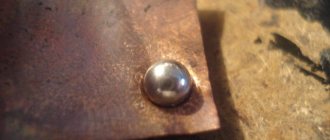
- We make a winder for the fishing line. To do this, on the opposite edges of the handle we fix two hooks of their wire, onto which a fishing line with a diameter of 0.15-0.3 mm is wound. Its length is in the range of 10-30 meters.
- A silver drop of jig is fixed to the edge of the fishing line.
Read here - How to make a pen at home - a step-by-step master class on making ballpoint, gel and fountain pens (video and 100 photos)
At this point, the production of the fishing rod stops. It is considered ready for use.
We recommend you look here
- How to make a paper ball - simple step-by-step instructions with photos and diagrams on how to make a paper ball (120 photos)
- How to make a pom-pom: step-by-step description of how to sew a beautiful pom-pom from yarn with your own hands (75 photos)
- How to make a notebook with your own hands - a step-by-step master class on how to make a stylish and beautiful notebook (video and 120 photos)
Float
Our do-it-yourself self-hooking fishing rod in its equipment, in addition to fishing line, also contains a float, which should have a low density and float well on the water.
Instead of a purchased float, you can make it yourself from a bird feather, a wine or champagne cork, a twig, tree bark, or foam rubber.
Such a float will have the necessary ability to see the bite and hook the fish correctly and on time.
- How to embroider icons with beads - a review of the best ideas with photos and examples from masters
How to find water on a site - a review of the most effective methods from experienced professionals
DIY cage: master class on making decorative and functional cages (115 photos)
Installation of a side fishing rod
First, the handle is mounted. To do this, axial holes are drilled in all wine corks, through which they are mounted on the thick end of the whip. Mushroom-shaped ones are located along the edges, and ordinary ones are located between them. To improve fixation, you need to use glue, for example, “Moment”. The reel is attached to the handle using electrical tape or construction tape.
It is better to take the unloading (movable) throughput ring. It will be the only one on our design. We put it on the whip and start installing the nod. It will smooth out wave fluctuations and signal a bite. The nod is placed on the tip of the whip and, if necessary, fixed with glue.
The fishing line is threaded through a nod, a movable ring and wound onto a reel. The load is attached in a sliding manner, allowing it to fall to the place where the leash is tied. You can also use special rubber stoppers to limit its movement. The length of the leash is 40-70 cm, depending on the fishing conditions. The size of the hook should be selected based not on the size of the expected catch, but on the size of the bait. A float can be used if fishing is carried out not from the bottom, but in the water column. Otherwise, its use is unjustified.
Homemade sinker
You can also make a sinker and a stand for fishing rods yourself. The stand is made from willow or bird cherry branches.
Using an ordinary penknife, we cut out the branches, stick them into the place from which we will fish, and place a fishing rod on it.
A sinker can be made from a nut, washer, bolts, small nails, tied to a fishing line between the float and the hook.
In the absence of factory ones, hooks can be made from a pin or sewing needle, carefully bending them and making an eye.
Making a mini feeder
In such conditions it is more convenient to fish with a short feeder, but factory rods are never shorter than three meters. Therefore, it is better to make a mini feeder with your own hands. For this purpose, some kind of spinning rod that is no longer used for its intended purpose is suitable. This can be a one-handed spinning rod of a plug-in or even telescopic type, but with power characteristics, since you will have to use feeders of different and often impressive weights. It's easier with a telescopic spinning rod. You just need to remove the upper knee-top, which will make the rod much more powerful. But in this form the feeder will be a rough stick. This means that we need a fresh and simple solution that will turn this rough stick into a universal short feeder, capable of casting the heaviest and lightest feeders, while accurately and sensitively showing the bite. To do this, you just need to make a quivertype from piano wire about 26 cm long. If possible, it is best to use a smooth string from a decommissioned piano, taken from the middle register. But any spring wire will do. If only it had the properties of a spring and was not very rough. The ends of a piece of wire are folded in half. The length of the double part is about 3 cm. One end of the future quiver tip guard is wound to the tip of the rod, and a spinning tulip of the largest diameter is put on the other double end with glue. The joints are wrapped with a thin nylon cord or strong thread and impregnated with varnish. At the connection point, you need to wind the cord under the “clothespin” of the feeder bell.
No tail, no scales!
That's it, our fishing rod is ready, all that remains is to dig up worms, find insect larvae or make dough, and you can go fishing, but how to make a cover for fishing rods with your own hands is an even simpler matter.
To store our fishing rod, you can make a cover from potato bags or old pants.
You will need scissors, needles and thread. There is no doubt that your homemade tackle will help you catch the treasured fish of your dreams!
Photo of a fishing rod with your own hands
Read here - Introducing the Rescue Tool
Did you like the article?
0