WHAT FISH ARE CATCHED ON SUPPLIES?
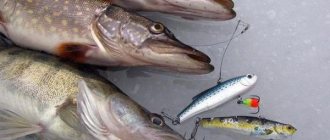
The bait is a fairly effective tackle for catching pike, although it can also be used for catching other fish, such as catfish, burbot or pike perch, taking into account the peculiarities of their behavior. Carp can also be caught with the help of a bait.
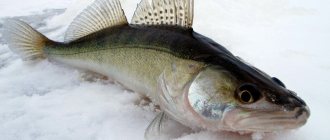
It is not so easy to catch pike perch in winter because it is active early in the morning and late in the evening. The rest of the time he prefers to be at depth. If you choose the right place to install it, you can count on success. Deep areas with a rocky bottom, where pike perch usually hides, can be especially catchy.
When hunting for catfish, you will need a fairly strong fishing line or cord. Naturally, only powerful hooks are used for catfish. Moreover, similar requirements are imposed on all elements of the tackle, otherwise weak points can weaken the tackle as a whole and, as a result, breakage of the tackle and loss of a large specimen. It is better to take crucian carp as live bait.
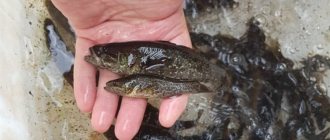
Crucian carp can live on a hook for up to 5 days. The supplies from the boats are installed in the evening, and in the morning, again, the boats check them for the presence of the catch. It is advisable for the live bait to swim closer to the surface of the water. To catch catfish, it is better to take a medium-sized crucian carp. It is better not to place large crucian carp, since they will be as active as possible, and the catfish may refuse to hunt for them.
Many anglers do not recognize this type of fishing due to the lack of dynamics, which is considered unattractive and not adventurous. Despite this, some fishermen still do not refuse supplies, considering them to be quite effective gear. In addition, the simplicity of the device does not require extra costs. There is no need to stand over the tackle. It is enough to check it a couple of times a day - in the morning and in the evening, which allows you to go about your business, such as setting up a camp or simply relaxing, enjoying the untouched nature.
https://f1sh1ng.ru/lovlya/shuka/postavushki.htmlhttps://fishingadvice.ru/postavushka-na-shhuku/https://handf.mirtesen.ru/blog/43017432141/Postavushka-na-schuku-svoimi- rukami
What other fish can I stock?
This is an effective tool for catching pike, but it can also be used for other fish. With their help you can catch such fish. Like catfish, burbot or pike perch. However, in this case, it is necessary to take into account the behavioral characteristics of these particular fish. You can also catch carp using this tackle.
For example, pike perch is not always available in winter. He comes out to feed in the early morning and late evening. He spends the rest of his time in deep holes. You need to choose the right time and place for fishing. The stands need to be installed where the bottom is rocky or hard. After all, the places where pike perch hide are located near these places.
When fishing for catfish, you need to use a fishing line or cord strong enough for this fish. You also need to take strong hooks that can withstand catfish. Since strength is very important in this case, when using knots, you need to choose those that will minimally weaken the strength of the fishing line. In this case, some fishermen recommend using crucian carp as live bait.
This live bait can live on a hook for up to five days alone. The time for fishing is chosen as follows. In the evening, they put out supplies on the boats, and in the morning they check the catch on them. At the same time, we adjust the tackle so that the live bait (in our case we are talking about crucian carp) floats just under the surface of the water. It should be chosen in medium size. This option is considered the most effective. Larger ones may be too active for catfish. He may simply not be able to keep up with them.
HOW IS FISH CATCHED ON SUPPLIES?
The technique of fishing with hooks is not particularly complicated. The main thing is to find a promising place where pike may appear in search of food. It is advisable that live bait be prepared in advance. Small perch, ruffe or roach will be used as live bait. They usually catch fish at depths from 1 to 3 meters. When fishing in reeds, it is permissible to use gear at a depth of up to 0.5 meters.
For greater catchability, it is better to install several stands at a distance of 10 to 15 meters. With so many gear supplied, you will have to spend a lot of time checking the supplies, so it is not advisable to fish with any other gear. If the pike takes the bait, it will try to move to the side, so the position of the fishing line will change dramatically. If a small predator takes it, it will try to drag the rig into the thickets of reeds, reeds or other shelter. If he takes a large specimen, he will try to take the rig to depth, pulling the line with maximum effort.
For a more dynamic development of events, it is advisable to check the tackle and change live bait more often. If there are no bites in the same place for a long time, then most likely this place is not interesting for pike. In this case, it is better to move to another promising place.
Features and nuances of fishing
Winter fishing with girders for pike is interesting and multifaceted. A couple of random trips does not reveal the essence of such fishing. To understand it, you need to constantly practice. Sooner or later, the reservoir will open up and reward the persistent fisherman with wonderful fishing or a trophy specimen. The specifics and features of pike fishing in winter on girders depend entirely on the conditions of a particular reservoir. After lengthy experiments in the same place, the secrets and tricks of catching pike on girders in winter are revealed to the fisherman. He goes home with a catch even when the fishermen of the same day sit next to absolute zero.
( 1 ratings, average: 5.00 out of 5)
Features of winter supplies
In order to immerse the supply into a reservoir in winter, you need to make holes. If any other gear is left for a long time, it will freeze, but this does not threaten this device. This feature is due to the fact that the supply is immersed where the water does not freeze. It is attached to the surface using a stick laid across the hole. The top is covered with brushwood and additionally covered with snow. With such insulation, the tackle can stand all night and not freeze; if there is ice, it will only be a thin layer.
To summarize, we can conclude that the product has the following advantages:
- It’s inexpensive in the store, and you can make it yourself;
- it is possible to build directly on a pond;
- the fishing line unwinds evenly, so the predator will not be scared;
- suitable for fishing in places hard to reach for spinning;
- can be used at any time of the year;
- It is permissible to use in various types of reservoirs.
Postavushki can be used as the main type of fishing, i.e. put it down and go about your business. For example, pick berries, mushrooms, relax, etc. You can also catch pike with a spinning rod at the same time. In the second case, there is a much greater chance of getting a rich catch, especially if you place several supplies at once.
Also on this topic:
Fishing in the Moscow region - the best places
Catching carp on top (cake)
Catching pike perch with a spinning rod - choosing bait and location
Catching crucian carp on a feeder in still water
Features of sea fishing
Differences between winter and summer supplies
The positive side of using a stand in winter fishing is that it does not have surface equipment. When fishing with girders and other winter gear, some important elements remain above the water, which is why they freeze and reduce the functionality of the structure. However, the supply is not in danger of freezing. Since all equipment is under water during fishing.
In winter, it is convenient to fix the stand over the hole. For example, to do this, it is enough to wrap the structure around a stick and place it horizontally, transverse to the hole. Securing summer tackle is a little more difficult.
However, summer fishing for pike with a stand has its advantages. In warm weather, live bait can last much longer. This increases the likelihood of an active bite and saves live bait. In winter, replace the fry more often. In order for it to last as long as possible, it is better to avoid using gudgeon or bleak for such purposes, which are among a number of low-hardy fish.
Watch a video about summer fishing with baitfish:
Do-it-yourself summer girders for pike
The breadth of assortment in stores dedicated to fishing in our time can only delight. It is very easy to get lost in the abundance of products on offer. Many options for the necessary girder can be easily found on the counter of one of them.
You can do it differently. It is interesting for a fisherman to make his own tackle. Technology won't make you agonize over this for long. The zherlitsa can be assembled from available materials found on the river bank.
The easiest way to assemble a zherlitsa, spending the least amount of money, is to build it from a wooden stick, resembling a slingshot. hole should be made at the base of the slingshot so that the rope can be threaded and secured.
On the horns it is necessary to make small cuts, a maximum depth of two centimeters. It is important to secure the rope (line) so that it does not have the opportunity to unwind on its own.
This method is also notable for the fact that the slingshot can be mistaken by the pike for an ordinary snag, or part of a branch, which will not scare it away while fishing. the color of the surrounding area for camouflage purposes . Most often they are painted green (possibly brown). The workpiece is ready.
A fishing line is tightly wound around the rod, while winding it around the spear, it should draw a figure eight. A hook is attached to the end of the fishing line. As for the sinker, the need for its use depends on the depth of the reservoir. It won't be needed in shallow water. The total length of the fishing line should not exceed fifteen meters.
After attaching the tackle to a pole (tree), unwind four to eight meters of fishing line and throw it into the water. That's it, your homemade zherlitsa is ready.
If you follow all these rules , then the zherlitsa will do all the work for you. Proper installation and a carefully chosen location will not only save your time, but will also bring a lot of loot . The tackle invented by our ancestors is today the most effective way of passive fishing.
The method has been proven over the years and generations. Try to master it too. It is worth understanding that if you are attracted to sport fishing, then you will be bored when fishing with a girder. The beauty is that you can combine passive and active options . Happy fishing.
Installation of a pike fishing stand
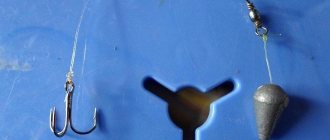
Before installing the tackle in real pike fishing conditions, I complete the tackle as follows (Fig. 2). In the recess of housing 1 I tie and wind 10 meters of fishing line with a diameter of 0.5 mm.
I put a swivel 5 on the main fishing line of the girder, and below I tightly fasten a lead pellet 4, which limits the downward movement of the leash.
I tie a cone-shaped sinker 3 to the end of the main line of the supply. Equipping with a sinker increases the weight of the supply by 80 g. The weight of the sinker is quite enough to reliably anchor the tackle in the place where pike is caught.
To the swivel, through a clasp 6, I attach a nichrome leash with a diameter of 0.3 mm and a length of 30 cm, equipped for catching medium-sized pike with a double No. 8 (according to the Russian numbering of hooks).
The clasp included in the set of summer equipment allows you to remove the leash from the main fishing line when catching a toothy predator.
I prefer to catch pike on such girders, using small, 10-12-centimeter roach as live bait.
I pierce the fish’s upper lip with one of the double’s hooks or insert a sting into the nostril and secure it with a strip of elastic so that the fish cannot free itself and lives longer.
(Here the author of the tackle most likely means a small square of elastic, like those used to secure the beads of artificial baits on the hooks of reelless jigs or a ring of a bicycle nipple elastic.)
When fishing for pike on a stand near the algae, I swim 3-5 meters away from them and lower the sinker of the girder rig to the bottom of the reservoir.
Then I tighten the fishing line and fix it in one of the cuts in the body so that it does not sag, and the position is at an angle to the surface of the water (Fig. 3).
It is important to ensure that the live bait set for pike fishing at this moment does not confuse the leash of the rig with its main fishing line. I install stands for summer pike fishing 10-15 meters apart from each other.
Their inclined position informs me that there is no bite, and free swimming, leaving the general row - that the pike took the bait on the girder
I install stands for summer pike fishing 10-15 meters apart. Their inclined position informs me that there is no bite, and free swimming, leaving the general row - that the pike took the bait on the girder.
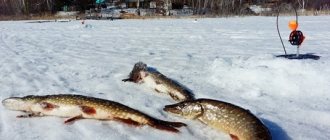
A small pike weighing 0.4-1 kg usually drags the bait into the coastal algae, through which you have to wade through it, fingering the fishing line with your hands. Pike larger than 1 kg are pulled to depth by the float of the girder.
Read Fishing for perch with a popper and the top 5 best models
On rivers, they also catch pike well with set-ups: I put them in bays, in quiet water, choosing places where pikes usually hide.
The trap needs to be checked periodically: untangle the rig, replace dead fish with fresh ones, remove the caught pike and adjust the rig.
During the day, supplies charged for pike fishing have to be checked 3-4 times and always before the evening dawn. If there are no pike bites, you need to install the girders in another place.
A homemade supply for summer pike fishing has another important advantage: the equipment is compact when assembled (see Fig. 1) and is easy to transport
To assemble the girder, you need to tightly wind the fishing line in the groove of the float of the supply and insert the sinker into the recess, where it will be tightly fixed by the wound fishing line.
After this, you need to wrap a leash around the body of the girder, fix it on it, sticking both hooks into the foam.”
This is all the essential stuff that was published in the article about installing and catching pike on fishing tackles and setting up the girder equipment. If anyone is interested in my own thoughts and additions regarding fishing for pike and pike perch, read the next article.
Pike fishing stand on the river
Above is a magazine description of a home-made summer installation, where I didn’t really like the equipment included with the zherlitsa.
Live bait gear for catching pike in a weak river flow can be made simpler. Then installing each set from a boat near the intended pike site will take no more than 2-3 minutes.
Therefore, for the floating installation of gear on the river, I will draw the equipment of my suppliers.
Currently, drawings from my website, as well as descriptions of homemade gear passed off by online thieves as their own inventions, literally fill the Internet with fishing topics.
Although it is clear that creatures with defective brains, who may face a real prison sentence with compensation for the damage caused for stealing someone else's intellectual property, cannot in any way be fishermen. These are just home-grown “businessmen” making pennies by showing garbage advertisements.
Moreover, these nonentities steal materials from fishermen, that is, from the environment to which they consider themselves. Therefore, they deserve the name “network rat” with all the ensuing consequences.
Next, read the recommendations related to the installation of a set of supplies with a nichrome solid leash in the equipment of a summer girder for catching pike on a river or reservoir. That is, where live bait on a rigid nichrome leash will be carried away by the current from the supporting fishing line of the summer girder.
It is advisable to paint one of the planes of the foam plastic supply red. Then, when a pike grabs a live bait from a trap, even with peripheral vision you can react to the tumble of a contrastingly colored float in the river flow, if a large pike has not drowned the foam float of the trap in the water.
And in the configuration of the summer supply, I would also put a much lower limiting weight that prevents the sliding leash from lowering along the main fishing line of the rig to the ground of the reservoir (half a meter from the bottom).
And I would replace a bunch of equipment elements such as a swivel, a clasp and a metal leash on a stand for catching pike on the river with one solid hard nichrome leash with a ring equipped with a double or tee. See photo.
The depth of summer fishing areas for pike with live bait is from one to 2.5-3 meters. The most promising fishing spots without frequent hook hooks are placed 3-4 meters from the border of algae and snags. These are the most likely places for pike ambushes.
I install stands in places where pike are supposed to stop on a weak river flow no more often than every 10-12 meters.
I won’t teach you what you already know about periodically checking and replacing dead bait on a summer pike fishing pole, unhooking algae, and reeling in excess fishing line.
In principle, the autonomous supplies shown in the picture, connected to the place for catching pike through a bottom sinker, can be installed on large ponds, if, thanks to a good food supply, there are a lot of pike there, and in the waters of lakes.
And, for sure, in the process of catching pike with live bait, a heavy homemade hook from a tube with a wide opening of the striker may come in handy many times.
To assemble the girder, it is necessary to tightly wind the fishing line of the equipment in the transverse groove of the float. A nichrome leash should be bent over the winding line diagonally. And all this management is to fix it in the foam with the stings of the double or tee hooks.
Manufacturing process
To make a homemade supply, there is no need to purchase any special equipment. All the necessary parts can be found in almost any household. Nowadays, several options for installing the supply are popular. One of them consists of:
- A small piece of rubber hose (about fifteen centimeters);
- Wooden stick;
- A standard set of equipment, including fishing line (from 0.3 to 0.5 millimeters), hooks and sinkers;
- Knife and sew.
Manufacturing takes place in several simple steps:
- One edge of the hose is pierced with an awl. This is how two small holes appear, placed opposite.
- The other side of the hose is cut slightly lengthwise.
- A strong fishing line is threaded through the holes, forming a loop. With its help, the stand will be attached to a stick that serves as a holder.
- Fishing line for equipment is threaded into the same holes. It is then tied tightly and wound around the middle part of the hose.
- A leash is attached to the end of the fishing line, onto which you first attach the hook and swivel.
- To secure the line and prevent it from getting tangled, the end of the line is pulled through a slit on the other side of the hose. This makes the device easy to transport.
- A large sliding weight is installed on the main line, the weight of which ranges from four to twelve grams.
The supply is ready for use. Before throwing it into the pond, insert a stick into the hose and secure it with the loop provided for this purpose. Then live bait is put on the hook and fishing begins.
Manufacturing pike supplies for summer and winter fishing
Post fishing is a passive type of fishing. Nevertheless, she has many fans. The advantages of using the supply are that it is easy to manufacture and requires minimal costs. It’s easy to use, but always effective, so this type of fishing is suitable for both beginners and professionals.
The design allows you to catch pike with this tackle all year round - summer, spring, autumn and even winter. We will look at the differences between the equipment for ice fishing and the design for open water.
The history of the supply began with the use of girders. These designs are very similar, but have several important differences. The fishermen shows the bite by raising a red flag. The catch does not signal a catch in any way. The fish is detected on its own, and the fisherman should know a few subtleties in order to detect the bite in time and pull out the catch. The supply is so easy to make that you can make a dozen or even more pieces in a few hours. In this case, a minimum of effort and money will be spent.
The supply works only with live bait. You can catch it in the river, or buy it in advance at a specialized store. Then the bait is unwound, the live bait is put on the tee and lowered into the reservoir. Fixing the tackle is done using a regular stick or other similar object. The stand is suitable for both winter and summer pike fishing.
To make a homemade supply, there is no need to purchase any special equipment. All the necessary parts can be found in almost any household. Nowadays, several options for installing the supply are popular. One of them consists of:
- A small piece of rubber hose (about fifteen centimeters);
- Wooden stick;
- A standard set of equipment, including fishing line (from 0.3 to 0.5 millimeters), hooks and sinkers;
- Knife and sew.
Manufacturing takes place in several simple steps:
- One edge of the hose is pierced with an awl. This is how two small holes appear, placed opposite.
- The other side of the hose is cut slightly lengthwise.
- A strong fishing line is threaded through the holes, forming a loop. With its help, the stand will be attached to a stick that serves as a holder.
- Fishing line for equipment is threaded into the same holes. It is then tied tightly and wound around the middle part of the hose.
- A leash is attached to the end of the fishing line, onto which you first attach the hook and swivel.
- To secure the line and prevent it from getting tangled, the end of the line is pulled through a slit on the other side of the hose. This makes the device easy to transport.
- A large sliding weight is installed on the main line, the weight of which ranges from four to twelve grams.
The supply is ready for use. Before throwing it into the pond, insert a stick into the hose and secure it with the loop provided for this purpose. Then live bait is put on the hook and fishing begins.
Fishing for pike on a stand has several features and stages, including:
- The right choice of location. First of all, the fisherman must make sure that there is pike in the place he has chosen.
- Preparing fry for live bait. This could be perch, ruff, roach and other simple fish.
- The installation depth of the supply should vary from one to three meters. For fishing in reed beds, half depth is also suitable.
- For greater fishing productivity, it is better to install several stands at a short distance from one another. The optimal distance reaches fifteen meters. When placing several gears at a distance, regularly check them all for bites and catches.
- You can determine the bite by the shape of the fishing line. If it is stretched and located exactly horizontally, then there is no catch. If it is deformed, has bends or is located vertically, this means that the predator is already on the hook.
The zherlitsa is an improved supply. We have a detailed article on this topic.
By the location of the bait after the bite, you can determine the size of the catch. For example, a young pike, after being hooked, goes into the reeds or algae thickets. However, a large predator will drag the caught fry to the bottom of the reservoir. Keep track of the condition of the live bait and remove the catch immediately to attach a new fry. This will provide interesting and active fishing. However, if there are no bites for a long time, it is better to change the place for fishing.
How to increase your fish catch?
Over 7 years of active fishing, I have found dozens of ways to improve the bite. Here are the most effective ones:
- Bite activator . This pheromone additive attracts fish most strongly in cold and warm water. Discussion of the bite activator “Fish Hungry”.
- Increased gear sensitivity. Read the appropriate manuals for your specific type of gear.
- Pheromone -based lures .
Pike feel safe in the area near the shore, where there are a lot of rhizomes and algae. In addition, in such places a lot of fry swim, which the predator feeds on. Therefore, such zones are productive for catching pike. For a fisherman, it is best to install the stand in the following places:
- In the coastal part, where there are a lot of reeds and grass. After standing near the reservoir for some time, you can notice how the pike repeatedly appears on the surface.
- In the area of a fallen tree or where there are a large number of snags.
- Channels where strong currents border on standing water are also one of the favorite habitats of pike.
- In spits with a sandy bottom, located lower than the islands, in island straits and similar areas near the coast.
However, it is difficult to fish in areas littered with cramps without breaking the gear. It will be easier if the supply has a fixed supply of fishing line. Thanks to this, the pike will not take the gear far into the snag and will not tangle it. It is also important to choose the right live bait. The best choice is bleak, which likes to float to the surface instead of sinking to the depths and tangling the line. Throw the supply not into a snag, but between two overgrown areas.
In addition to the supply itself, fishing with it requires some more gear and tools. One of the reasons for this is the characteristics of the predator. Pike has very sharp teeth. She also usually swallows the bait very deeply. For this reason, a fisherman may cut his hands when removing the hook from the inside of the fish.
To avoid this and other unpleasant situations, stock up and use the following devices:
- With a gapper you can easily open the mouth of a fish and fix it in this position. The device works as follows: the gapper is closed and placed in the pike's mouth (this is easy to do even if the mouth is closed). The device is then released and, thanks to a spring built inside, expands, leaving the predator's mouth open.
- Then you need to use an extractor or a medical clamp to remove the hook from the insides of the predator.
- To make it easier to remove large and active fish from a pond, you can use a landing net.
- To store caught predatory fish while you continue fishing, use a cukan or a rope on a wire.
Using a yawner will protect your hands from injury
Young pike feed on fry of carp and perch species. An adult has a more expanded diet, which may include fry of vendace, perch, roach, crucian carp, smelt, etc.
Choose live bait depending on the area in which you will be casting the bait. If this is a shore full of writhes and reeds, it is better to choose fry that like to swim on the surface - bleak, redfin, rudd. If the tackle is cast on a more or less flat and uncluttered bottom, it is better to give preference to fish that are distinguished by their vitality - perch, crucian carp.
Take action!
When fishing for pike with a girder on a small (10-15 meters wide) river with a small current, an abundance of backwaters and creeks, thickets of aquatic vegetation and an average depth of about 2.5-3 meters:
- Prepare and equip all the fishing rods at home - the gear should be set up as quickly as possible on the reservoir.
- Since it is most likely to catch pikes ranging in size from 1-1.5 to 2-3 kg, use a transparent monofilament line with a cross-section of 0.3-0.35 mm, an olive sinker weighing 6-8 g, and a metal leash 15-20 cm long. with triple or double hook No. 3-4. For such a small river, wind no more than 10 meters of fishing line on each girder - such a supply is quite enough so that the pike, having taken the bait, is detected and cannot get the equipment too tangled in the grass.
- It is best to take 5-6 girders with you - install 4-5 of them, leave 1 in reserve;
- Having arrived at the reservoir, initially carefully, without creating unnecessary noise, walk along the river bank and select several places in which there is a high probability of pike presence - backwaters and small backwaters, snags, fallen trees and lying in the water, reed thickets, water lilies
- From alder, hazel or young aspen growing on the shore, cut the required number of poles from 2 to 3 meters long, remove small branches from them, carefully sharpen the butt part of each of them;
- Do not remove bark from poles to camouflage installed gear;
- Using a fishing rod with a sinker, measure the depth in the places where the girders are placed; based on the results of measurements, reel in and fix with a splitting line such a length of fishing line so that the live bait is 5-10 cm above the bottom;
- It is best to prepare live bait in advance - in this case, give preference to juveniles of “local” fish species: small roach, perch. In this case, the pike is more likely to take live bait without being wary;
- Place the live bait behind the back, being careful not to damage the fry’s spine;
- Tie each of the poles securely to the top of the pole and carefully, without creating unnecessary noise, lower the rig with live bait into the chosen place and firmly stick the pole with its pointed end into the shore;
- After all the gear is installed, move some distance away from it and fish with a float rod - the absence of a person on the shore near the gear, clearly visible to a sharp-eyed predator, will allow him to safely come out of his hiding place and attack the baitfish on the hook;
- Check the vents every 3-4 hours. It is very difficult not to notice the triggered tackle - the fishing line is stretched with a string, the tip of the pole often bends under the jerks of the pike. Having noticed a triggered girder, do not hook or hesitate - just quickly pull the fish ashore, allowing it to tangle the fishing line in the grass or branches of the nearest snag;
- Having pulled the pike ashore, using a yawner or, in extreme cases, a twig, remove the hook with live bait from its mouth, not forgetting that your fingers should not end up in the pike’s mouth;
- To ensure that the fish does not spoil and remains alive for a long time, place it on one of the carabiners of the kukan, tied to a reliable stake driven into the shore, and lower it into the water;
- After catching a pike, re-bait the tackle with fresh live bait and throw it into the same place.
Girder for summer fishing
Next, we’ll look at how to properly make a girder for pike in the summer. This is a fairly simple tackle, although relatively rarely used. Do-it-yourself summer girders for pike are made even faster than winter ones. It is enough to cut a long pole and a slingshot, instead of which a piece of plastic pipe or a bottle can also be used.
A fishing line is wound crosswise around the slingshot, and the slingshot itself is attached to a pole, which must be firmly stuck into the ground on the shore at an angle of approximately 45 degrees. If it is not possible to secure your homemade equipment in this way, then you can even simply put it on the water. If possible, instead of a pole, you can use tree branches hanging low over the water. At the same time, there is no urgent need for live bait to be located as close to the bottom as possible. In the summer, a toothy predator may well come out of its hiding place for prey located in the upper layers of the water.
Installation of such girders usually begins in the late afternoon, and you should come to check for the presence of a catch already at dawn. The tackle has a self-hooking effect - the pike, grabbing the bait, drags it to the side in order to swallow it.
How to make tackle yourself
The order is as follows:
- You need to take a small piece of hose. Up to 10-12 cm long.
- On one side you need to drill through the pipe to get 2 opposite holes. They are made at a distance of approximately 2 cm from the edge. The cord is then attached to these holes. A small loop is later made on it. On the other hand, you just need to make a small cut along. This is necessary to secure the fishing line so that it does not unwind from the hose on its own.
- Drill a hole in the middle to tie the main line. But it can also be attached to the previously made side. After the fishing line is firmly attached to the body of the tackle, it must be wound around the hose. A fishing line can be taken with a diameter of 0.4-0.5 mm. In the winter season, a regular fishing cord is used instead.
- Then the sinker is fixed, its weight is selected depending on the fishing conditions. Approximately 4-12 g, it should not sink the tackle much. The load can be made sliding.
- Lastly, a leash with a swivel and a single hook are attached.
- Live bait is attached immediately before throwing the equipment into the water.
The tackle can be made in various ways from available materials.
The length of the fishing line should not be too long. It should be greater than only 5 m from the depth at which you plan to fish. So, for small reservoirs the length will be 10 m, and for deep ones - 30.
What is the purpose of the cord that we attached to one end of the hose? To fix it on the shore or on a hole. In winter, for example, the tackle is immersed in water, and you can pass a stick through the loop and place it along the hole.
The reel does not have to be made from a hose. It is made from any available materials: polystyrene foam, a wooden stick or thick cardboard. The tackle can also be made from a 1.5 liter plastic bottle.
How to make and equip
There are several options for making supplies. Let's look at how to make the most popular ones. In any case, the kit includes a piece of stick that rests on the hole. The tackle itself is tied to this branch at a certain depth. To do this, use a piece of nylon thread or thick fishing line.
The simplest supply is the option with a hose:
- To make such equipment, you will need a piece of hose with a diameter of approximately 3-4 cm and a length of about 15 cm.
- A hole is made at one edge of the hose at a distance of 3 cm from the edge, to which a loop of nylon cord and a main line with a diameter of 0.3-0.5 mm and a length of about 20 m are attached.
- We put a sinker weighing 30-50 g on the main line and secure it with stoppers. Some baits are made without a sinker, then the live bait is located in the middle layer of the reservoir. Fishing with such depth of live bait can be effective on spits at the beginning and end of winter.
- A fluorocarbon leader is attached through a swivel.
- A tee or double is attached to the leash.
This type of tackle is convenient for catching pike perch. When hunting pike, the device changes slightly. Instead of a hose, a piece of hard rubber measuring approximately 8 by 5 cm is used. On one side it is necessary to make an incision to secure the fishing line, and on the other, a hole for tying a nylon cord, which is attached to a stick on the ice.
The fishing option for burbot is distinguished by a more powerful sinker, since fishing takes place in the current, and a smaller hook. Moreover, when hunting for this predator, the sinker should lie on the bottom, and the leash should be at least 40 cm long. The tackle itself can be made from fishing line with a diameter of 0.4 mm, since this fish is not afraid of rough rigs.
There are several options for planting live bait:
- under the back;
- with the winding of the leash under the gill cover;
- combined.
Advice! The first option is better suited for small live bait, the second and third will be more reliable with large fish. Moreover, in the last two cases, the fry is most often suspended vertically, which better attracts even passive predators.
Additional gear
In addition to the supply itself, fishing with it requires some more gear and tools. One of the reasons for this is the characteristics of the predator. Pike has very sharp teeth. She also usually swallows the bait very deeply. For this reason, a fisherman may cut his hands when removing the hook from the inside of the fish.
Read Winter lures for perch and techniques for catching predators with lures
To avoid this and other unpleasant situations, stock up and use the following devices:
- With a gapper you can easily open the mouth of a fish and fix it in this position. The device works as follows: the gapper is closed and placed in the pike's mouth (this is easy to do even if the mouth is closed). The device is then released and, thanks to a spring built inside, expands, leaving the predator's mouth open.
- Then you need to use an extractor or a medical clamp to remove the hook from the insides of the predator.
- To make it easier to remove large and active fish from a pond, you can use a landing net.
- To store caught predatory fish while you continue fishing, use a cukan or a rope on a wire.
Using a yawner will protect your hands from injury
Homemade pike stand
Above is a magazine description of a homemade fishing rig for pike, and I really didn’t like the picture showing the rig in a charged state.
But some of the fishermen may take these supplies into service and try to set them up in this form for pike fishing.
Therefore, I transferred Figure “3” from the previous page to the material of this article and for pike fishing I propose a slightly different method of installing homemade supplies for the following reasons.
Even if you don’t look very closely at the adjacent image of the grenade, you may get the complete impression that setting up a homemade pike rig is more sensitive to the slightest influence of external factors than stretching a grenade.
Judge for yourself: Firstly: if you believe the picture, then to catch pike with girders near the algae, we will have to measure, with an accuracy of a couple of millimeters, the depth of a reservoir with a muddy bottom, into which a cone-shaped weight with an inverted top will necessarily, and no one knows how, fall through.
Secondly: the fishing line cannot come out of the slot of the supply float in the place shown in the figure with the blue line. Its output will correspond to the orange dotted line. For this reason alone, setting the pike even without a grip should be on the verge of triggering.
Thirdly: an inverted cone-shaped sinker with a high center of gravity, and even weighing 80 grams, will definitely fall on its side.
As a result, the reel of a fishing tackle installed for pike fishing in this way, due to the torque created by the weight of the load of the reel, will immediately rotate clockwise by 90 degrees.
If you are going to equip such a sinker with a cone-shaped weight, then you need to give it at least the shape of a bell, but the wide base of the sinker should be at the bottom.
In the same way, even on a weak wave, raised by the wind or current, the main line of such a design of a homemade pike rig will definitely be torn out of the horizontal slot.
Although all these destabilizing factors may not be necessary if the bait set up for pike fishing is loaded with live bait. One slight jerk of the fish may be quite enough for this girder to work even without the pike’s grip.
And we may simply not have 4 seconds left to move the boat away from the charged supply to a safe 200 meters.
That’s why I propose to form a slot in the middle of the wide end sides of the float and use a flat weight when fishing for pike.
The new slot is drawn with a red dotted line in Figure “1” of the previous page.
In this case, the pike fishing stand will become more resistant to gusts of wind and jerks of live bait.
We make the supply with our own hands
The process of making this gear is quite simple and anyone can handle it. To do this, you need to prepare all the materials in advance.
What you will need
- a piece of fishing line about 8 meters long with a cross-section of at least 0.5 mm;
- sinker weighing about 20 grams;
- a piece of small rubber hose, about 15 centimeters;
- a tee or a reliable double with a carbon leash;
- nylon thread.
Build process
After all the materials have been collected, you can proceed directly to collecting the supplies. This must be done carefully and carefully so that the device turns out to be of high quality and without flaws.
- Stepping back three centimeters from the edge of the rubber pipe, a through hole is made. Here the main fishing line and a nylon ring are attached, which will be attached to the spacer near the hole to stabilize the tackle.
- On the other side of the rubber hose, you need to make a neat cut of two centimeters. It is into this that the edge of the main line will be inserted.
- Depending on the depth of the reservoir where fishing will be done, a fishing line is wound around the tube. As a rule, 15 meters is enough here.
- The main line is threaded into the sinker and secured with special stoppers. A leash with hooks is attached to the free end.
- All protruding and uneven ends are cut off and the stand is ready for use; all that remains is to catch the bait and attach it to the hook.
There are a huge variety of different modifications of this gear. After all, every home craftsman prepares it for himself, taking into account the characteristics of the reservoirs where fishing is carried out. Some people use a rubber hose, while others prefer a bamboo cane.
Also, the quality of the hooks may vary. The most important thing when choosing them is to calculate so that they can withstand heavy loads. This happens due to the fact that supplies are often checked every few days. If the tackle or part of it is poorly executed, then the fish will most likely simply break loose and swim away.
Post fishing tactics
To catch the desired trophy on a stand, it is very important to know not only how to mount it yourself, but also how to properly fish with it. Experienced fishermen know the reservoirs and use their own method on each of them, which brings maximum efficiency
First you need to choose the right fishing spot. Here you need to know the features of the reservoir: the state of the bottom, the channel, the presence of underwater obstacles, creeks. It is best to place the fish in snags, since this is where predatory fish are most active due to the large concentration of fry.
Next you need to catch and prepare live bait. Moreover, you need to keep it alive for as long as possible, since in this case the chances of a successful bite are much greater.
After the bait is placed on the hook, the tackle should be lowered into the water. As a rule, it is enough to lower the line by three meters. However, the bottom topography and the quality of the reservoir itself play a huge role here. So, in reeds and snags, the tackle is immersed only to half the depth.
To increase the chances of a rich catch, it is worth placing several stands at once with an interval of 15 meters from each other. If the tackle has changed its location, then it needs to be checked. If there is a catch, then remove it and replace the live bait with a new one.
You can fish with a fishing rod throughout the year, but it brings a particularly rich catch in October and November, when many predatory fish are most actively biting before the start of wintering. It is at this time that experienced fishermen come forward for predatory prey.
In summer, fishing with such gear is usually done from a boat. Experts recommend installing stands along the boundaries of reeds, thickets, in channels between rivers, and on rifts. Small fish most often accumulate in these places in search of food. And this is precisely what attracts a large number of predatory fish here that don’t mind hunting.
Fishing with girders in winter
Pike on a zherlitsa in winter
There is an opinion that catching pike on a zherlitsa in winter is an unsportsmanlike, passive way of winter fishing. One could agree with this, if not for a few “buts”: catching pike with girders in winter means catching live bait, drilling a large number of holes, the angler running to the girder that “shot” (signals a bite), rearranging the girders. All these “buts” taken together require so much effort that actively catching pike with a balance beam or lure will seem like just a rest.
Installation diagram on ice
If it is not known at what depth and what places the pike sticks, the first girders are installed in a row from the shore in depth at a distance of 8 - 15 meters from each other, depending on the area of the reservoir and the diversity of the bottom topography.
In real fishing with girders in winter, some of the girders are triggered, while some are completely ignored. The bait fisherman moves non-working baits closer to those that bring fish, maintaining a safe distance (to avoid entanglement, live baits should not reach each other).
How to bet
Let's consider the procedure for installing an over-ice girder for pike fishing.
After the installation scheme for the vents has been determined and the holes have been drilled, we proceed to installing the vents on the ice. The procedure for installing a separate girder on a pike:
- We determine the depth at the installation site of the girder by lowering the equipment under the ice;
- We fix the equipment at the required depth at the bottom by loading the flag;
- We raise the rig of the girder and attach live bait;
- We lower the live bait to the bottom and set the girder in the working position above the hole.
You should not illuminate the holes, especially in shallow water. They are darkened by sprinkling with snow, especially if the base is not in the form of a lid. Even if the base covers the hole, it is still sprinkled with snow - this way the hole does not freeze longer.
At what distance from the bottom is it better to place live bait? When fishing for pike on girders, depending on the depth at the place where the gear is installed, the live bait is raised 20–50 cm from the bottom. It is believed that this way it will be more noticeable to pike. When fishing for burbot, live bait is lowered to the bottom.
Which live bait is better
To use as live bait on a girder for pike, it is better to use medium-sized roach, silver bream, crucian carp, gudgeon or perch. Ruff is more often used when fishing for burbot, but if there is a shortage of live bait, it is also suitable for pike.
The live bait should be a typical inhabitant of the reservoir; the object of the pike's hunt is the local live bait. Crucian carp is distinguished by its vitality, roach and silver bream, at first, more actively attract pike. Many people believe that the best bait for pike is perch.
In general, you can use any live bait if it was caught in the same body of water.
How to properly mount live bait
It is very important to correctly place the live bait on the hook of the baitfish. The activity of the live bait and the time until it turns into a dead fish depend on this. The effectiveness of hooking pike also depends on the method of baiting the bait.
Experienced garrison fishermen use mainly two methods of attaching live bait:
- Behind the back, under the dorsal fin;
- Through the gills, the forend of the double into the mouth.
The first method is to place the live bait carefully, under the dorsal fin, without affecting the skeleton and internal organs. You need to try to injure the live bait as little as possible, start piercing against the direction of the scales. The hook must be very sharp.
The second method injures live bait less, it lives longer, and gives more effective pike hooks. A leash without a hook is inserted into the fish’s mouth from the side of the gill covers, the double is tied or attached through a loop and is inserted back into the mouth with the forend.
There are other ways to place live bait on a baitfish hook - by the mouth, by the tail, using an elastic band, but they all have a number of disadvantages.
Biting, hooking and fishing
When fishing with girders, there are two phases of pike biting.
- Live bait grip. The pike makes a throw, grabs the bait and freezes for a while. At this moment, a slight unwinding of the fishing line from the reel occurs and the girder flag is triggered;
- Swallowing live bait. The pike turns the bait with its head towards the throat, and slowly moving, swallows it. At this point, the line continues to be ejected from the reel.
When should you hook a pike? Under no circumstances should you hook immediately after the flag is triggered. It is necessary to wait for the second phase of the bite, which occurs 10 - 50 seconds from the moment the bait fish grabs, and after the pike has reeled in several meters of fishing line, hook it.
Fishing for pike is usually not difficult, as long as the leash can withstand the sharp teeth of the pike.
Live bait for fishing
Among the live baits used for catching pike on a girder, use juveniles of the following fish species:
- goldfish;
- perch;
- roach;
- rudd;
- gudgeon
Also, do not use prickly ruffe for girders, which pike, unlike pike perch, do not eat. Do not place small white breams and white breams with a wide body on pike baits as live bait.
Attach live bait in the following ways:
- carefully pierce the back of the bait fish with any of the double hooks just above the dorsal fin;
- pierce the upper lip of the live bait with a hook;
- pass the leash through the gills into the mouth of the bait fish, put a double hook on it, then pull the leash and fix the hook in the mouth of the fry.
Read How to store smoked fish
Store live bait in bulk buckets or special buckets - cans. At high temperatures, change the water as often as possible and do not expose the container to direct sunlight.
Store live bait in bulk buckets or special buckets - cans
Peculiarities of winter behavior of pike
Winter fishing for pike on girders is the most appropriate method of fishing for the toothy predator from the ice. Vertical trolling gives excellent results on the first and last ice, during periods of thaw, and also if the ambush point of the pike is known (on a home reservoir that is constantly visited). In the deep winter, when the predator is passive, it is the winter girdles that allow you to find the toothy one and pick up the keys to it. Their main advantage over artificial baits is a live fish on a hook. Several factors influence the winter pike bite:
- Oxygen regime.
- Availability of food supply.
- Winter migrations (determined by the first two points and the movement to spawn at the end of freeze-up).
- Weather influence.
- Changes in the water level in a reservoir (this is relevant in artificial reservoirs on large rivers).
Article about ice fishing for pike:
Weather influence
Many articles and books have been written about the influence of weather on the predator’s bite. Information sometimes differs radically. It is difficult to determine exactly what weather is best for catching pike in winter on girders. Firstly, all bite forecasts can only be calculated for a certain area and a specific body of water. Secondly, in addition to the weather, there are many more influential factors that are listed above. Thirdly, even in the most unfavorable scenarios, you can always find a specific pike that will be tempted to grab it, while another individual will stand somewhere nearby and not respond to the bait. So, in what weather does pike bite best on the girders in winter?
Traditionally, the best weather is considered to be a smooth state of the atmosphere, without sudden jumps or anomalies. When the environment changes, the fish need to adapt, this takes some time.
The best time to bite pike in winter on the girders:
What is a supply?
In order to independently assemble a device at home, you should have an idea of what it is and what the device as a whole looks like. A postavushka is a fishing tackle in which, unlike a girder, there are absolutely no flags or other identifying marks indicating a bite.
Fishing is done with live bait, which can be small fish caught before. It is attached to a tee, which is released into the water, while the tackle is secured to the hole. Since there are no warning signs here, you should periodically check all the holes and remove the caught fish from the gear.
Advantages
Fishing with a stand has a number of significant advantages, thanks to which many fishermen prefer this particular method.
First of all, when using this method of pike fishing, your hands are freed up; there is no need to constantly hold the gear in your hands.
You can place several supplies at once, which increases the chances of catching the desired trophy. The coil is located under water. This prevents it from freezing into the ice and always unwinds perfectly and calmly. Thanks to this, you can check such gear less often than others.
Flaws
The only drawback, according to experts, is the absence of any beacons that signal the catch. Because of this, you can simply miss the moment of biting. However, it can be easily eliminated by adding a flag, like the zherlitsa.
For many, a significant drawback is the lack of active action, since you have to spend a lot of time setting it up and then just sit and wait.
Postavushka or zherlitsa?
One of the most fertile periods for fishing with a girder or stand is winter. Each of this type has its own advantages and disadvantages, which will be discussed in this article, but first we should tell you what they are.
A zherlitsa is a tackle designed for catching predatory fish during ice fishing. A distinctive feature of the zherlitsa is its beauty and structure. A sign of beauty is its elegant flag, which signals the fisherman about a bite. After the predator grabs the bait, it tries to swim away from the biting place and at the same time the fishing line located on the snow unwinds. At the same time, the flag sharply straightens due to the tension of the fishing line.
A stand is an under-ice tackle with a spacer on top that prevents the fish from dragging the tackle under water. The reel in this case is a small piece of hose with slots on which a fishing line is wound. The release of the line occurs due to the pull of the bait by the fish.
So, the zherlitsa. This tackle fascinates with its extraordinary flag play. But this impression will quickly disappear if the basic rules are not followed:
- It is strictly forbidden to move a long distance from the supplied tackle. If you move further 40 meters, the raised flag will no longer be noticeable, regardless of any improvements that resourceful fishermen come up with to make the flag more visible. If the girder is pulled out of the water at the wrong time, then you can say goodbye to this tackle.
- When fishing with a girdle, it is worth noting that the fishing line used often freezes into the ice. Because of this factor, the predator, sensing resistance, often throws the bait. This, of course, will not affect cases when the live bait is completely swallowed, but still this factor greatly influences successful bites.
- Often the sinker is hung above the installed tee; in this case, when the reel is unwinding, the bait sinks to the bottom with loud noise, which ultimately scares away future prey.
- The price of a zherlitsa in specialized stores is about 40 rubles and more. For comfortable fishing, you need to install at least 10 gear. And this is not always affordable for the fisherman.
Read: How to make a nod for winter fishing
The main disadvantage of supplies is the lack of a bite alarm, namely a flag. Therefore, you often have to check the supplied tackle. But besides this disadvantage, there are also a number of advantages:
- The ability to leave gear for several days without fear for its safety. The reel and line in the supplies never freeze into the ice.
- No weights that can scare away predatory fish. The role of the sinker in this tackle is played by a piece of hose.
METHODS OF MANUFACTURING SUPPLIERS WITH YOUR OWN HANDS
What is most important is that this tackle is made quite simply, without the use of any scarce elements of the tackle. Unfortunately, it is unlikely that you will be able to buy it in a store, but making it yourself is very possible. In fact, there are several options for such gear. This article will look at one of them.
To make the supply you will need the following materials:
- Not a large piece of rubber hose.
- Sturdy wooden stick.
- Line, sinker and hooks.
- Knife and awl.
The manufacturing process is as follows:
- First of all, you need to take a piece of hose and pierce it with an awl closer to one of the ends so that you get two holes located one opposite the other.
- On the other hand, a piece of hose is simply cut.
- The fishing line is threaded through the holes so that a loop is formed, with which the hose will be attached to a wooden stick.
- The main fishing line on which the fish will be caught should also be threaded through these same holes. One end is fixed here on the hose, and the rest of the line is wound in the center of the hose.
- Not all of the fishing line is reeled in. A leash with a hook and swivel should be attached to the remaining fishing line.
- To prevent the line from unwinding on its own, it is fixed in the cut of the hose. During the bite, the line will easily pull out of the cut and begin to unwind from the tube, which is what is needed.
- A sliding sinker should be attached to the fishing line, weighing from 4 to 12 grams, depending on the strength of the current.
- The gear is ready, and all other operations with it are carried out while fishing. Here it is attached to a wooden stick and placed on a live bait hook.
During the manufacturing process, other approaches to the use of materials are possible. Alternatively, you can use different hooks and also experiment with the leash. You can install it, or you can do without it. There is a huge field for experimentation here. In this case, we take as an example a fairly simple structure that is installed from the shore.
There are designs that consist of a heavy weight and a float, which allows them to be installed from a boat. This makes it possible to fish in deeper places. After all, it’s especially difficult to cast gear from the shore.
In winter fishing conditions, the tackle is attached to a stick, which lies across the hole and is camouflaged with snow.
How to make a pike stand with your own hands?
Of course, this type of fishing gear is extremely easy to make and does not require any special parts or materials. It is impossible to buy it in stores. You can only do it yourself. On the other hand, there are a large number of different options for its manufacture. Let's present one of them here.
Required materials:
- A piece of rubber hose.
- Wooden stick.
- Line, hook, sinker.
- Awl and knife.
Now let's talk about the manufacturing process itself:
- First, we pierce the hose with an awl near its edge. We get two small holes located one opposite the other.
- We cut a piece of hose on the other side.
- We thread the fishing line through the holes so that a loop is formed. With its help, the delivery will be secured to the stick.
- We thread the fishing line through these same holes that will be used to catch fish. We fix one end in this place. We wind the rest of the fishing line around the middle part of the hose section.
- We leave the end free, to which we attach a leash with a hook and swivel.
- To prevent the line from unwinding, insert it into the slit in the hose.
- You need to put a sliding sinker on the fishing line. Its weight usually ranges from 4 to 12 grams.
- The delivery is ready. All that remains to do when fishing is to thread a stick through a piece of hose, tie a fastening loop to it and equip it with live bait.
Of course, variations are possible during manufacturing. You can use various hooks, you can use a metal leash or do without it at all. All these and similar issues are resolved according to the specific circumstances of fishing and the experience and tastes of the fisherman himself.
Here is an option that is installed on a stick that is stuck into the bottom of the reservoir. There are other options. The design is effective when this fishing tool is attached to a structure with a float and an anchor. This makes it possible to display them from the boat in deeper places. When fishing in winter, you can attach it to a stick, which is placed across the hole and covered with snow to camouflage it.
Summer bait for pike perch
A fishing summer bait for pike perch is shown in the adjacent photo.
I’ll immediately explain the purpose of the elements of fishing tackle.
Below the letter “H” is shown the shape of the end surfaces of the reel supplied by us for catching pike perch and pike perch.
The flattened, smoothed shape of the reel of the summer bait for pike perch allows the foam float to react to gusts of wind to a lesser extent.
The length of the reels in our homemade floats is approximately the same as in the magazine version of the supply, only we paint the side planes of the float.
In the middle of the float of the summer girder for pike perch, a groove about half a centimeter deep is sawed in a circle (with a round file), which serves for winding up a supply of fishing line (12-15 meters).
In a state charged with live bait, under the influence of wind or a slight current, the float of the floating girder from the side of the fishing line charged in the slot sinks slightly more than from the opposite end.
Therefore, when fishing for pike perch or pike, predatory fish will need very little effort to turn the reel over. After that, the summer girder is unwound from the float - the line is supplied, which is shown in Figure “5”.
The pike perch will not feel much resistance from the fishing line even when leaving with live bait in the mouth cavity from the sliding sinker of the fishing line somewhere to the side, since unwinding it from the reel of the fishing line, which has the shape of an ellipse in cross section, requires a very small torque.
Under the number “1” is shown a magazine version of a fishing rod float for pike perch. The round arrow shows the direction in which the fishing line is released from the reel of the reel when the pike perch with live bait moves away from the sliding sinker somewhere to the side.
Under the number “3”, a lilac line indicates the main fishing line thrown from the summer fishing line, which is inserted into the hole of the sliding sinker “4”.
On my pike perch baits, the main line is connected to the leash using a loop-to-loop knot. A knot tied to the main fishing line (0.3-0.35 mm in diameter) simultaneously limits the movement of the sliding load along the summer fishing line from below.
The number “6” denotes the braided cord of the supply leash with an end knot tied to it in the form of a loop. The thickness of the fishing braid on my girders for summer fishing for pike perch is 0.22-0.25 mm, the length of the leash with floats is 35-40 centimeters.
At the other end of the leash of the stand for catching pike perch, hook No. 8 or double No. 7 (according to Russian numbering) is tied.
The number “7” on the leash of the bait shows two round foam plastic floats with a diameter of 10-12 mm, which do not allow the live bait attached to the hook of the girder to press to the bottom. As a result, the fish is further visible to the approaching pike perch.
In addition, a pike perch can grab live bait raised above the bottom when it is in a resting state or in a dead state.
Zherlitsa - a stand for catching pike from the shore
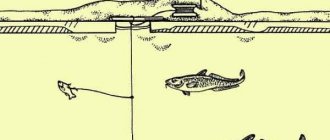
The simplest vertical summer rig for catching pike from the shore is shown in the picture.
Pike live bait tackle consists of a homemade forest spreader with a supply of fishing line with a diameter of 0.35-0.4 mm, wound on a rubber tube, a sinker sliding along the fishing line, a nichrome leash consisting of hinged links, a tee or double for attaching live bait to the bait.
Taking into account the vertical rigging, live bait for catching pike is placed behind the back with a puncture next to the first ray of the dorsal fin. Therefore, to install a stand from the bank on a river, you should find a place close to irregularities on the bottom and with minimal river flow.
A homemade nichrome flexible leash, consisting of movably fixed links, is shown in the photo. The same leashes are used on my winter pike fishing rods.
To install the girder, a long branch is cut, the pointed end of which is stuck into the soil near the edge of the bank.
As a forest clearer, you can use a piece of rubber hose with a diameter of 30-40 mm, a length of 60-80 mm with a slot on one of the edges of the tube that holds the fishing line.
To signal the pike's grip on live bait, a bell of any design, attached to the end of the hook of a cut branch, is suitable.
This is all the basics that I can share about catching pike with my summer baits. However, I can also add that the fishermen of our company begin to catch pike on supply closer to the end of August and as long as the autumn weather allows.
I offer a few more simple homemade gear designed for catching pike with live bait.