Breeding worms at home is possible not only for experts, but also for beginners. This activity is quite cost-effective, especially if you approach it responsibly and first analyze all the key points.
In general, to make your plan a reality, you do not need to prepare any special premises or have a large start-up capital, but rather purchase the necessary soil in advance and take maximum care to create the most favorable conditions for the reproduction of worms.
Types of worms, their benefits
There are many types of worms in nature, however, the following are suitable for breeding at home:
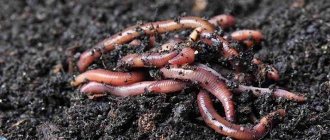
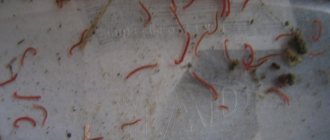
Rain, their bodies consist of a ring-shaped segment and have small bristles.
The main features of this type are:
- average length 12 – 29 centimeters;
- sliding body;
- dark color;
- average life expectancy 2.5 – 3.5 years;
- cylindrical shape.
Important: rain ones are considered the most unpretentious and are in greatest demand among buyers.
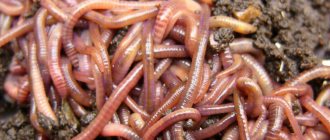
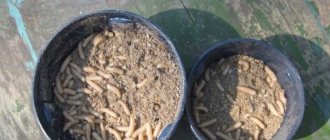
Californian, which are distinguished by their red color and short length.
Their features include:
- average length 6.5 – 8 centimeters;
- weight 0.8 – 1 gram;
- unpretentiousness;
- high fertility.
A prospector who is distinguished by high vitality and the presence of self-preservation instincts.
The primary features of this type include:
- avoiding low temperatures;
Note: if the soil becomes cold, it crawls as deep as possible or dies.
- average length 9 – 14 centimeters;
- high fertility.
Important: the prospector easily switches from one type of nutrition to another.
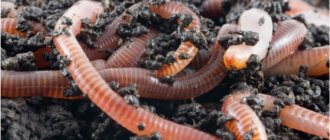
Many people are convinced that these individuals do not bring much benefit, but this is not true.
Thanks to them comes:
- Absorption of bacteria in soil.
- Saturation of soil with amino acids and biological substances.
- Increased productivity.
- Removing soil from rotting plants.
- Improving the quality of mail, in particular giving it more structure.
Important: it is also difficult to reduce soil acidity without them.
How to breed worms for sale
Breeding pets is a promising and inexpensive type of business activity. Investments are minimal, profitability is high. Individuals are in demand among fishing enthusiasts, summer residents, and farmers who specialize in preparing compost.
The optimal place to keep bait is cellars, sheds, garages. The technology and method of growing worms at home is simple, even a beginner can handle it.
Breeding worms at home can turn into a good business. The main distinguishing quality of such a business is a high level of profitability when compared with minimal investment of money.
Breeding worms for fishing in the countryside has many positive aspects:
- simple content technology;
- accessible equipment, the mastery of which does not imply the possession of special skills;
- increased demand for worms - the business will be in demand;
- You can sell not only animals, but also fertilizers - vermicompost and worm tea, which are unique compositions that effectively increase the yield of fruit crops, vegetables, and fruits.
The owner must create the most comfortable conditions conducive to the reproduction of the inhabitants. It is not necessary to be a professional in this field and know how to breed earthworms at home for fishing, but you should familiarize yourself with tips on caring for residents, replanting them, and feeding them.
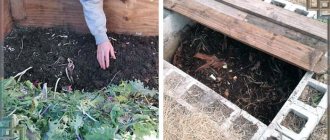
To successfully raise worms, a fisherman must prepare a special box, soil, planting material, and substrate in which the animals will reproduce and feed.
For housing, wooden or plastic boxes with a height of no more than 40 cm should be arranged. Drainage holes should be made in their bottom in advance. Depending on the species of animals, the soil is soil from molehills or garden soil.
Important! When placing soil in a container, you need to make sure that there is no ash in the composition. It makes the substrate acidic, which adversely affects the functioning of the body.
Royal larvae are purchased in special nurseries or obtained naturally. Dig out the required volume of soil and remove the worms.
Breeding worms at home for beginners
Anyone can install worm hutches at home. The main thing for this is:
- Carefully consider the place where the mini-farm will stand.
- Using suitable tools, make a worm hole.
- Study all the requirements for the soil, and what conditions need to be maintained for the development and active reproduction of these individuals.
- Populate them correctly.
- Regularly feed and monitor the quality of water that enters the soil.
You should also think about how and to whom they will be implemented in the future.
How to choose a place?
In order for individuals to take root and begin to actively reproduce, you should choose the location wisely.
They feel comfortable if their mini-farms or worm hutches are located:
- warm;
Important: a comfortable temperature is considered to be 20 – 27 degrees Celsius.
- in silence;
- without any vibrations;
- where there are no specific and pungent odors.
An important point: if a person puts mini-farms in a room where the temperature is more than 35 degrees, then all the individuals will die.
Types of worms
The most comfortable, simple and popular worm traps are:
- carton boxes;
- wooden boxes;
- boxes made of food-grade plastic;
- old refrigerators;
- special vermicomposters.
Regardless of the type, each worm must be:
- dry:
- clean;
- on average 40 – 90 centimeters in length and width;
Advice: if a person plans to populate rain, red and other individuals in large quantities, then it is best to take old refrigerators.
- durable;
- with constant access of oxygen.
Important: without ventilation, all worms will die.
How to breed worms in an apartment
Breeding worms at home for fishing is also possible in a city apartment. At first glance, this seems absurd and unsanitary, but there is an option to do this without harming living conditions. To raise creatures, enamel dishes are chosen, it can be a basin or a bucket. Worms also live well in an aquarium.
If we talk about a plastic or wooden container, then the worms will not live in it all winter. But, if we consider growing worms as a short-term measure, such a box can be taken. Now we need to start selecting land. Please note that the soil should not contain a lot of humus.
It is advisable that it not be there at all. Fallen leaves and tree roots rot under the influence of high temperatures. Humus, in turn, absorbs oxygen from the soil. If there is little oxygen, the worms will not be able to survive in such conditions. Carefully monitor the quality of the soil and choose the right food.
How to make a worm trap yourself?
To make your own worm cranks you will need:
- plastic boxes that are designed for transporting and storing vegetables (fruits);
Note: boxes are needed in quantities of 5 - 6 pieces and measuring 40 - 50 centimeters in length.
- drill;
- small wooden rods;
- sackcloth.
Manufacturing instructions:
- Take one box and use a drill to make holes on the sides.
Important: there is no need to drill the first drawer at the bottom.
- The remaining boxes are taken and small holes are drilled in each on the bottom side for ventilation.
- A single layer of rods is laid out at the bottom of each box.
- The top is covered with clean burlap.
Subsequently, prepared soil is poured on top of the laid burlap, the worms are moved into it, and the boxes are placed on top of each other.
Tip: it is recommended to cover the top drawer with a towel or light blanket to keep warm at all times.
Conditions for breeding worms: soil, temperature
No species of individuals will be able to take root if optimal conditions are not created for them.
For settlement it is important that the soil:
- It was wet.
Note: the ideal soil moisture for breeding and reproduction of each type of worm is 70%.
Advice: if a person finds it difficult to answer what moisture content the soil has, then you can test the mail yourself. To do this, it is recommended to take a handful of earth in your hand and squeeze it tightly. If a couple of drops of water are observed, the soil is sufficiently moist and suitable for use.
- Quite loose.
- Not sour.
It is noted that the best soil is taken next to a reservoir. In situations where the soil is highly acidic, it is recommended to add crushed chalk or sawdust.
In addition, the most important condition is maintaining a certain temperature. It is normal for the worms to stand at 19 – 28 degrees Celsius.
An important point: if the temperature in the room is below 18 degrees Celsius, this will lead to a decrease in the fertility of individuals by 5 to 7 times, and sub-zero temperatures and heat of more than 29 degrees will lead to their death.
In addition to optimal temperatures and suitable soil for cultivation, it is necessary to:
- lighting was in the range of 50 - 60 W;
- regular ventilation;
- absence of drafts and sudden temperature changes;
- complete isolation from pests, in particular rats;
Note: Rats and other rodents actively eat worms, especially earthworms.
- the water supplied to them did not contain chlorine or other chemical impurities.
An interesting point: it was noted that if the soil is moistened with rainwater, the fertility of the worms increases by 1.5 - 2 times.
How to check in?
Settling is allowed only 1.5 - 2 days after the soil has been prepared.
In general, this process goes through the following stages:
- Holes 3-4 centimeters deep are made manually in the soil.
If the box is 40-50 centimeters long, then it is enough to make 6-7 indentations.
- Rain, red and other species are taken, and then carefully moved into the prepared holes.
You need to move it gradually, first into one recess and then into another.
- The top of each hole is lightly sprinkled with earth.
- The box is covered with a blanket or lid, which provides the necessary air circulation.
An important point: you can feed only two days after successful settlement.
What to feed the worms?
When two days have passed since settlement, the individuals should be fed.
In general, they are unpretentious and are excellent food for them:
- White cabbage.
- Potato peel.
- Black bread.
- Straw.
- Banana peels.
- Rotting plant leaves.
The main thing to remember is that they are contraindicated for food:
- lemons, tangerines, oranges and other citrus fruits, including their peels;
- all types of meat;
- fish;
- canned food;
- sweets;
- eggs.
Note: It is also prohibited to feed these individuals with manure.
All food that will be used as feed should be:
- crushed;
- not cold;
- slightly damp.
Feeding needs to be done every 3-4 days, and the crushed food is laid out in an even layer on top of the soil.
An interesting point: they get used to any new food within 10–14 days.
Feeding earthworms
When preparing food, it is recommended to organize a compost pit in which food waste is placed. What to feed earthworms at home:
- leftovers;
- peels from fruits and vegetables;
- bread crumb and crust;
- tea bags;
- foliage, grass.
What not to use in bait:
- fertilizer;
- meat products;
- cat and dog droppings;
- garlic, onion peel;
- zest and pulp of oranges, lemons;
- dairy products;
- fish delicacies.
How to feed worms at home - the accumulated residues are distributed over the soil in a layer of 10 cm. Feeding should be done once a week. An easy way to check if they have enough food is to place some soft paper or newspaper on top and spray water on it with a spray bottle. If the worms begin to eat the leaves, this indicates that the food has run out and a new portion needs to be added.
The owner will not have a question about what to feed earthworms at home for fishing. Animals are not picky when it comes to food, but properly managed waste will accelerate the release of substances that activate the production of vermicompost. The preferred food for earth dwellers is grass or rotting remains. Stale bakery products and waste after washing from packages of kefir and fermented baked milk will help increase vital activity.
Important! A fresh portion of the mixture is added only after the individuals have eaten the food.
To whom and how to sell worms?
Breeding worms is a low-cost, but at the same time quite profitable business.
You can sell them, and in fairly large quantities:
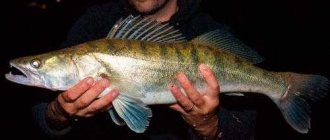
- To fishing stores.
Due to the high life expectancy of these individuals, their unpretentiousness, and most importantly, the enormous demand for them among fishermen, specialized stores actively purchase worms for subsequent resale.
- Farmers. Since worms help improve soil quality and, as a result, help increase productivity, no farm can do without them.
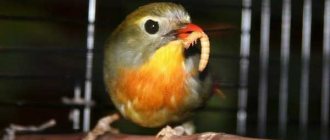
- To pet stores. Many birds and fish prefer these individuals as food.
In addition, you can sell them to your friends and neighbors, especially those who are interested in fishing or have vegetable gardens, as well as fish farms.
An interesting point: according to statistics, the demand for worms has increased by 18% over the past two years.
They can be implemented in three ways:
- Whole worms.
- Worm tea, which is stored in clean plastic bottles.
- Vermicompost.
To make it you need:
- chop the worms with a knife;
- dry;
- mix with a little mail.
Vermicompost is stored in plastic containers and at temperatures from – 10 to + 20 degrees. Small plastic containers or plastic bags are excellent for packaging of any type. The main thing is that they constantly receive oxygen and have a sufficient amount of soil.
Do-it-yourself dacha
Did you know that such an unusual activity as breeding worms can become a very profitable business for you? It turns out that worms are very useful creatures! Not only do their life processes produce a very useful and indispensable fertilizer for agriculture, which is called vermicompost, or, more understandably, vermicompost, but the worms themselves are a very popular product! Are you surprised? Well, remember who really loves worms and is great at catching them? Of course, fish, which a person eats to replenish the body with such a useful substance as phosphorus. Therefore, by starting to breed these useful creatures, you will always have regular customers interested in making your business flourish!
In order for your business to truly flourish, you need to create a mini-farm for these beneficial worm-like creatures. Properly manufacturing a vermicomposter will help you with this, in which your worms will “live” and produce “waste products” that are so necessary for your business.
If you have decided to start this business, keep in mind that to start you will need no less than $100! It is for this amount that you can buy your first ever box of... worms, which can later bring you, if not millions, then thousands of dollars for sure!
We make a vermicomposter for breeding worms with our own hands
• First of all, you need to purchase containers where your worms will be “housed”. Plastic boxes sold in stores labeled “for meat” are perfect for this purpose.
• The next stage is making a lot of holes in the new, smooth, solid plastic trays! It is better to drill holes with a drill with a diameter of 5 mm, so as not to damage the tray, since plastic is a fragile material and can easily crack under pressure. But in order to know where and what to drill, you must first, using a marker and ruler, mark with dots the places to be drilled. The ideal option is when the holes are at a uniform distance from each other of 25 mm. Using a regular awl, lightly “punch” the marks, thanks to this the drill will lie exactly in the right place and will not slip to the side. Having received a container with a holey bottom, we move on to the next stage.
• We move on to the proper preparation of the lowest tray, intended for collecting a very powerful fertilizer called “vermichay”. To do this, take another plastic box, the same size as the previous ones, only in it we will not drill many holes, but only one! The hole should be at the bottom of the plastic container, right next to the sides (as shown in the picture), into which we will insert a ½ inch ball valve.
Prepare in advance a faucet of a suitable size, as well as a steel washer and a secondary plastic gasket to seal the connection. We carefully drill out the hole with a drill, then for this purpose we use a cutter and layer by layer we expand the hole to the desired size. In order not to overdrill the hole, try on the faucet; it should fit tightly through the hole. Having achieved the desired result, install the faucet into the plastic tray.
The trays are prepared, let's move on to making stands for the trays with our own hands
• We will need a “furniture board” with a thickness of 1.8 cm and dimensions of 125x40.5 cm. We need to cut this board into two equal halves. It is best to use a jigsaw - the work will go faster and more accurately! After this, mark on one of the resulting boards, using a marker and a compass (compasses can be replaced by saucers, plates, etc.) a semicircle, which will also need to be carefully cut out (see picture)! It is better to round the corners and sand them thoroughly.
• Our structure must stand, therefore, armed with a shovel handle (so as not to think for a long time and not look for suitable material) and a hacksaw, we saw off four bars of 25 cm each.
These bars will serve as the legs of your homemade vermicomposter. On each “leg” we mark the center with a marker, and use an awl to “punch” the hole. After this, we take a drill with a 4 mm drill in our hands and carefully, without unnecessary movements, so that the block does not split, we drill a hole for the fixing screw.
• Now it's time to put the structure together. To do this, evenly, near each corner of the resulting boards, using the same marker, we mark the places where the legs of the future vermicomposter will be attached. Insert a 5 mm drill bit into the drill and drill a hole for the fixing screw.
We screw the legs into our vermicomposter
• Our vermicomposter is “ALMOST” ready! It remains to take care of proper ventilation for our structure. “Proper” ventilation implies a system of ventilation holes in which the substrate will be sufficiently moist and will not be subjected to excessive ventilation, which will result in the substrate drying out and the death of everyone in it. As they say - the golden mean! So, back to our holey plastic containers. We take strong “gray” tape (designed for sealing ventilation connections) and carefully seal the holes at the top of the drawers. All except one on each end side - we will prudently cover them with a mosquito net so that no insects disturb the quiet, peaceful life of the future “tenants”. To make the mesh fit more tightly, the side of the containers should be lightly treated with a “hedgehog”, this is a kind of attachment for a drill. After this, the mesh, placed on the glue, will literally grow to the container.
• We install the stand, stack the boxes on it one on top of the other - the vermicomposter is ready and waiting to be used!
• In order for the “tenants” of your structure to live cozy and comfortable, try to get a non-woven fabric, which you should use to line the bottom of the perforated containers and the top of the entire contents of the boxes. So, we cover the bottom of the “holey” container with a non-woven fabric, fill the purchased substrate with worms, add a nutrient medium for the worms (leaves, sawdust, paper) on top and again carefully cover everything with a non-woven fabric. It is advisable to cover the top drawer with a lid; the lid can be bought at a hardware store, or you can make it yourself from ordinary plywood.
After placing live goods in a self-made vermicomposter, do not forget to monitor indicators in the room where the unit is installed, such as temperature and humidity. The temperature should be between 15-25 degrees Celsius, and humidity 75-85%. These are precisely the optimal conditions under which worms quickly reproduce and carry out normal life activities.
We made a vermicomposter, raised worms - what to do with them now?
Breeding worms at home is a profitable business, but no less troublesome! Demand for worms and the fertilizer they produce starts in early spring and ends in fall (and that's just in agriculture)! What to do with them all winter? Where to put this constantly multiplying, swarming mess?
There is also a way out and it’s quite profitable! It would be more accurate to say that there are several ways out! One of them is to sell worms to fishermen - the fish love them very much and, oddly enough, in winter they also want to eat well! The second option would be to supply worms to pet stores as a complete and environmentally friendly food for fish, birds, and all lovers of natural meat. So don’t worry - if there was material, but where to put it - there will always be a way out!
By the way, when buying worms, know that the fertilizer produced by Californian worms is in greatest demand in agriculture! But it is better to feed the fish with fast-reproducing worms, which are called prospectors!
Watch the video: Homemade vermicomposter. Sergey Korobka
It’s a simple matter, but it requires attention and care! In the process of breeding worms, you will learn many different tricks and wisdom that will help you grow high-quality goods and increase your capital many times over! By learning something new, new opportunities open up for us!
We recommend reading:
- What you need to know about fertilizers - compost pit
- How to understand landscape design
- Types of stoves for home and garden
- Frame panel houses - choose a contractor
- What natural plant protection products can you make?
- Stove with boiler
Pros and cons of worm farming
The occupation of settling, and subsequently creating optimal conditions for the reproduction of rain, red and other species, is a rather simple matter, characterized by a number of positive aspects:
- Profitability.
- In great demand, especially in regions where there are many fishing bases, farmlands and pet stores.
- Low financial costs for preparing for their breeding.
- The unpretentiousness of these individuals.
- Their high ability to reproduce.
- The absence of any additional financial investment after the worms are installed.
The only costs are for food and, if necessary, fertilizing the soil.
However, such breeding has some negative aspects:
- Chances are that demand will not be as high as expected.
An important point: low demand may be associated with the breeding of these individuals in regions where there are a small number of farms and an almost complete absence of fishing bases.
- High competition. Since breeding does not require large financial expenditures, in many regions a large number of people are engaged in this. Consequently, in the future, worms will be difficult to implement due to the large number of proposals.
- Psychological barrier.
Many people are afraid of worms, and it is important to understand that breeding them should only be done if a person does not feel disgust or fear of them.
Profitability calculation
According to estimates, a person gets 9,500 - 10,200 worms from one cubic meter of soil in one year. On average, the price per unit is within 1.5 - 2.5 rubles. Thus, if the average price of 2 rubles is multiplied by 10,000, then it turns out that a person can get 20,000 rubles from the sale of 1 cubic meter.
Important: due to low costs, this figure is quite high.
Reviews
My wife and I have been breeding worms for 4 years now. We make worm chutes ourselves and place them in the basement of our house. There are no problems with sales; fishing bases willingly buy everything, and at a high price. Grade:
Nikolay, 45 years old, Podolsk
There are no difficulties with this matter. The main thing is to make the boxes correctly and prepare the mail. They multiply quickly, and you don’t have to look for buyers for long. Grade:
Vladimir, 59 years old, Volgograd
Last summer I made a worm hut, covered it with soil and moved the miners there. However, most of them died, and the rest did not reproduce well. This may be due to temperature changes and very dry soil. Grade:
Mikhail, 44, Vologda
I have been breeding the rain variety for 3.5 years. I deliver to the same fishing stores and have a stable income. Grade:
Alexander, 39 years old, Ulyanovsk
I breed prospectors at home for myself and my neighbors. They actively buy them for their greenhouses and for fishing. For me, this is a hobby that brings in a small income. Grade:
Peter, 59 years old, Tver
Breeding worms at home is not difficult and even beginners can do it. The main thing is to create optimal conditions, make the worm hutch correctly, and then find regular customers.
Blitz tips:
- It is worth remembering that low and high temperatures are detrimental to these individuals;
- it is better to study the demand in a particular region in advance, and then start breeding them;
- It is important to understand that if a person has a panicky fear of them or a feeling of disgust, then such an activity should be abandoned.
How to Grow a Dung Worm for Fishing
Dung worms are another favorite delicacy for fish. You won’t find such worms directly in the ground; they need to be dug up in a pile of animal manure or compressed and wet leaves. In appearance, dung worms are similar to red worms. The difference lies in the conditions of detention and the unpleasant odor that the yellow liquid emits. It appears when a worm is placed on a hook.
Breeding worms at home for fishing is possible in a special worm bin, also called a cultivator. To create it you need 500 worms, if the size of the structure does not exceed a square meter. Next, special soil is prepared, it should include sawdust, straw, hay, manure, and soil.
The greater the pressure in the soil, the more comfortable it is for worms to live. Their habitat should be moist all the time, but without an excess of water.