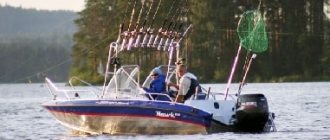
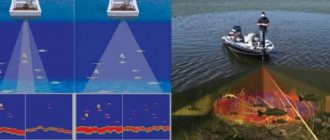
Home page ✦ Echo sounders ✦ Setting up an echo sounder As my practice shows, most fishermen use it this way: turn it on while on the water and simply turn it off after fishing. All! Of course, you can also use it this way, but it didn’t hurt to read the instructions for the device at least once. I assure you that you will learn a lot of interesting things about your echo sounder, and even more so about your chartplotter. After the first switch-on, at least in an elementary way, you need to adjust the “language”, “sensitivity”, and switch to the “metric” system. It is highly advisable to increase the “pulse frequency” to the maximum and slightly increase the “screen scrolling speed”. The rest that is not clear should be set to “Auto” or as set by default. But still, even with such simplicity, several important, elementary rules must be followed. Take the time to study the operation of the device on the ground. The device may have errors. This applies to the determined density of the soil and the presence of objects that can be mistaken for fish. Therefore, it is advisable to analyze the image on the monitor, including by adjusting the sensitivity of the sensor. Do not forget that the device constantly displays a dynamic picture on the screen, the earliest results of its operation are shown on the left of the screen, and the latest data are shown on the right. Even when parked, the device works. And always remember - if a horizontal line is constantly reflected on the screen, it means a constant depth, and not at all that there is a flat bottom below you.
⛵ Adjust the sensitivity and depth scale
The main factor ensuring an accurate determination of the size of a fish by an echo sounder is its correctly selected sensitivity and set depth range. In general, the larger the fish, the stronger the echo signal from it and the larger the signal mark on the screen. The echo sounder settings are very important here, because excessively increasing the sensitivity can make a half-kilogram perch appear on the screen as a three-kilogram whitefish. On the other hand, reducing the sensitivity too much can cause the whitefish to look like a 300g roach on the screen. Switching the depth range from 0−10 meters to the range from 0 to 20 meters reduces the fish mark on the screen by almost half. So, firstly, you need to manually set the range of viewing depths so that you can see the bottom of the lake near the bottom edge of the screen at the deepest point to which you plan to fish. Then we raise the sensitivity to such an extent that dots randomly appear and disappear all over the screen, and then reduce the sensitivity so much that these random dots simply stop appearing on the screen. You should note the sensitivity setting found, and try to repeat it in all other cases at the same depth of the reservoir.