Very often, fishermen prefer to use homemade floats; much less often they use store-bought ones. Most likely this is due to the love of fishermen for making their own gear. It’s very easy to make a float with your own hands; you just need to have a basic knowledge and the necessary materials, and a little imagination.
Coating the float with paint is possible based on everyone’s personal preferences. Let's take a closer look at the materials suitable for manufacturing, help you decide on the shape of the float and understand its manufacture.
How to make a float with your own hands
The float is considered one of the main elements of any equipment, and its advantage lies in the ease of manufacture from improvised materials at home. True, if you make a float with your own hands for the first time, its appearance will be somewhat different from what you want, so training and unsuccessful experiments cannot be avoided.
But after you gain some experience in this matter, making a float will be quite simple, and even purchased gear will be envious of its appearance and shape. The advantage of homemade floats is the ability to independently select the shape, material and other parameters. After all, it is not always possible to find the desired tackle in the store.
Most likely, many of the readers have already done this, but if you visited the pages of our site, then problems with achieving the ideal shape and parameters could not be avoided. The most common mistakes are incorrect calculations, choice of shape and material for making the float.
Choice of material and configuration
In order to make a float, you can use any materials, the main thing is that they are easy to process and have positive buoyancy. The most popular are:
- waterfowl feathers;
- plastic tube;
- cork material;
- tree;
- Styrofoam.
The choice of material depends on the type of fish you plan to fish for. It is also very important to determine in advance the speed of the current in the reservoir. Making a float for fishing in a current with your own hands is somewhat more difficult than for fishing in a body of still water.
This is due to different buoyancy indicators for a certain material. In simple terms, the sensitivity of the float will change depending on the material used.
. For example, to catch cautious fish such as crucian carp or roach, it is better to use floats made of a plastic tube or goose feather.
And for fishing for fish that have quite powerful bites (carp, perch, bream), it is better to use materials with greater buoyancy, such as cork material or wood. Therefore, before you start making a float, you need to know exactly what kind of fish you are going to catch and in what conditions the fishing will take place.
Float antenna
Photo by Anatoly Mailkov
The warmest days of summer have arrived, which are traditionally characterized as the time of no bites. Let me clarify: those who fish at random, out of habit, use insufficiently sensitive gear and equipment, have no bite. Today I am returning again to the issue of the sensitivity of floats, and specifically to their antennas.
It should be clarified that by functional antenna I mean the entire part of the float protruding above the water. A structural antenna is a continuation of the float body in the form of a thinner rod made of different materials. This rod may have additional elements in the form of thickenings or balls. In most cases, the structural antenna coincides with the functional one - and at the same time they say that the float is loaded “correctly”. In fact, the latter can only be stated from the point of view of the designers of this float, created for specific fishing conditions, equipment and loading.
Depending on the fishing conditions, which very often do not coincide with the assumptions of the designers, the correct functional enclosure does not coincide with the correct structural one. This is expressed in the fact that, due to fishing conditions, the float has to be underloaded, that is, in addition to the structural antenna, there is also part of the float’s body above the water. Or, conversely, it is often necessary to overload the float so that only part of the structural antenna “sticks out” from the water. Strictly speaking, if you have to overload or underload the float according to fishing conditions, this indicates that the float in this case was not chosen entirely correctly.
There is no need to try to make the float universal and indispensable, no matter how loved and “tested” it may be. It’s probably still worth taking advantage of the experience of other fishermen and choosing a float that would work effectively under the given conditions if properly surrounded, that is, under a structural antenna.
For those who want to learn how to fish on the most uncool days, I suggest you figure out what the point is. Placing the float under the antenna in itself only serves the purpose of achieving the desired sensitivity of the entire equipment. Here we can see a direct relationship between the thickness and carrying capacity of the antenna and the weight of the bait. As an example, I suggest anyone who wants to take three floats with different antennas in terms of carrying capacity (or, perhaps, it would be easier to say, in terms of buoyancy) and use different baits on the hook.
In the case of bloodworms or maggots, which have practically zero buoyancy, the difference in the size of the float depending on the size of the bait will be almost invisible. The difference is clearly visible if you put canned corn on a hook. If you place one, two and three grains in succession on a hook, then a float with a thin “sports” antenna will simply sink, and in the case of a thick antenna, which serves as a continuation of the body of a balsa wood or foam float, the difference will be obvious only in the case of three - four grains of corn. One could conclude that the heavier the bait, the thicker the antenna is needed. The conclusion is incorrect for cases of catching cautious and well-fed fish.
For example, when I catch carp from the bottom with a plug or a fly rod, provided that the weather is calm and the depth is shallow, I use floats with a thin and fairly long antenna. Setting the descent using a depth gauge gives an error of several centimeters due to the soft silt. After setting the primary release, I bait the corn, and if the float starts to sink, I add a release until the bait is on the bottom. Very accurate and convenient. The sensitivity of such equipment is so high that you have to restrain yourself and not hook at the slightest movement of the float. In calm stranded weather, this setting is unsurpassed in efficiency. If there is a wave, then one bait for anchoring the equipment will not be enough, and I put the main sliding sinker on the bottom. Tungsten alloy olives proved to be very convenient here. The olive is selected so that, in addition to it, there is only one small sub-graft in the load, which also serves as the lower stopper of the olive. That is, the loading is reduced to one point. When biting, the bait provides minimal resistance.
If you go the traditional route or when the waves become such that it will be difficult to observe a thin antenna, then the angler chooses a float with a thick antenna. The most important thing here is that almost always the choice is an overly thick antenna. Due to the high buoyancy of the antenna, sensitivity to bites drops so much that the float equipment begins to give way to well-built bottom equipment. At the same time, you need to keep in mind that the closer the equipment is located to the shore, the more careful the bites are, and as a result, a situation is created when you catch with bottom gear, but not with float gear.
Another case, now on the move. Almost always, especially if the current is strong enough, the more you can slow down the passage of the equipment, the greater the likelihood of a confident bite. A strong current is very rarely “even”, and in order to prevent the float from being pulled under water during free swimming, designs with a floating and thick antenna are usually chosen. This is especially justified when the depth is shallow. In such cases, I even use ball floats without keels and antennas. But this is good when the rig is allowed to float freely.
But the fish doesn’t take the swim, and you need to hold or delay, and then the float “climbs out” of the water. The actual sensitivity of the equipment to bites does not change, but it becomes very difficult to observe careful bites on a float with a thick antenna and an equally thick part of the body emerging from the water. If the antenna is thin, then you can choose a design in which the upper part of the float body is quite thin. For example, the upper body is comparable or even thinner in thickness than the thick antenna on another float. Observing bites becomes incomparably easier. When I fish with a technique with a constant delay of the rig, and not necessarily with a plug, then I obviously overload the float with a thin antenna, and the number of unnoticed bites is reduced to nothing.
What's the point of all this conversation? And to the fact that many fishermen are left without a decent catch in a good place, with good and well-used bait and with good tackle, only because they do not see bites. And the reason for this is the clearly visible antenna. If we leave aside the classic case of bream “laying out” a long float, then in all cases we should strive to use floats with antennas with minimal diameter and carrying capacity. But I myself notice this in myself, so there is no need to go to extremes. The antenna needed is the one that is needed in the given conditions. This applies not only to diameter and length. By the way, about the length. An antenna that is too long makes sense only in absolute calm and if you don’t get tired of the constant tangles of the fishing line behind the antenna in the case of a float with two attachment points. I emphasize - with two points.
The color of the antenna is important. Everything is simple here. If the background of the water is dark, then the antenna is bright yellow. If the sun shines in your eyes, then the antenna is black. Orange coloring is the most universal, but with it the careful submergence of the float is often not visible when roach or crucian carp try the bait. A good solution is to use replaceable antennas and use waterproof felt-tip pens. The worst coloration, from the point of view of observing cautious bites, is striped antennae. The stripes blur, merge, and observing small movements results in severe eye strain. The only advantage of floats with striped, long and thick antennas is good sales. But this “advantage” is melting away before our eyes, as evidenced by the sales statistics of large wholesale companies. There is one exception - the herabuna with striped but thin antennae, but this is a separate topic. I am not in favor of abandoning classic designs, but in favor of selecting a float not only by appearance, but also by fishing conditions. That is, treat the usual gear creatively and make the necessary adjustments.
Andrey Yanshevsky July 27, 2021 at 04:04
From the pen
You can make a goose feather float with your own hands very light and close in shape to the ideal, which is why it is considered one of the most sensitive and best. Its sensitivity allows you to see the most precise touch of a fish.
For many novice fishermen, the use of such a float marks the beginning of a fishing career; with subsequent experience, it is replaced with more modern models. Just a couple of years ago, besides making a float with your own hands from a goose feather, it was not possible to use other equipment.
Making such a float yourself is very simple, you just need to clean the feather from the fluff and it is almost ready. If necessary, you can shorten the feather itself a little with a blade, this is also quite simple. The only thing you need to remember is to carefully clean off excess fluff so as not to break the seal of the pen.
, it is best to use a lighter or blade for this. Then clean the burnt feathers using very fine sandpaper to bring the feather into perfect shape.
All that remains is to attach the sensitive goose feather float to the main fishing line with your own hands. It is best to secure it with two pieces of nipple, about 4 millimeters wide. The nipple is very easy to put on the feather, the main thing is not to forget to thread it onto the main line. But this mount is not ideal - it has several negative features. The nipple quickly burns out in the sun and will not last more than one year. But the simplicity and accessibility of such fasteners significantly covers its disadvantage.
When fishing in cloudy weather, it will be quite difficult to see an unpainted float made of such material, since the white color (namely, this is the color of a goose feather) is very difficult to see. It is best to paint such a float with your own hands so that it is easier to see it from a long distance and without particularly straining your eyes. The most common means of coloring is nail polish; every fisherman's wife, girlfriend, daughter or mother has it. Do not paint the entire length of the float; it is better to paint only the part that will look out of the water.
As practice shows, this is the best option for saving time. You will spend only a few minutes making it, and you will be satisfied with the quality throughout the entire fishing season, and maybe for many years.
I often notice such floats on the shelves of fishing stores, which means that they are really in demand.
Video
I think it’s better to watch a video about making such a float once and just repeat all the actions of the presenter. This way you will get excellent tackle that is suitable for catching cautious fish, such as crucian carp.
Required materials and tools
We will need balsa. It can be purchased at aircraft modeling and shipbuilding stores. This material is very light and durable and can be processed well. Balsa is sold in slats and bars:
The main thing is to choose a bar with the same density along its entire length. The optimal density of balsa for floats is 0.1 – 0.12 g/cm. cube We also need steel wire with a diameter of 0.5-0.7 mm and carbon fiber rods 1 mm thick and 1 meter long.
To process the balsa we will use enamel or yacht varnish, light spirit and Moment glue. To make pass rings we need wire with a diameter of 0.2 mm. To paint the float we will need acrylic paints. They are sold in the store for creative activities.
It is better to process balsa using a DC motor DPR 52 drill:
If there is a more powerful motor, 150-200 W, then it is better to use it. If you don’t have one, you can use an electric drill with drills. We will also need sandpaper of different sizes, a sharp knife, pliers with wire cutters and drills with a diameter of 0.3 to 1 mm.
From a plastic tube
To make a float, a tube made of juice, a balloon, a flag or cotton candy can be suitable. Finding it is not difficult. This float is similar to the one described above, only the tube requires a little more modification before use. Its only difference from floats made from waterfowl feathers is its appearance and strength.
The main problem that fishermen face when they want to make such a float with their own hands is making the tube absolutely tight. But there’s nothing complicated about it, just heat the open edges of the tube with a lighter and seal the holes.
It is best to use a soldering iron to avoid leaving burns on your fingers. After all, an open fire is always an increased fire hazard. With a little experience, you will be able to seal the edges of the tube perfectly evenly.
Some fishermen prefer to fill the tube with liquid silicone or plug the holes with it. But such actions require silicone, which not everyone has, and additional time for it to cool. Transparent silicone is best suited for such purposes.
As soon as you make the tube airtight, consider that the float is ready, all that remains is to secure it to the main fishing line. If the color of the tube does not suit you, then again nail polish can come to the rescue. The homemade float is attached in the same way as the first option - on the nipple.
Video
It's worth spending 5 minutes of your time to watch a video on how to make a straw float in a matter of minutes. The tube from the flag was chosen as the main material. Just watch and repeat the actions after the leader.
How to increase your fish catch?
Over 7 years of active fishing, I have found dozens of ways to improve the bite. Here are the most effective ones:
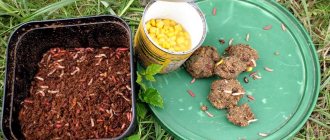
- Bite activator. This pheromone additive attracts fish most strongly in cold and warm water. Discussion of the bite activator “Hungry Fish”.
- Increased gear sensitivity. Read the appropriate manuals for your specific type of gear.
- Pheromone-based lures.
Bombards are also:
- Universal.
- Floating.
The disadvantage of the above gear is the response to bad weather. On a windy day they will be blown away, but this disadvantage can be corrected if the fisherman uses bait made of animal origin.
In addition, they are:
- sinking, such devices are used in bad weather and for fishing at great depths; they can be used for smooth fishing;
- neutral, which allow you to keep the bait at the required distance.
Many people cannot afford to purchase a bombard in a specialized store due to the high price of this equipment. In this case, the best option would be to make your own gear. This process is simple and does not require rare materials.
Today I will talk about a very unique way of fishing with a spinning rod and a float. For many, this will still seem wild, but in fact, there is nothing strange about it. After all, we will not be using an ordinary float, but it will be Bombarda or Sbirulino. This kind of fishing really expands the capabilities of the spinning angler! But first things first.
Can you throw a bait weighing up to 2-3g over a distance of 50-60m or more with your standard spinning rod? I don’t think so... But the method described above allows you to do this. At the same time, fishing with a bombard makes it possible to move the bait at a very slow speed and in any water horizon, including along the surface itself.
— At the end of the main line of the spinning rod there is a bombard, and closer to the fisherman, at 2-3 m, there are several leashes with baits.
— The bombard is attached to the end of the main line, and then, behind it, a leash 1.5-3 m long, with bait.
— A combined method, when leashes with bait are available both above and below the Sbirulino float.
First, briefly about the fishing technique, and then I will analyze in detail the elements of the equipment, including the Bombarda itself. The spinner has a heavy Sbirulino float at the end of the spinning rod, 2-3 streamers, flies, a twister, mini-spinners or just hooks with the same worm attachment are installed on the leashes... There are a lot of options!
It also happens: Tackle for jerk fishing
We make a long cast and lead the tackle, with long pauses, twitches, and play along. You can carry such equipment along the surface itself, literally bouncing flies on the surface of the water, if the Bombarda is floating. In half the water, if Sbirulino is neutrally buoyant. And closer to the bottom, if the Bombarda is sinking quickly or is additionally loaded with lead.
It is clear that we are using very small, elegant spinning and fly baits on thin leashes, far from the shore; the float is not close (at 2-2.5m, on a leash). The fish are biting! And how! And all kinds of fish! I think it’s now clear why fishing on Sbirulino is a very interesting and promising method of fishing, opening up new horizons and opportunities for the spinning angler.
Now about the Bombarda tackle in more detail!
The rod used for fishing with Bombarda is very special. The form is 3-4m long. Typically this will be a telescope. But if I can find a suitable plug, at least in 3m, I would take it. The rod has a medium action, or even a slow, semi-parabolic action. The tip of the rod for fishing with Sbirulino is even softer - it is very sensitive even to mild bites from small white fish.
The rod has an increased number of guide rings to ensure greater sensitivity of the tackle when retrieving. A regular spinning rod can also be used, but a longer rod with a medium or slow action is much more convenient. A long rod allows you to make longer casts of the Bombarda. It is also known that the longer the spinning rod, the more clearly you can control the wiring of the tackle. In this method of fishing with a Sbirulino float, this is extremely important.
The reel for such fishing with Bombarda is simply a good, inertia-free, spinning reel. Coil size 2000-2500.
The main line is either fluorocarbon with a diameter of 0.18-0.25mm, or thin braid. The somewhat weak fishing line is fully compensated by the finely tuned drag and high flexibility of the rod (the action is slow for good reason...). So there are chances in the fight against a large predator.
The Bombarda itself can have different weights, from 7g to 25g or more. I prefer medium bombards, weighing 10-15g. I have already said that there are Sbirulinos with different degrees of buoyancy: floating, suspended, slowly sinking, quickly sinking. As for the coloring of the bombards. We have no interest in a fish seeing our bombarda and getting scared... The opposite option is also possible, when the predator is not afraid, but attacks the bombarda, mistaking it for a living, moving object.
We don’t need this either, since there is no tee on the float... So, in 70-80% of cases it makes more sense to use Sbirulino made of transparent plastic. However, there are situations when it is important for us to control the position of our gear on the surface of the water. And here, you have to use Sbirulino with a bright, variegated color.
It is clear that this only applies to floating Bombards. It is better to take all sinking bombards transparent. I used good Sbirulino from Cormoran and DAM. The latter, specifically variegated, are for surface fishing with Sbirulino. You can make Bombarda floats with your own hands. But this is a topic for a separate post. He will!
Particular attention should be paid to the swivels for Sbirulino. Since the equipment can rotate strongly during wiring and there is a risk of the line twisting, triple and even quadruple swivels of different designs are used.
The leash is long; after the bombard, it is made of thinner fluorocarbon or transparent, reliable monofilament. Lures can be tied directly to it or on separate, short leashes of their own. Short leashes help diversify the game of baits. But, at the same time, the risk of entanglements and entanglements increases when casting gear with a Bombarda.
Lures for fishing with Sbirulino are very different: mini spinners No. 00-0; miniature wobblers, up to 4cm; micro-twisters ½-1 inch; flies; streamers; hooks for various baits (flies, worms, grasshoppers, etc.).
This is such an interesting tackle with Bombarda. You can catch many different species of our fish with it. At the surface these are: rudd, chub, asp, kettle perch, pike. In deeper layers, in addition to the above-mentioned fish, you can count on catching almost any white fish: bream, roach, etc., as well as catching pike perch, large pike, carp...
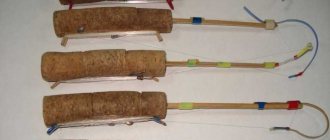
Valery Fedorov from Ukraine shares another secret with us. This time we will talk about equipment for a marker rod. In addition, such a setup can also be used for regular bottom exploration using a weight. Having such equipment at hand, it will be possible to study the bottom more thoroughly, and therefore fish in more promising places.
Source materials:
- passage ring on one leg with an internal diameter of 5-6 mm with a Sic insert;
- steel leash for a predator (preferably twisted in the form of a cable);
- carbine;
- swivel;
- bottle cap;
- heat shrink tubing (optional).
Carefully unbend the leg of the ring and connect it to the leash. We put a heat shrink tube over the connection and shrink it. Cut the cork lengthwise to the center. We insert the resulting connection into the cork and tighten the cork tightly with a nylon cord. We put a carabiner on the opposite end of the leash. The universal marker equipment is ready.
After attaching a weight, you can use it to tap the bottom. By passing the fishing line through the ring and attaching a marker float to it, you can use it as a marker. The stopper near the ring is needed so that the passage ring does not fall to the bottom. This will eliminate the possibility of the float becoming entangled in algae.
Valery Fedorov. Kyiv.
Stuart Conroy England Team Member, Multiple World Champion
Milo Colombo The most famous Italian angler, World Champion in team and inter-club championships
Pierre-Francois DeschepperAlso known as "skippy", Member of the Belgian team
Karoly KralikOutstanding Hungarian fisherman, developer of Cralusso floats
Michael Schlogl Member of the German national team, Ingenious inventor!
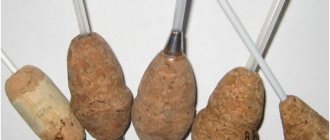
Made from foam or cork
Almost all floats are made using the same technology, despite significant differences in the materials used. But such a material as cork has one significant difference - ease of processing, and sometimes its complete uselessness. Only such floats have rather poor sensitivity, but are very well suited for catching pike with live bait or strong peaceful fish.
For the fisherman to notice a distinct bite, the fish must make a lot of effort. Such a float will be an ideal option for live bait fishing, since the movements of live bait under water will not interfere with recording a powerful bite from a predator.
Making a float from foam plastic with your own hands is quite simple and for this you need to have basic knowledge about working with tools and processing materials. The selection of foam is very important; be sure to choose foam with a high density
, otherwise you won’t be able to make a normal float with your own hands.
First you need to cut the workpiece to the required size and shape, after which it needs to be processed using sandpaper or a sharpening machine. Now you need to make a hole exactly in the middle for attaching a stick or pen. Then simply slide the nipple onto the tube and main line, and secure the float to the rig.
The float should be painted only if there is a significant need for it. Any material that is resistant to water and moisture is suitable for painting.
Video
Now for a traditional video about making a wine cork float. Such a float has a minimum cost and maximum efficiency when catching trophy-sized fish.
Made of wood
Wooden floats are quite popular among fishermen, but making them at home is difficult. And even without special equipment, this process will take a lot of effort, and the appearance of the float will not have the best performance. And choosing a tree so that the manufactured float meets the fisherman’s requirements can be quite difficult.
Many of my friends give a wooden float the required shape using a drill, but not everyone can do it well the first time. But nothing comes easy, it is quite possible to practice on hard woods and then gradually move on to working on softer woods.
You can try to make a float with your own hands from bamboo, but as practice shows, this is also not an easy task. The peculiarity of a bamboo float is that it either does not work out at all, or it turns out perfect.
Video
Now it's time to watch a video on how to make a good wooden float yourself. I’ll say right away that without the necessary equipment you won’t succeed. Although you can listen to the advice of the author of the video and try to do this.
From reed
Many fishermen prefer to use a reed float to catch crucian carp, roach and bream. It is so easy to make that it can be made even while on the shore of a pond. All you need is to cut off the main part of the reed stem and process it. The main thing is to choose an undamaged area of the plant so that it does not have cracks or other defects.
You need to choose the length of the float based on your own preferences and fishing conditions. Most often it is recommended to use 10-13 centimeters. To achieve the ideal shape, you can grind off the edges of the float and give them a cone shape.
Now you need to attach a small stick or tube to the top of the float. The inner part of the stem is very soft, so such manipulations will not pose any particular difficulties. All that remains is to paint the finished reed float with your own hands and let it dry.
It is very simple to fix such a float on the fishing line; it is best to do this using a nipple. Install one nipple in the middle, and secure the second at the very bottom of the float. Long service life, ease of manufacture and good sensitivity give this product an advantage over others.
Video
I think you will be interested in watching a video on how to make a float from reeds in a few minutes. Right? If this is the case, then I suggest that you start watching the video without hesitation and describe your experience in the comments.
Sliding float
Very often, fishermen are faced with the situation of fishing over long distances. In cases where it is necessary to cast a distance significantly exceeding the length of the rod, only one thing can help - a sliding float.
Let's look at how to make a sliding float with your own hands and ensure its movement along the fishing line. And this is done quite simply, the main thing is to correctly attach the float to the main fishing line. The movement of the float is controlled by two special stoppers on the main line, with the help of which the fishing depth is adjusted.
The task of the lower stop is to avoid contact of the float with the hook, and the top one is to adjust the fishing depth. The maximum flight range is achieved precisely due to the lower stopper. Fishermen make stoppers themselves or buy them in fishing stores. Due to the fact that the cost of such a product is extremely low, it is not worth fiddling with it.
In such equipment, you can use absolutely any float, the main thing is that it moves freely along the fishing line. One of the most common options is a foam float with a hollow tube passed through its entire length. You will only need to secure the silicone stoppers or tie a stopper knot.
A light float will be quite difficult to throw over a long distance. So you should be very careful when selecting the weight of the finished product depending on the casting distance required for fishing.
Video
Now I suggest you watch an interesting video on how to make a sliding foam float without much difficulty and effort. I guarantee that you will then be able to brag to your colleagues about your achievements in this area.
Italian method
The Italian method of fishing with a sliding waggler is very different from the English one. Typically, Italians fish with heavier floats and put fewer weights on the line (⅔ of the total weight of the weight falls on the float, ⅓ on the line). I confess that before I took up this article, I had never tried fishing using the Italian method, the effectiveness of which, however, impressed me. Two things especially struck me.
First, of course, is the size of the floats. I ordered Maurizio Chinook wagglers online with load capacities ranging from 14 7g to 20 10g. The wagglers I had ever fished with before were nowhere near as heavy.
Secondly, despite the huge size of the floats, the equipment used is thin and sensitive, much more flexible compared to English equipment.
The reason most likely lies in the difference in the main species of fish inhabiting the waters of England and Italy. While we mainly catch bream, tench and large roach, Italians most often have to catch carp, crucian carp and other cyprinids. Therefore, while the British try to immobilize the bait on the bottom, the Italians strive to provide it with as natural a descent as possible through the water column using more flexible equipment.
For a long time I did not dare to try fishing the Italian way, watching the sophisticated movements of anglers throwing rigs with huge floats secured with a weight at a distance of 50-100 cm from the main load. I have never been impressed by rigs that are difficult to cast. But since then, the Italian equipment has changed a lot; it is protected from tangling and the float, as in the English equipment, lies on the main load.
Here's how Milo prepares his rig:
- Thread a small stop bead onto the fishing line.
- Place the waggler and add two silicone stop floats
- Place the main load of 1-2 balls or pellets with a hole on the Cralusso cambric
- Lock the end of the equipment with a swivel
- Add a piece of fishing line or braid (Nicolas prefers icecore) 0.3mm, 30cm long. You can easily make such a harsh twist yourself using superglue or buy a ready-made one on the website of Michael Schlögl’s online store!
- A 1.5m leash is attached to this rigid piece of fishing line using a simple loop-to-loop knot or another swivel. 2-3 pellets No. 6 are installed on this leash, then one pellet No. 8.
It also happens: Fishing with a boat - how to fish with a boat
This is simply fantastic equipment, I have no words! It is incredibly easy to cast to any distance and never gets tangled!
A long leash without a swivel allows you to place sinkers no matter what distance from the float, which is an advantage compared to English equipment. Now let's see what gear you need to use for this fishing method.
Fishing rods.
Taking into account the size of the wagglers, it is necessary to use rods with a stiffer action than for the English method. You can fish with longer rods (4.5-4.8 m) so that the hook is more effective, despite the resistance of the large float.
Floats.
As I said, I use excellent floats from Maurizio Schlepatti. For this type of fishing, I chose a Chinook model with a balsa body and a peacock feather antenna. Another great float for this type of fishing is the Milo Gerardix Italian slider, its largest size is up to 30 15g! Of course, Michael Schlögl is not far behind everyone and offers very original wagglers with fastenings derived from the famous Cralusso Rocket.
The Italians use floats with a huge built-in weight, the basic principle is to use a waggler with 2/3 built-in weight
Match float
Making a match float with your own hands is quite simple, but this will require certain materials:
- 4 ear sticks.
- Heat-shrinkable tubing (shrinked diameter should be approximately 3 millimeters).
- Heat shrink tube with a diameter of 6 millimeters.
- A piece of wire with a cross section of about 1 millimeter.
- A wooden stick about 15 centimeters long (for the float antenna).
First you need to remove the cotton from the ear sticks. After this, two pieces (about 15 centimeters long) need to be cut off from the first (the diameter of which is about 3 mm) shrink tube. These sections need to be put on ear sticks and heated to form a monolithic long antenna.
This will be the main rod of the float; to make it completely ready for fishing, all that remains is to install the antenna for centering. It is best to attach a plastic cone-shaped form to the top; its weight should not exceed 0.5 grams.
Now you need to make the body of the float, it can be flat or cylindrical, it’s up to you. For this, foam or any other material that has positive buoyancy is best suited.
All that remains is to make a small hole in the base, fill it with waterproof glue and insert the antenna there. To make a sliding float, you need to attach a small swivel to the bottom of the base.
It is best to paint the float in a bright color that will be visible at long distances, since the finished product will have a fairly large mass and the possibility of long casts is not excluded. If you need to use a float during night fishing, you should use paint with phosphorus elements.
Video
Would you like to watch a video that provides step-by-step and clear instructions for making a match float? Then you are welcome to watch. Just repeat all the steps after the leader and you will get an excellent product.
How does a sliding float work?
The design of such a float implies the presence of two stoppers, between which it is located, that is, it slides. If, when thrown correctly, it floats up, then you should take it out and pull the stoppers a little lower, usually 10-15 centimeters.
If, on the contrary, it is not visible on the surface of the water, they should be moved a little higher, until it is visible. The antenna is specially made to be very bright so that a person can easily notice it at a long distance, which is a big difference from the body of a deaf person.
Here is a photo of the sliding float:
- The stopper should be slightly larger than the float ring. If it's smaller, it might just go through it.
- Many fishermen use a stopper knot, which performs the same function.
- It is always better to use stoppers that are the right size, as it will take much longer to tinker with the knots.
- The stop knot can be made using thin nylon rope or the fishing line itself.
If the stopper is too large, it will hit the rod guides, which is also not very good.
Underwater float
An underwater float has many differences from the products described above, which are designed for surface fishing. The task of the underwater float is not to signal a bite, but to raise the leash with bait above the bottom.
Making such a float is quite easy. You will need to find a material that is lightweight and floats; it is best to use high-density foam for this purpose. Take a piece about 10 millimeters wide and about 40 millimeters long.
Now you need to give the workpiece a certain shape; it is selected depending on the fishing conditions and the fish you plan to catch. For example, an oval or round shape is better suited for catching catfish. After giving the workpiece the required shape, it needs to be sanded with sandpaper.
Now you need to make a through hole through the entire body of the float. The purpose of this hole is to fix the float on the fishing line. You can fix it in one position using silicone or rubber stoppers.
It is very important to completely paint the float and its entire interior to protect it from moisture ingress and accumulation. After all, he will constantly be in the water.
Video
Well, now the most interesting thing - a video about making an underwater float with your own hands at home. Clear, simple and understandable step-by-step instructions from a well-known presenter - Pal Palych.
English method
We must pay tribute to England, because it was there that fishing with a sliding waggler was born. It appeared at the international level in 1975, when Ian Heaps used it to win the individual title. Ironically, waggler fishing then began to develop in other European countries, while in England everyone became interested in feeder fishing.
However, this technique has changed a little over the period of time that passed from Heaps' victory to the victories of Alain Scottorn, also an admirer of this technique, which brought him 2 championship titles, in Croatia and Hungary. Whereas in Ian's time the float was placed further away from the main weight using a #4 weight, today England anglers place the float directly above the weight.
It also happens: Ice fishing gear
The equipment is very simple, you just need to follow a few rules:
- The diameter of the main line must be at least 0.2mm
- The internal load of the float should be small; ideally, the load should be distributed 20% at the base of the float and 80% on the fishing line.
- For a waggler, it is better to use the Drennan float adaptator with an oval swivel, which ensures easy sliding and effective locking.
- the bulk of the load of 3-4 large pellets with a cut should be located at a distance of 1.2 m from the hook.
- Under the main load, no more than 2-3 small pellets should be placed at the same distance from each other.
- The leash must be secured using a micro-swivel, its length should be 30cm.
- no need to use a bead or double knot to block the waggler, one knot is enough
Stopper knot
Our champions have different techniques for implementing the locking knot.
Stuart Conroy uses a piece of 0.25mm fishing line about 15cm long for the knot. He places it on the main line, then makes a loop and threads one end of the line through it five or six times. Stewart then slobbers the knot and tightens it, cutting off the excess line, leaving the ends no more than 3cm.
Pierre-François Deschepper uses a thinner fishing line (0.14-0.16mm) about 30cm long for the knot, which he folds in half. He places the line folded in half to the main line and makes a loop, wraps the ends around it, which he then threads into this loop. Then he does exactly the same as Stewart. The advantage of using double-folded thin line is that the knot slides easier in the rod guides and slides easier along the main line when you need to change the depth.
Milo Colombo, like an increasing number of Italians, uses braid instead of fishing line for the stop knot. He takes a fairly thick and rigid braid with a resistance of 5-7 kg, the same one used by carpists for deep fishing (marker rods) or for feeding with a bait rocket. This braid ties very easily around nylon fishing line without damaging it, and is also available in very bright and eye-catching colors.
Fishing rods.
Stewart, like all his colleagues on the England team, fishes only with 14-foot rods (4.2 m). But this does not mean that they bend poorly, quite the opposite. He usually fishes with 4-6 SSG floats (about 6-10g). Therefore, there is no need, and not even recommended, to use too powerful fishing rods. Stuart fishes with a Drennan Matchpro Ultralight (for me, I prefer the Drennan Matchpro, which allows the use of heavier wagglers if necessary), very progressive action, but with a very energetic whip that makes casting incredibly easy.
Floats.
Stewart insists that the float should have an internal load of about 20%. This will ensure that it stays in contact with the main weight throughout the cast. For many years it was very difficult to find floats suitable for this type of fishing, except for the floats of Dick Clegg, the former captain of the England national team, but these were rarely sold anywhere.
Then the Hungarian Perfect wagglers appeared, often used by Nicolas Beroud and William Raison. Then again from Hungary came models created by two-time world champion Tamas Walter with a white peacock feather shaft slightly longer than the Perfect floats.
Wagler mount.
All of the floats listed have a simple brass rod at the base, without a ring, and are attached using fasteners, the structure of which, therefore, is important. It must have a swivel. The presence of such a fastener allows you to change floats depending on fishing conditions or visibility conditions, and also makes it easier to actually install the equipment on the fishing rod.
The swivel of the Drennan fastener is stronger than standard swivels built into the float's washer base, and its eye can easily be flattened into an oval shape with pliers. This way it will easily slide along the fishing line without abrading it, and it will be easier to block with a stopper knot. The only disadvantage of Drennan fasteners is that their silicone casing is somewhat weak and can break when using a float with a thick brass rod. That's why Michael Schlögl offers swivel fasteners with a thicker cambric for fishing with large floats.
Water-filling float
Has everyone ever bought shoe covers at a pharmacy and paid attention to the container in which they were packaged? From this plastic container you can easily make a water-filled float at home. It is transparent and has a rounded shape, which makes it an ideal material for such purposes.
The container even has a lid that allows you to easily change its load using water or lead directly on the pond while fishing. Even externally, this container is very similar to the well-known bombard, and they perform the same functions.
All that remains is to adapt the container for fishing. To do this, you need to make two holes on its bottom; it is best to make them parallel. Now you need to thread the winding ring through the holes on which the swivel is attached.
Since the container must be sealed, it is necessary to carefully treat the holes with waterproof glue.
You can load such a float directly while fishing, fortunately there is plenty of water there. For convenience, you can paint the product in any color using nail polish or any other waterproof material.