Should I buy a ready-made fishing rod or assemble it myself?
When a person decides to try his hand at fishing, he still doesn’t really know anything and is faced with many questions, one of which is the question of purchasing a ready-made fishing rod or buying a complete set for it, from which the tackle can be assembled with your own hands.
Both options are good, and both have a right to exist. A ready-made fishing rod is the best option for those who do not want to waste time on details and want to get quick results. Of course, those who wish to become familiar with the art of fishing and the use of gear can purchase the necessary parts and make a fishing rod themselves.
Types of float rods
The further the distance for casting the fishing rod, the longer it should be.
There are the following types of fishing rods:
- Flying rods. These rods do not have guide rings. You can make the equipment for them yourself and wind it on a reel.
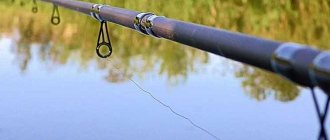
- Bolognese fishing rods have guides and a telescope. They are somewhat rough, so long-distance throws cannot be made with their help.
- Match rods are designed specifically for long-distance casting. Outwardly, they are very similar to spinning rods.
- Plug rods are used at long distances from the shore. The design of the fishing rod includes several composite plugs connected to each other.
Assembling the ideal float equipment
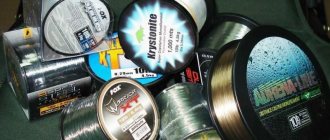
Since when fishing with float gear, the main share of the load falls on the fishing line, the demands placed on it are serious. It must be reliable and inconspicuous, while having a minimum diameter.
Line for float equipment
The sufficient strength of modern fishing lines with a cross-sectional diameter of 0.15 - 0.18 mm allows you to catch not only medium and small fish, but also quite large specimens, the main thing is the competent technique of fishing for the caught prey. Even a slight decrease in the diameter of the fishing line sometimes significantly increases the number of bites.
We also recommend reading:
How to properly tie a jig to a fishing line Diagram on how to learn how to tie a hook to a fishing line Tourist knots - types and methods of tying Gardner's loop for a feeder: how to tie
In addition, the thicker the line, the more difficult it is to cast light baits over long distances.
Considering that the fish’s eyes, thanks to their large viewing angle, are able to clearly view surrounding objects, the color of the fishing line should be chosen based on the surrounding background.
What should a leash be like?
To make the tackle unnoticeable, to prevent the main line from breaking when hooked, and also to protect it from toothy predators, use a leash made of thinner fishing line (0.12 mm), which is tied to the working line. The leash length is usually 15 – 20 cm.
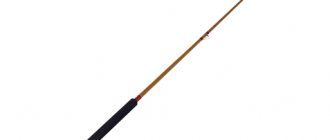
Choosing a fly rod for float fishing
For a beginner, the best option for a fly rod would be a medium-fast action rod. This is due to their versatility when catching any medium-sized fish. A high-quality fishing rod should have a rigid action. Its length is usually from four to six meters.
A long rod is correspondingly heavier than a short one. And in a fly rod, lightness is of great importance. Therefore, to begin with, you should opt for fishing rods less than five meters; they will be quite enough for the first fishing.
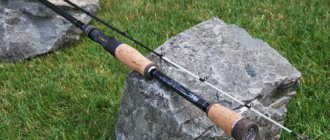
It is better to choose rods with reels. If there is no reel, the rod will be lighter in weight, but weaker in terms of fishing performance. Using a simple reel is the choice of every fisherman.
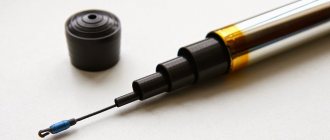
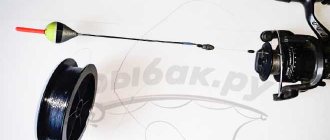
Float rod equipment
To properly equip a float fishing rod, you need to string a couple of small pieces of cambric onto the main fishing line. Subsequently, you need to insert the top and bottom of the float into them.
Some floats have a ring at the top, then a fishing line is threaded through it, and the bottom is secured with cambric. Then they take the pellets and place them on the fishing line, clamping them with pliers. According to the degree of approach of the fishing line to the hook, you need to reduce the weights in size. The last load must be moved ten centimeters away from the previous one. This sinker is provided to distribute the weight of the equipment.
Next, you need to connect the main line with the second, lead line. And at the end you need to attach a hook to the leash. The leash must be more than 10 centimeters long. The hook must be secured with a special knot.
How to attach a float with a ring at the top to a fishing line?
To secure the float using a ring and a cambric, you need to pass the thread through the mounting ring, and you need to attach a plastic ring to the antenna. You need to insert a monofilament thread into the plastic ring in advance. The ring is fixed at the top of the float. The thread should pass inside the ring and through the mounting ring on the keel.
How to attach a float without a ring to a fishing line?
To attach a float to a fishing line without a ring, you need to attach two optimally sized cambrics to the fishing line and insert the upper and lower keels of the float into them.
Blind rig on a fishing rod
The equipment is called blind because the length of the fishing line from the rod to the hook does not change. The line is attached directly to the tip of the fishing rod, and the reel is not used. On the one hand, a fishing rod with a blind rig has some limitations - you cannot return the line if the float is carried away by the current or when a large fish is caught. But on the other hand, the tackle turns out to be the simplest, most mobile, lightweight, and suitable for high-speed fishing of small and medium-sized fish. Such a fishing rod with a blind rig is called a fly rod.
Features of a fishing rod with a blind rig
The difficulty of landing large fish without a reel should not create prejudice towards blind equipment. If only because large fish on a fly rod are still rare for novice fishermen. And modern, very thin fishing lines make it possible to compete with blind tackle against fairly decent specimens weighing more than 1 kg. The more significant issue is the limited fishing distance. Sometimes on shallow water shores this becomes the main reason for replacing the fly fishing rod with other types of tackle.
Now about the advantages of a fishing rod with a blind rig.
- The tackle is extremely simple. Even a child can operate it. Fishing practice, as a rule, begins with a fishing rod with blind equipment.
- The gear is mobile and does not require bulky equipment. Everything you need for fishing with a fishing rod with a blind rig can literally be in your pockets... The ability to search for fish and running fishing, surveying places, extreme maneuverability - this is what makes a fly rod unrivaled.
- Possibility of high-speed fishing with active biting. No other tackle can fish as quickly as a fly rod. For novice fishermen it may not seem significant, but athletes value this...
Length and rigging
The universal length of the fly rod is 5 meters. At the same time, the best balance of mobility, lightness and fishing range is maintained.
To operate 7 and 8 meter rods you need some experience; such rods are not recommended for beginner fishermen.
Any fly rod adapts to fishing conditions using blind equipment. A whole set of equipment is prepared for the fishing rod depending on the weather conditions and the fish being caught. We also prepare a variety of spare leashes with different hooks for certain baits and with different fishing line diameters.
Thus, the same rod with universal properties can be adapted for both high water and heavy crucian carp.
How blind rigging is made
The length of the rig with a leash should be 10–50 cm shorter than the rod, then the rod will be convenient to control.
- At the end of the main fishing line, a loop is made for attaching to the connector or to the rope at the end of the fly rod, the fishing line is cut to the required length plus (+) 0.5 meters.
- A float and cambrics with which it is attached are put on the fishing line.
- Next, a set of sinkers of such mass is attached to the fishing line that only a thin antenna of the float is above the water, and its floating body is submerged. It is recommended to make a set of two to three pellets, one of which is closest to the hook and acts as a backup.
How to set the load
The pellets are selected at the final section of the fishing line, then crimped, above them the fishing line is flattened with pliers, the pellets through this place are moved higher to an undamaged area, and the lower 0.5 meters of the fishing line are cut off and thrown away. Thus, when selecting the float weight, the main line remained intact.
The usual distribution of weights on the fishing line is a sub-weight 10–25 cm from the hook, an intermediate weight 20 cm above the sub-weight, and a main sinker 60 cm above the sub-weight. The intermediate sinker can be lowered to the sub-sink to stabilize the equipment in windy weather, during currents...
How to tie a snap
- At the end of the main line, a small loop is made to secure the leash using the loop-to-loop method.
- The main line is attached to the tip of the fly rod. There are different options - most often using a thread, or using a loop with a loop thrown over the tip of the fishing rod. In these options, a loop is tied on the fishing line of the rig for quick attachment to the fishing rod.
- The equipment is wound on a reel. Signed - the weight of the load, the diameter of the fishing line, as well as the length of the rod or its number in the arsenal. When fishing, selection and replacement of equipment can be done quite quickly.
Diameters and weights for blind equipment
The lighter and thinner the equipment, the better it catches. But lightness should not interfere with controllability, otherwise the lightness will lose its meaning. The equipment must be operated confidently in all conditions. Therefore, for a fly fishing rod 5 meters long, the weight of the equipment in calm weather and with the thinnest fishing line can be 0.7 grams. The float is selected with such buoyancy. But for windy conditions and thicker lines, you may need a 2.5 gram rig, otherwise it will be difficult to cast.
As the length and rigidity of the rod increases, the blind rig needs to be made heavier.
The usual thickness of fishing line for a fly fishing rod is 0.12 mm. And the leash is 0.1mm. But in windy weather, for catching small fish, it is advisable to reduce the diameters of the lines by 0.02 - this will immediately have a positive effect on stability and catchability. For carp fishing, fishing lines of 0.15 - 0.18 m are used, while the load can reach 2.0 - 4.0 grams.
It is more advisable to use small and thin hooks - No. 16 - No. 20. But their size depends primarily on the size of the bait, as well as on the fish being caught.
How to fish with blind rigs
Let's take a closer look at some of the nuances associated with the technique of fishing with blind rigs. You must always understand how the bait is positioned relative to the bottom. To do this, a heavy pellet is attached to the hook, and at the selected fishing point, the release of the equipment is set by moving the float along the line, so that the float is in its working position.
Opposite the tip of the float, a mark is made on the rod with a marker. Now, by moving the float in one direction or another, you can clearly understand how long the leash is on the bottom or how high above the bottom the bait is.
Fishing techniques with a fly rod
For most types of fish, the most popular are three basic fishing techniques using blind rigs.
- at the bottom there is 2 - 3 centimeters of the leash;
- the bait hangs 2 - 3 centimeters above the bottom;
- the entire leash and sub-line lie on the bottom - anchoring the rig in the wind or current.
It remains to add that hooking with thin equipment must be done carefully. The same thing happens when casting. As a rule, thin equipment breaks not because of large fish, but because of the rough actions of the angler. Beginners can, as a rule, master the technique of fishing with blind rigs during the first two to three fishing trips.
Loading the float
If the float is loaded correctly, then only its antenna will be visible on the surface of the water. Thanks to this weight, the equipment will be very sensitive to even slight touches of the fish to the bait.
In windy weather, the equipment should have low sensitivity so that the float is not covered by waves, and then the bite can be seen.
How to load a float on a pond?
The lead pellet is secured under the float with pliers. The float is then thrown into the water.
If more than half of the float is visible above the surface of the water, you need to attach a few more pellets to the fishing line and load them until only the top of the float remains visible.
How to load a float at home?
You can load the float without leaving home, using a two-liter bottle. To do this, attach a large lead pellet, and then smaller pellets, continuing to attach them until the float is loaded to the bottom line of the antenna. If the float is loaded, excess parts can be cut off using scissors or wire cutters.
Fishing rod equipment for catching crucian carp with a float
In 99% of cases, when using a float rod for crucian carp, you need tackle for fishing from the bottom. When the crucian carp bites boldly and there is a hunger, coarse thick rigs also work. However, in spring and autumn in clear cold water, as well as in summer, when it has already eaten, this fish is often capricious. And he can simply not take the bait, spit it out if, when rising from the bottom, he feels a heavy weight or resistance from the equipment.
The main requirement for equipping a fishing rod for crucian carp is maximum sensitivity. This is a fairly large fish - it easily moves and pulls a weight of 5, 10 grams or more. When it bites well. However, when testing the bait, sensing something is wrong, the crucian carp often stops trying to swallow the bait. Therefore, it is always better to use thin, neat rigs. Since the rude ones only work when they are hungry. The diagrams proposed below for correctly equipping a float rod for crucian carp have been tested over years of practice. And they are simple amateur equipment options, without unnecessary sports bells and whistles and expensive elements.
Blind equipment
Sometimes anglers argue which float equipment for crucian carp is better, blind or sliding. However, I think there is no difference - as long as the float is properly loaded. Mounting a fishing rod on a crucian carp can be done in any way. For long-distance casting, the sliding version is more convenient. Rigging a fly rod for crucian carp is rather a blind option. You can rig a Bolognese fishing rod for crucian carp this way or that way. The depth still rarely exceeds the length of the rod. Blind equipment is simpler, neater and more reliable. No stoppers needed. However, for long-distance fishing with depths of 3 meters or more, the sliding option is more convenient, since the float goes down to the sinker.
For example, I almost always fish with solid light floats with a spinning reel - even when the depth is under 5 meters. Yes, when casting a rig, when the float is right at the tip, inconvenience arises. But they can be solved by careful and precise casting, training and practice of casting the tackle. So it's more a matter of personal preference. Effective rigging for crucian carp can be done in both cases - this is more about loading the floats, choosing the diameter of the fishing line and hooks. It doesn’t matter how the float hangs, tightly or slides, as long as it’s done correctly.
Usually the float in the blind version is attached to the leg through a pair of cambrics. If there is a ring in the body, we pass it through it too. Also - a feather float, we plant it on 2-3 cambrics of the required diameter. Microfloats with a short keel and antenna can also be attached to one point. It is important here that the float sits firmly on the fishing line, but moves under force to adjust the depth. This is achieved by selecting the diameter of the cambrics and their density depending on the material.
Small floats up to 3 grams are often deaf, while large floats are sliding. However, there are fans of small sliding floats, as well as large deaf ones.
Sliding float
In the sliding version, you can make a float tackle for crucian carp with your own hands from an ordinary blind float. To do this, you need to attach a metal or plastic loop to the leg. Ready-made connectors are also sold. The type of sliding float - with one point or two - depends on the number of such loops. The second ring is usually located in the float body itself.
The line passes through the rings, and the level of the float is adjusted with stoppers. The upper one is for setting the depth, the lower one is so that the float does not fall directly on the load and does not get confused with the leash.
- Rubber stops do not fit into the rod rings. Therefore, in the rigging of crucian carp fishing rods for long-distance casting, which are created for fishing at depths significantly exceeding the length of the rod, you need to use micro-stoppers, special knots that taper in the direction of departure with a cone - so that they pass the rings well when casting.
- In such equipment, the holes on the float itself also need to be small so that the microstop does not slip through. But this is already a rare case. At such depths it is easier to fish with a feeder or donka, so as not to have to worry about knitted stoppers.
- A sliding float with rubber stoppers is a universal tackle. But what is more important here is the correct loading itself, and not the method of attaching the float. A rod for catching crucian carp from the shore is usually 5-6 meters. This is enough for the near zone. But they can also be used for long-distance fishing. A properly equipped fishing rod for crucian carp is not a special tackle for this particular fish. Depending on the leashes and the size of the hooks, you can catch either carp or roach with it.
Detailed article - sliding float for crucian carp
Leash attachment
Every novice fisherman always faces the problem of attaching a leash. And often beginners do not know how to solve this problem.
There are many methods for attaching a leash, but it is easier to use one of the most well-known methods. You can always learn a lot of interesting things about attaching a leash on specialized forums from anglers.
How to tie a leash to a fishing line?
The easiest way is to attach pieces of insulation to the fishing line. The number of pieces should correspond to the number of leashes that will be attached to the fishing line. Next, you need to tie the loops on the fishing line so that the cambric is between the two loops.
Hook selection
When choosing a hook, you need to look at what it is made of. It is better not to choose hooks made of ordinary wire; this is the cheapest and most unreliable option. And if you still decide to take them, then you need to take several spare ones at once. The guarantee of quality is the presence of vanadium and hydrocarbon steel in the alloy. They are more expensive, but they definitely won’t let you down when fishing.
How to properly tie a hook to a fishing line?
A properly tied hook ensures that the fish will not pull it off the line. To do this, you don’t need to know a million methods of binding; just a couple of reliable methods will be enough.
There is one reliable and convenient method that helps many fishermen. First you need to thread the fishing line into the hook up to half its length. The line should be threaded from the side where the hook tip is located. Wrap the long end of the fishing line five to seven times around the fishing line and the hook and thread it through the other side, and tighten the knot.
There is also a universal knot - a good and strong knot. Actively used for hooks with and without eyelets. If you learn how to tie a universal knot, you don’t need to use others.
Fishing rod rig
In the case when you decide to use a fishing rod without rings, it is necessary that the length of the fishing line be equal to the length of the fishing rod. A maximum superiority of no more than half a meter is allowed. Only this amount of monofilament will make it possible to cast easily and pull out the catch comfortably.
Video showing the process of organizing the equipment of a float rod:
Choosing a float
The float is used to signal a bite, so its choice must be taken with full responsibility. First, you need to decide on the depth of the fishing spot. So:* a depth of up to one meter requires a float with a carrying capacity of up to 1 g;
- depth 1-3 m – from 1 to 2.5 g;
- depth more than three meters - float 3-5 g.
If the body of water has a strong current, then it is necessary to use special floats for fishing in the current.
There is also a very interesting type of float equipment - a sliding float. To fish with it, you usually use a rod with an inertia-free reel for long casts or, in extreme cases, a regular inertial reel with a drum.
Line and leash
The leash for the float type of equipment is itself a controversial point. Indeed, in this case, the gear is at the same time distinguished by its subtlety and invisibility, and clutter with bridles and loops. The leash is made on the basis of a thinner fishing line than the main monofilament for the reel. Its length will directly affect the quality of the bite:
- A short leader is the most sensitive and will allow you to see every touch the fish makes to the bait. Although in this case there is no need to rush, because you can catch the catch earlier than it would have to be done;
- a long leash may not allow you to feel the bite at all, and therefore the fish will be able to swallow your bait and go free swimming.
For this type of gear, it is recommended to use exclusively monofilament fishing line. It is desirable that it be thin - 0.08-0.1-0.12-0.14 mm. But this is not the most important thing, since a number of other factors need to be taken into account:
- fishing conditions;
- parameters of the fishing line itself and its properties;
- elements that make up the rod itself.
Correct loading
In order to produce the correct sensitive load, it is recommended that you secure a medium lead pellet under the float, carefully clamping it all with pliers. Throw the rig into the water. In the case when the body of the float is slightly visible, it is recommended to add more weight. In this case, be sure to make sure that the minimum depth is set. After all, in this case the weights should be suspended, and not lie at the bottom of the reservoir.
It is necessary to add lead darts until only the tip of the float . Only in this case will you achieve good sensitivity. But if fishing is in strong winds, you can allow some part of the float’s body to be visible. This way, you can eliminate the visual illusion as the float passes through the waves.
Read more about choosing and loading a float in the article about floats for crucian carp.
Hooks
Experts recommend choosing hooks depending on the desired catch and the size of the bait. You need to take a moment to imagine what kind of mouth your fish has, and whether it can calmly swallow such a hook. On the other hand, an excessively small hook will also become a hindrance. Because in this case there will be a lot of idle bites. After all, the fish will not be hooked and will get off the hook. Therefore, you can say goodbye to your trophy.
Shepherd boy
The catcher is also popularly called a snitch; it is a small sinker attached to a leash near the hook, and takes part in loading the float, or more precisely, its antenna.
Some fishermen like the bait to be located a little further from the hook, explaining that attaching the bait close to the bait only scares the fish. Although this statement can be considered absurd if we remember how clogged most of the country’s water bodies are.
If the fish is medium in size, or the distance between the hook and the catch is a little more than twenty centimeters, then there is a chance that the fisherman will not notice the bite, because The grate will not come off the surface of the bottom and will not really move to the side.
The principle of fishing with float gear
Immediately before fishing, it is necessary to point-feed the selected place. Moreover, it is advisable to throw bait in the form of medium-sized balls.
Next, you need to set the distance from the float to the hook, commensurate with the depth of the chosen fishing spot. And only then can you start fishing. Most fish bite from the bottom of the reservoir, and not in the water column or on top. Although small species of fish, such as bleak, verkhovka and sometimes even chub, get food from the surface.
In this case, it is recommended to constantly experiment with baits and flavors. Moreover, you can fish not only from the surface of the bottom of the reservoir, but also at half-water or at some distance from the ground.
Antenna
The antenna is the part that is visible to the fisherman and signals a bite. The characteristic features of the antenna are very closely related to each other, so they should not be considered separately from each other.
Antenna characteristics:
- Material
- Thickness
- Length
- Visibility
- Sensitivity
- Color
- Buoyancy.
Most often today, antennas are made from the following materials:
- Wire made of stainless steel . It will not sink in water, because its density is several times greater than the density of water.
- Carbon fiber . It also does not sink in water, its density is one and a half times greater than water density.
- Fiberglass . Fiberglass has a wide range of buoyancy.
- Polyethylene . It has almost zero buoyancy.
- Polypropylene has positive buoyancy.
- Bamboo . Bamboo is also quite buoyant.
When choosing an antenna, you need to focus on its visibility and sensitivity in water. A thin antenna is more sensitive and resists less when biting. It is also difficult to see in water.
Bulky baits are also used with thick antennas. But thick antennas are less sensitive and their windage is higher. As for antenna colors, red is considered the most optimal color.
How to properly equip a float fishing rod with two hooks?
You can’t be sure what the fish will bite on today, so fishermen practice attaching two hooks to the fishing rod at once. For example, worms are attached to the first hook, and bread to the second.
There is some valuable advice that says that there is no need to use large quantities of bait. A very small amount is required. Because on hot days it can quickly disappear and deteriorate, which negatively affects the condition of the inhabitants of reservoirs.