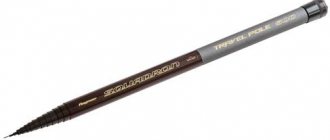
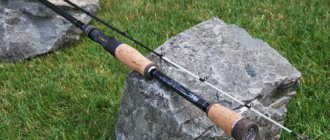
The fly fishing rod is a telescopic form without guide rings and a reel. This fishing rod is made of carbon fiber or fiberglass and has a number of features not only in its structure and equipment, but also in additional elements.
This article will discuss in detail such a part of the fly rod as the connector, its pros and cons, selection rules and manufacturing methods.
So, the connector is not an integral part of the fly rod equipment. It looks like a small fastener that is used to secure the finished rig to the fishing rod. It is usually attached to the very tip of the rod using super glue.
Today, there are factory-made connectors, which can be bought at fishing markets, and homemade ones, which are made by fishermen on their own.
Factory connectors include plastic or metal fasteners, while homemade connectors include latches made from all kinds of available materials.
On expensive fly rods, as a rule, connectors are already installed, while on cheaper ones, a small rope plays the role of a connector.
How to choose a connector?
In order to choose the right connector, you should use the following recommendations:
- The first thing you should pay attention to when buying a connector is its quality and reliability. It should be smooth without various joints on the alloy, sharp corners and any other defects, since a too rough sharp surface can easily cut a thin line not only when casting, but also when playing.
- The second thing a fisherman must make sure of is the material from which the connector is made. As mentioned above, they can be metal or plastic. It is better to give preference to metal connectors, since they are stronger and can last much longer than plastic fasteners.
- When buying a connector on the market, you should definitely try it on your fly rod. It should be clearly placed on the top of the fishing rod.
- The diameter of the inner surface of the connectors ranges from 0.66 to 4 mm. This should be taken into account not only when purchasing them, but also when purchasing the fly rod itself.
- Although connectors are not very expensive, it is still better to buy more expensive fasteners, since they are usually made of higher quality material than cheap connectors and have a longer service life.
How to choose the right one
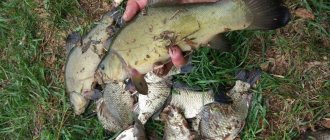
Connectors made of duralumin alloys are considered more reliable elements and are used when catching large and powerful fish, carp, barbel, ide and chub. Plastic varieties of products are only suitable for fishing conditions for small fish, roach, bleak, ruff, gudgeon and small crucian carp. The advantages of connectors are the speed of changing the main lines and the reliability of its fastening. In addition, this device is inexpensive, durable and easy to use, and, apart from glue, does not require additional materials for installation on the fishing rod.
Important! The method of mounting the device on a fishing rod depends on the design of the tip of the tackle.
If the tip has an internal cavity, then the product is purchased with a sleeve for internal installation. If the tip of the rod is solid, purchase a connector with a hollow shank. To accurately select a connector, you will also need to know exactly the outer or inner diameter of the last bend of the form. The easiest way is to measure the rod with a compass and use this tool to select the required accessory option in the store. But it’s safer to take the rod itself to a retail outlet and select a device by directly connecting the parts in a trial . Having chosen the option required for the configuration, the device is glued to the tip of the fishing rod blank with glue and after the joint has dried, the tackle is completely ready for installation of the cord.
Advantages of the connector
Using a connector for a fly rod has the following advantages:
- The connector allows the fisherman to very quickly replace one equipment with another without wasting extra time and effort.
- The connector is considered the most popular way to attach equipment due to the fact that it allows you to change equipment depending on the fishing conditions.
- Using the connector is very convenient and practical, since you do not need to tie complex knots or loops to attach it. It is attached only with glue.
- The connector has a low price compared to the elements of the equipment and the equipment itself.
- A high-quality connector can serve for quite a long time without deteriorating or breaking.
- Metal connectors can come in a variety of shapes, sizes and designs.
- Metal connectors can withstand quite a large load and not lose their shape.
- Very convenient as small fasteners, since they do not interfere with the operation of the gear.
Disadvantages of the connector
- A low-quality connector that has an uneven surface can easily fray the fishing line.
- The connector does not allow the use of very thin lines.
- Plastic connectors are very fragile and can break easily.
- It is highly undesirable to use connectors together with wobblers or any types of spinners, as this may affect the performance of the bait in the water.
- Poor quality connectors can bend and lose shape even under light load, making them impractical.
- The use of connectors if installed incorrectly can significantly affect the overall sensitivity of the gear.
- The connector must be light in weight, otherwise it simply will not be able to withstand the load from the bait used.
Homemade connector
Factory connectors appeared on the fishing market not so long ago, so they were often made with their own hands.
There are many ways to make connectors for a fly fishing rod, but we will look at the most effective of them:
Fishing line connector
This is done this way:
- wrap the fishing line tightly around the tip of the fishing rod;
- make a small loop at the end;
- wrap this loop with wire or strong nylon thread.
Through-ring connector
It's done this way:
- wind the fishing line around the tip of the fishing rod and make a loop measuring three centimeters;
- insert a pass ring into the loop, which should be made of ceramic;
- leave another half space of fishing line from the ring.
Fine copper wire connector
It must be produced in the following steps:
- fold a small piece of copper wire in half;
- attach the wire with a strong thread to the very tip of the fly rod;
- equip the wire with a small carabiner;
- Lubricate the thread with glue to make it even stronger.
Connector made from regular rubber band
To do this, you just need to wrap it around the tip of the fishing rod. It is also important that the elastic is tight and does not stretch.
Carabiner connector
This is done this way:
- attach a carabiner with a clasp to the tip of the fishing rod with threads;
- also wrap a small piece of fishing line around the fishing rod and make a small loop (it will be a spare one);
- secure everything with glue.
This homemade connector is the most successful, but it also has a significant drawback - it is prone to tangling.
Whether to make a connector with your own hands or buy a ready-made product - this must be decided by the fisherman himself, but at the same time he must remember that such a fastener in any case should be useful and of high quality.
Fishing rod connectors
Feeder, spinning, trolling, elastic band, throw, mugs. There are quite a few ways to catch fish and with the development of technology there are even more. However, the good old float tackle, which has been used for fishing since time immemorial, remains one of the most popular and in demand in our time.
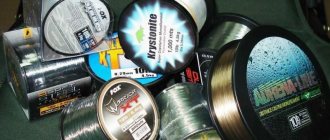
The material for fly rods has also become more technologically advanced, but the question of how to attach a fishing line to them, and even so that it can be easily and quickly replaced, still worries novice anglers. There are several ways, but the simplest is to use a connector for a fly rod, which serves precisely as a connector.
Connector purpose
It is the connector that serves as the connecting device between the rod and the fishing line, which allows you to securely secure the tackle and quickly change it if necessary.
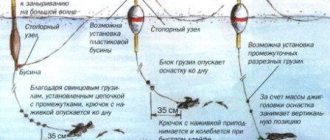
In this case, the fisherman will not have to tie extra knots and reconfigure the equipment. The loop at the end of the equipment is inserted into a special recess and closed with a movable cap. This is where all manipulations to equip the fishing rod end.
All that remains is to put the desired bait on the hook and throw it into a promising place.
Any specialized fishing store offers a very large selection of connectors. But this is not because manufacturers want to diversify the design. The tips of the rods have different thicknesses, which is why the connectors are produced in different diameters. In addition, they can be steel or plastic, which affects both the quality of the product and the price.
Right choice
It is best to select a connector for a fishing rod when purchasing the fishing rod itself. This will make it easier to correctly determine the required diameter, and this is one of the most important conditions.
The product should be put on the top with some effort and in no case dangle. You can’t count on being able to glue the houses down.
You will have to use glue in any case, but a connector that is not selected according to size will not last long.
The diameter of the connector should be selected very carefully
Another important condition is the absence of any, even very small, defects on the product. Burrs, sharp edges, and cracks are unacceptable. They can lead to a banal cutting of the fishing line at the most crucial moment, which will invariably lead not only to the loss of fish, but also to the loss of all equipment, and it is much more expensive than even the most sophisticated connector.
It is also recommended to bring the product to your ear and squeeze with your fingers. A poorly made connector will crack, which means that it is better to put it aside and look for a more durable one.
What homemade bite alarms are there for bottom gear?
We should probably start with the shortcomings. There are only three of them, and the first two can be easily avoided by choosing the right product.
- Defects that can lead to line cutting.
- Cheap plastic connectors are not durable.
- Reduces depreciation. Which, however, is not very significant due to the short length of the connector.
There are far more advantages:
- Quick change of equipment. Including winding up the old line and unwinding the new line, it takes no more than a minute.
- Easy to install.
- Reliability of fastening.
- No extra knots when tying fishing line.
- Compactness.
- Durability.
- Price. Even the most expensive connector is several times cheaper than lost gear.
There are many more advantages, and the question of whether or not to use a correctly selected connector disappears by itself.
As already mentioned, it is best to choose a connector when purchasing a fishing rod. But it happens that the rod is already at home, for example, it’s a birthday gift from a good friend who knows your hobby, and going for a connector with a fishing rod is not always convenient. And then the question arises: is it possible to make a connector with your own hands?
The answer is simple: you can. A homemade connector can be of several types, the main thing is that the basic principle is observed - quick replacement of equipment.
From wire
A piece of soft wire is bent in half to form a loop. The ends are tied with nylon thread to the tip of the rod. The thread is impregnated with quick-drying waterproof glue. Instead of wire, a piece of thick fishing line can be used. Fastening of the equipment is carried out using the “loop-to-loop” method.
The wire loop is reliable, but not very convenient when changing equipment
The relative disadvantage of this homemade connector is only one. In order to tie a new rig, you will have to pull the entire fishing line through the loop at its end. And this is several meters with a hook, sinkers and a float. And it takes longer, and you can get confused. Otherwise, this method is quite reliable.
It differs from the previous method not only in that a piece of ordinary fishing line is used instead of wire, but also in the location of the loop. A piece of fishing line is bent in half. The ends are wound with nylon thread so that the loop is slightly lower than the tip of the rod. The thread is thoroughly impregnated with waterproof glue.
The equipment is attached as follows: you need to tie a loop at the end of the fishing line. The loop is threaded through a homemade connector and then placed on the rod tip. The method does not require unnecessary movements.
The thread must be thoroughly impregnated with glue
Safety pin
Another fairly simple way to make a connector at home.
A safety pin with a ring at the end is wound onto the tip of the rod so that the ring extends beyond the tip. In this case, the nylon thread is wound only up to half of the pin, so that its sharp tip remains free. The thread is impregnated with glue. Instead of thread, you can use cambric or braided wire.
The loop at the end of the tackle is threaded through the ring of the pin and put on its free part.
Changing equipment on such a homemade connector takes seconds
There are other ways to tie a fishing line to a fishing rod, but these three meet the main requirement - quickly changing equipment right while fishing.
Purchased connectors are also different, and not all of them require permanent attachment to the rods. There are also removable ones. For example, a connector made of a plastic or rubber ring with a hole in the middle and a carabiner attached to it.
Removable connectors require special attention
The fastening is quite reliable, but during fishing it is necessary to periodically check that it does not slip off the tip of the rod and that the snap hook does not come undone. In other respects, such a connector even outperforms a regular locking connector somewhat. The gear attached to it does not need to be changed. Just take another rig with a connector already attached and put it on the rod tip.
Very often, when fishing, situations occur when the angler is forced to quickly and efficiently respond to a changed situation and the behavior of the fish. Tie another hook or leash, change the float to a more sensitive one or vice versa. There's so much more.
Fiddling with each element separately is both long and tedious, but when you have several ready-made equipment for different conditions in your arsenal, then such a simple and necessary thing as a connector really helps out. There is no need to tie complex knots and waste time setting up new gear.
A few simple movements - and you can continue to catch, receiving indescribable pleasure from it.
Source: https://intellifishing.ru/snasti/konnektory-udochki
Where to buy a connector for a fly rod?
A connector for a fly fishing rod can be purchased at special fishing markets, where various equipment elements and other additional parts for such fishing rods are sold.
In addition, with the development of Internet communications, you can easily purchase connectors in online stores that professionally sell them.
Here is a link to one of these sites: https://www.superfisher.ru/Konnektory-i-amortizatory.html
As can be seen from everything described above, despite its rather small size, the connector for fly rods is a very important and necessary element, without which almost no professional fishing can do.
Using these recommendations, you can purchase a really high-quality connector that can serve you well for more than one fishing trip in a row.
Other methods of attaching fishing line to a fly rod
We attach the fishing line to the fly rod, forming a ring from wire or a paper clip. Next, we attach the antennae emanating from the circumference of the ring to the quivertip of the rod, winding the nylon thread tightly, turn to turn, and subsequently sealing the winding with glue. The fishing line is attached to the ring using a loop-to-loop connection.
As a result, we get a strong blind mount. Rewiring the equipment will require cutting the line at the ring and forming another loop on the cord.
We make another connection to the tip of the tip using cambrics. To form a connection, you will need a cambric that fits tightly around the tip of the form. We cut a 10-centimeter piece of selected material into two equal parts.
We pass the first one freely along the fishing line, and tie a cord to the second one and pull it onto the tip, moving it 7–10 cm towards the butt of the rod. We wrap the cord in a couple of turns around the free tip of the tackle and close the fastening by pulling the first piece of cambric onto the blank. The connection is ready.
The next method can be implemented in two versions, in one of which a knitted nylon casing will be used, and in the second a hat elastic or model. The casing is threaded onto the quivertip, previously lubricated with glue, so that a 10 cm piece of rope hangs from the tip of the rod and the connection is allowed to dry. Next, a knot is formed on the free section. The fishing line is tied at the end of the rope by tightening a loop, which is secured with a formed knot. Replacing with a new installation requires cutting the fishing line and making another connection through tightening the loop. When using a model, the elastic band itself is attached to the tip of the tackle with a nylon thread with sizing. And just like with a rope, they form a knot that acts as a stopper for the loops of the mounted fishing lines.
Important! The model acts in two ways, serving both as a connecting element and as a feeder, which gives the fisherman reasons to use more sensitive equipment and thinner line diameters when fishing. On the rigs themselves, prepared for fishing conditions, loops are knitted in advance and fishing lines are attached to the model and rope directly during the fishing process.
Over the long history of using fly rods with blind rigs, anglers have come up with many options for attaching fishing line. Both simple and more complex, and fastenings for large fish, and plug-type ones - with a rubber shock absorber. Now, out of all the variety, only a few options are used. Let's consider them by popularity and ease of use.
Connector The simplest and most popular option is to use a plastic connector that is glued to the top of the whip. The connectors have different mounting diameters, from 0.65 to 2-3 mm, so choosing the one you need even for a thin “sports” whip is not difficult. The principle of operation of the connector is simple: a loop of fishing line is inserted into the eye of the connector, which is closed by a moving part. The connector can be installed on two types of whips: tubular (hollow) and with an insert (sports). The highest quality connector, also used by athletes, is Stonfo Elite. Despite the apparent flimsiness of the miniature plastic part, I don’t remember a case where it broke while fishing; The strength of the Stonfo Elite is obviously higher than the strength of the fishing rod. Its slightly higher cost than its analogues is justified because one such connector is enough for the entire service life of the rod. The most convenient way is to select a connector when buying a fishing rod, and glue it on at home, although the seller can often do this. The fly fishing connector should be put on with minimal clearance, but a little force is acceptable.
Why do you need to glue the connector at home? Yes, because the quality of the gluing will be better - it will be possible to remove the varnish from the top 5 mm of the whip and degrease it. The connector is glued only with cyanoacrylate glue (and no other!). When gluing, it is important to avoid excess glue, which can tightly “grab” the moving part of the connector. If this happens, it will be impossible to disconnect the connection; you will have to try again with a new connector. To belay, I usually slide the moving part onto the whip (it is important to track its position “up and down”), glue the upper fixed part, remove the remaining glue and, after it has dried, put on the moving part.
On sports whips it happens that the diameter at the thinnest part is less than 0.5 mm. The connector, of course, can be glued to such a thin whip, but I prefer to shorten it to at least a diameter of 0.55-0.6 mm, since when fishing a thin whip can easily be broken by a careless movement. Usually it is enough to saw off 2-3 cm with a diamond needle file so that the reliability of the tip no longer raises questions.
“Rope” This was once a very popular line attachment option, especially for rods with sports whips. Its advantage over other fastening methods used at that time was the complete absence of overlaps with the fastening unit. I still successfully use the “rope” on bleak fishing rods at a high fishing pace, when there is no time to monitor the line. Its essence is simple. A piece of thin rope without an internal core (you can use a hat rubber sheath) is pulled onto a whip to a length of 1.5-2 cm and glued with a suitable (film-producing) glue or epoxy resin. A knot is tied 1-2 cm from the end of the whip or a droplet of epoxy resin is formed. The fishing line is attached with a noose above the knot (droplet). The method is simple and very reliable. Fears that the noose-noose might unravel are in vain; in many years of use, I have not observed such a case.
Read: Modern float fishing rod To quickly untie the noose on a loop, tie a piece of fishing line with a double knot; antennae are trimmed to a length of 5 mm; for them the noose is instantly released. The droplet allows a thin whip to pass into the lower knee (and the connector is not always the case) for washing or drying the upper knees.
This method of manufacturing a fastening element also helps in cases where it is impossible to purchase a high-quality connector.
A pair of cambrics This simplest option for attaching a fishing line is suitable when there is no serious load on the fishing rod, as a result of which the upper cambric can fly off, or if other methods are not available. For fastening, you need to select a pair of fairly rigid PVC casings (silicone ones are not suitable!), 10-15 mm long. One is put on the top of the whip, the other (with a larger diameter) is put on the middle or lower part. The fishing line is clamped on the whip with the lower cambric, wound on the whip and secured with a second cambric at the tip. This method has many disadvantages. The upper cambric sometimes flies off; when fishing, if there is a large distance between the turns, the fishing line becomes taut, like a string on a bow; It is necessary to take into account in the rig the length by which it is shortened due to winding on the whip. This method may be needed as a backup option in cases where you need to depict something “in a hurry,” for example, when the rod tip breaks.
Elastication English anglers use this term when equipping a plug rod with rubber. But you can use modern technologies for a fly fishing rod. For many years now, a couple of my rods, designed for catching large fish with blind rigs, have been equipped with an elastic rubber shock absorber, and I dare to say that its ability to perfectly absorb jerks of fish when fishing significantly outweighs the disadvantages.
The obvious disadvantage of using a rubber shock absorber on a fly rod is that you have to significantly shorten the whip (and, of course, the overall length of the rod). There is nothing you can do about this - you need to ensure free passage of rubber in the whip, but you can buy an additional whip and shorten it or pick it up from existing broken ones. At one time, I shortened my original one without regret, because, having tried fishing with tires, I would never return to the option without a shock absorber.
The second implicit disadvantage is a slight increase in the mass of the upper part of the fishing rod, which leads to some deterioration in the action. However, this is offset by shortening the whip, and the loss is largely unnoticeable. Hooks cause certain inconveniences when fishing: you have to tear off the hook just like on a plug-in rod (by separating the legs - in the case of a plug-in connection or folding them - in the case of a telescope), since the rubber directly prevents the equipment from breaking.
The most important advantage, which, in my opinion, outweighs all the disadvantages, is the excellent performance of the rubber shock absorber when fishing for large fish.
As an example, I will give the experience of my good friend. For several years he caught medium-sized (up to 2-3 kg) carp in one of the semi-wild reservoirs, which was protected from poachers, but the reproduction of fish in it was natural. Gradually, the fish became smarter and with float tackle with a reel, due to the rather heavy equipment and problems of keeping it at the fishing point, it began to get worse and worse.
It was almost impossible to use bottom gear due to the strong snags of the reservoir. The use of a fly rod with a blind rig restored the number of bites, but the number of fish breaking the rig increased sharply, and it avoided the thick fishing line. I convinced a friend to equip his fishing rod with a carp shock absorber, and things started looking up.
It is clear that in such conditions the use of a plug would have given a better result, but my friend did not have one (however, as well as the desire to master a new type of fishing for a separate, albeit interesting, body of water), and he had sufficient experience in fishing with a fly rod. My personal experience of swing fishing with a shock absorber is much more extensive: from bream - on the dam of the Gulf of Finland to ide, bream and small carp - in the Lower Volga.
It makes sense to equip a fly rod with a length of at least 7-8 m with a rubber shock absorber, since large fish are rarely caught at a shorter distance. I have a pair of fishing rods “under the rubber” with a length of 10 and 11 m (since this fishing distance is no longer possible to reach with a plug). The equipment is the same as for the plug.
You will need a plug rubber shock absorber with a diameter of 1-1.2 mm (installed in one or two elbows), suitable for any fish (except carp) weighing up to 1-1.5 kg. The diameter of the shock absorber for larger fish or for medium-sized carp is 1.5-1.6 mm (two or three knees), for larger carp - 1.8 mm (three knees).
Read: Equipment for carp You will also need a connector between the rubber and the fishing line, a Teflon sleeve for the end of the whip and any kind of internal plug (to which the rubber inside the fishing rod is attached) along the diameter of the knee. Of course, only a hollow rod can be equipped with a shock absorber, and the power of the fishing rod as a whole must correspond to the shock absorber used.
The hollow whip is cut with a diamond file to such a length that the shock absorber fits freely into the hole, and a Teflon bushing is placed in place of the cut. The internal plug is adjusted to the edge of the first, second or third bend, a shock absorber is tied to it, passed through a whip and a connector is tied. The length of the shock absorber should be 10-15 cm less than the length of the knees in which it is located, which provides pre-tension.
As with the plug, multiple whips can be equipped for different conditions. When folding the fishing rod, you need to pull the rubber out of the knees, otherwise it may get between them and the knees will jam. It’s even better to carry whips and rubber separately.
Inexpensive fiberglass fishing rods are often sold with a ring glued into the whip. It must be checked for strength - if it is poorly glued, it will fly off under load, it is better to immediately replace it with a more reliable one. Other options for attaching a fishing line to a fly rod, even quite popular at one time, for example, with a metal fastener, wound around the whip with a hat elastic, behind a fishing line loop, etc.
etc., are almost never used, since they are more difficult to manufacture and use.
Leave an emotion Like Touched Ha-Ha Wow Sad I’m angry
Support the Rybalke.net project, subscribe to our channel in Yandex Zen
Today we will again talk about how to tie a fishing line to a fishing rod without rings. Installation using a plastic connector has already been discussed; information can be found here. The connector is, of course, a convenient thing, but not indispensable. Moreover, it is not always possible to buy it.
In my arsenal there are 4 additional ways to secure a fishing line on a fishing rod, which are not inferior in reliability to the factory version. So.
[custom_ads_shortcode2]