Basic requirements for anchors for PVC boats
- Regardless of the weather, the main task of the anchor is to reliably hold the boat (vessel) both in strong winds and in strong currents. The oncoming waves create jerks on the vessel; the anchor should not move when exposed to jerks.
- A snagged anchor should be easy to remove. Losing an anchor at the wrong time can be a real disaster for fishermen, so the anchor must be easily removed from snags.
- The mass of the anchor should be less. An anchor weighing 2.5 kg has the ability to hold several times more than an object weighing 10 kg.
- Must be sustainable. It is desirable that the anchor be painted or made of stainless alloys. Over time, rusty deposits will form on the anchor, which causes dirty things and short life.
Requirements for anchors for an inflatable boat
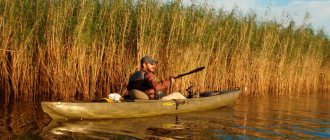
The main task of the anchor is to hold the boat in the current, so first you need to pay attention to the weight. It is also important to take into account that inflatable boats do not always have enough space to transport a long thick cable and anchor. But this is secondary - first you need to accurately determine the shape and weight of the anchor, which will be enough to ensure the stability of the boat on a body of water with current. How to choose an anchor for a boat?
The anchor for a PVC boat is selected somewhat differently than in the case of metal or wooden boats, since the windage of such a vehicle on the water is greater and the displacement is less. There are many forms of boat anchors, and each type is designed for a specific type of bottom.
It is critically necessary that the anchor, in addition to reliable retention, is also convenient for use on a small craft and is not very large. Corrosion resistance should be present in any case, so this parameter should not be particularly emphasized. The folding option will be the most suitable, because it simply saves space. One of the most popular is the folding cat anchor with four or more folding claws, which can hold it on a sandy bottom, but is practically unsuitable for stones and silt.
If tied incorrectly, the anchor can catch on snags fatally, so it must be tied to the bottom loop. A ring is attached to the upper loop, like on keys, and a rope is threaded through it - when hooked, a few strong tugs are enough to tear off the ring and pull the anchor out by the lower part.
One of the most important requirements for an anchor for an inflatable boat is the absence of dangerous sharp elements that can damage the skin. The pointed thin ends of the cat's paws grip the bottom better, but when pulled out there is a high probability of piercing the boat. Homemade devices in the form of bags of soil, stones and bricks are relatively safe, but often require a lot of weight to overcome the influence of the current.
The “best anchor” should not be very heavy, because you will have to get it out only with your hands, since winches and other things cannot be installed on a PVC boat. Even if the load is too heavy, you can easily fall overboard while pulling it up. If the boat has an eyelet and a roller for lowering, then safety on the water is also ensured by the fact that the rope does not rub the side at the lowering point and it is even more convenient to move the anchor to the lowered position from the stowed position and back.
Types of anchors
- and two rotatable lamps that dig deep into the ground are ideal There is a method that allows you to increase the holding power against the current; the anchor rope is tied to the front of the boat (bow loop) and lowered into the water as close to the side as possible. Where the current is deep or strong, this method is strictly prohibited, since the long rope may cause the boat to yaw, so it is advisable to use this method in shallow water bodies or in places with weak waves.
- There is an anchor shaped like an inverted mushroom. This anchor is easy to store, which is an advantage in mass ratios as well as size ratios. It is good to use in places where there is silt, clay, and also on the bottom with algae.
- An anchor with a mushroom shape, which has two legs, making it possible to burrow into the bottom with stones and snags.
The drift force depends on the weight of the boat. Two anchors are required to hold a large boat in a strong current. One anchor with lamps is on a long rope, and the second is a mushroom-shaped anchor, which is lowered onto another rope. The second anchor is used to prevent the boat from dangling so much.
- A ship anchor weighing 7 kg on a long rope can support a small ship in any weather. This type of anchor is well suited for fishing from a small boat. Such anchors are good to use on a soft bottom; they are not afraid of corrosion due to the vinyl coating; moreover, such a coating helps to avoid damage to the vessel when pulling out the anchor.
- Danforth anchor with special claws, with the help of which it is possible to use this design even in muddy areas. Often, such anchors are required for large boats, since the anchor itself of this model has a large mass and is also rather large in size.
Types of anchors for pvc inflatable boats
It should immediately be noted that currently, about 2000 anchors for PVC inflatable boats have been patented. The most common ones are:
- Admiralteysky. This is a classic look. Consists of a spindle, transom, two horns, claws, rod, bracket and eye. The main advantage of such an anchor is its versatility. It can be used on reservoirs with any bottom. In addition, it is characterized by a fairly high coefficient of holding force, as well as simplicity of design. Today a wide variety of Admiralty-type anchors are produced. Its main disadvantages:
- Difficult to handle.
- Bulky.
- High price.
- There is a possibility that the anchor cable may get caught on one of the legs and get tangled.
- Porter's anchor. In many ways it resembles the Admiralty one, except that the armature arms are attached perpendicular to the rod using bolts. Thanks to this, it can swing from side to side. An additional advantage of this type is that when one paw is immersed in the ground, the other is pressed against the spindle. Thanks to this, a higher holding force is ensured, and the likelihood of the anchor cable getting caught on a protruding paw is practically reduced to zero.
- Deckfort's anchor. Has a high holding force. The main difference is its design feature - the rod is located not at the top, but at the bottom of the spindle. When it hits the bottom, the rod prevents the anchor from tipping over. The main advantage is that it buries deep into the ground. But when using a Deckfort anchor, you must take into account the type of soil, since in some cases it can sink to such an extent that pulling it out will be very problematic, and sometimes even impossible. Main disadvantages:
- Ineffective on reservoirs with pebble bottoms.
- At great depths it can dive for a long time.
- Anchor of Norhil. Has increased holding power. The principle of operation is similar to the Admiralty. Advantages: High efficiency. With the same weight, the holding force coefficient of the Nordhil anchor will be 7 times higher than that of the same Admiralty one.
- Ease of transportation.
- Compact (foldable).
- Light weight.
- Has high efficiency.
Today, the anchor plow is one of the most effective when used on silty or dense sandy soil.
In addition to the above types, the following types of anchors can be considered the most common and used: cat, mushroom, river and some others. For example, the cat anchor is quite popular, as it has an extremely simple design and at the same time works effectively. A mushroom anchor is the best solution for those who like to fish on reservoirs with a sandy bottom. But the river anchor is, in principle, considered the most universal, as it can be used at any depth and in any rivers.
How to choose an anchor
Each anchor is designed and good in certain places that suit it. To choose the right anchor, you need to know at least approximately what kind of soil is in the places where you plan to swim, and the weight of your vessel (boat) also plays an important role. Weight can be found using a special table, or using a complex formula.
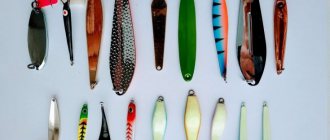
Anchor cat
- A boat (vessel) weighing one ton (1000 kg) requires an anchor of 10–12 kg, that is, the anchor should be about 10% of the weight of the boat. You can also choose an anchor according to the length of the vessel (boat). The anchor should weigh 1% of the length of the boat, for example 270–2.7 kg. Just remember that the anchor can be reinforced with a chain.
- For inflatable boats, experts recommend a cat anchor. This is the most common anchor that can be used in almost all soils. It is also small in size, which makes it easy to transport. The anchor weighs 2–12 kg, its magnifying mass is 0.5 kg. The price of this anchor is from 300 to 1500 rubles. Four kilogram cat anchor from 2000 rubles.
- There is also a hall anchor; like the Matrosov anchor, it is large in size, which allows you to hold the ship more firmly, and is well used on pebbles. Price for 4.5 kg 1800–2000 rubles.
- There is a Chinese model as a mushroom anchor with a PVC shell, which helps prevent rust and stains, and thereby extends service life. The price for an anchor weighing 5.4 kg is 1,380 rubles.
Three-prong anchor
Three-leaf anchor with a weight of 6.8 kg and PVC coating. Such anchors can stick to the bottom and also become hooked. The anchor is good to use on (inflatable) boats; thanks to the rubberized body, you don’t have to worry about damaging the boat. The metal from which the anchor is made is cast iron, made in China, capable of holding a load of up to 700 kg, price 1880 rubles.
- The floating anchor is 1500–2200 mm. This anchor is used for a vessel (boat) with a length of 15 meters. When the anchor is lowered into the water, it takes its shape and thereby prevents the movement of the vessel. A floating anchor can also be made of nylon; it is used during a storm or when there is simply a very strong current. The price is 3177, and the nylon anchor is 1360 rubles.
How to choose an anchor
Selected depending on the place of use. To do this, you need to know at least approximately the type of soil at the bottom and the weight of the boat. Recommended anchors by weight for different vessels:
- For watercraft up to 1000 kg - 10-13 kg. It is permissible to choose a weighting material based on the length of the boat - 1% of the size. You can strengthen the anchor with a chain.
- For inflatable boats, a grapple anchor is better suited. It is lightweight (no more than 12 kg) and compact, so it is easy to transport. The price in stores varies from 400 to 2000 rubles.
- The Hall anchor is highly productive but extremely large. Often used to stop boats on reservoirs with a pebble bottom. The cost of a product weighing 4-4.5 kg is 2000 rubles.
- The three-leaf anchor weighs 7 kg - PVC coating. It can press tightly to the bottom and have excellent grip. Works well on inflatable boats because the rubber hull is difficult to damage. The product is cast from cast iron. Capable of withstanding loads up to 750 kg. Cost—1900 rub.
- The Chinese version or anchor, called “Mushroom”, has a PVC coating that protects against corrosion. Therefore, it will last more than one year. The price of a weighting material weighing 5.5 kg is 1,400 rubles.
- A floating stopper with sizes from 1500 to 2200 mm is used for ships up to 15 meters in length. When it gets under water, it takes on the appropriate shape, thereby preventing further movement. The weighting material can be made of nylon material.
Used in strong gusts of wind, but not suitable for drifting. The cost of a nylon anchor is 1,400 rubles, a regular one is 3,200 rubles.
Floating stopper
Plow-style rodless weights are worth considering separately due to their increased productivity. There are many products with low weight, which, when reaching the bottom surface, firmly sink into the ground and securely hold the vessel. A PVC watercraft up to 3 meters in size can be held without problems by such a load weighing 3 kg in heavy currents. The holding force will be 30 kg per kilo of dead weight inherent in the Bruce anchor. Only this option is more suitable for larger vessels on long-term moorings.
Whatever the choice, it is important that the fastening is reliable. When using the anchor in the event of a storm or strong current, it must be fixed in two positions - at the bow and stern. At the same time, the ship is set adrift.
To save money, it is better to make a PVC boat stop yourself. It’s better to spend the money that’s not wasted on other fishing equipment. And you can use any available materials of the required mass. Video: securing the anchor rope
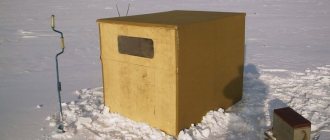
Non-snacking anchor for PVC boat
Often, while fishing, the anchor gets caught; the reason for this may be a rocky bottom, or because of snags.
In order to unhook the anchor, there are two ways:
In case swimming is carried out in places where the arms of the anchor may converge, it is necessary to tie another cable using a float (rubber ball, polystyrene foam). If the anchor gets caught too much (happens often), the rope will serve as a safety rope, thanks to which you can easily pull out the caught anchor.
Anchor eye - an indispensable assistant
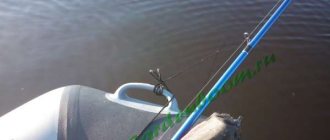
When figuring out how to reliably tie an anchor to a PVC boat, one cannot help but remember such a useful device as an anchor eye, which is also called a roller. It allows you to reliably and simply tie or secure a halyard on the side of the boat. The eye holds when the anchor is raised or lowered.
The peculiarity is that it is possible to fix or release the halyard using the roller quite quickly, that is, fishing hands eager for a good catch become free immediately after the weighting agent is immersed in the water.
The transom eye is useful for insurance and towing, while the anchor eye is placed on the bow.
Video on how to install an anchor eye:
Video about how the anchor release system functions and how the rope can be secured:
We hope our article on how to properly tie a PVC boat anchor is useful to you! Share your experience and life hacks in the comments.
A properly installed anchor is the key to safe and fruitful fishing, of course, if you have a reliable boat, which you can always buy in our store! We also have useful components for you.
Question answer
Question: How should I tie a boat anchor correctly?
Name: Tagir
Answer: You need a good rope. Loops are made at its end. The end of the rope can be attached to the stem with a special bracket, the other end is connected to the weighting material. If you plan to use the anchor where it snags easily, you can attach an additional line with a float, which will make it easier to pull the weight out when it gets snagged.
Question: How should you tie an anchor to a boat so that it is secure?
Name: Mikhail
Answer: It is best to use an anchor knot, which is considered the most effective and safe way to tie the line to the anchor system.
Share link:
How it works
You need to tie a cable behind the trend and pass it through the pin, which is located in the hole at the end of the trend. If necessary, when the anchor is hooked, the cable must be pulled in the opposite direction of the spindle, and the pin will break, thereby releasing the anchor.
There is a method for attaching a pin, with which you can pull the cable in any direction, not necessarily the opposite direction of the spindle, only with great effort. To do this, you need to secure the pin not to the trend, but to the cable. A rope (cable) is also attached to the cable, which will be closed to the trend and form a loop.
As a check, you can use wire and fishing line bent into a circle, and a polymer clamp, which can be easily purchased at any construction supply store, is also perfect. Also note that you can use not just one pin, but several at once, and thereby the breaking force will increase.
You need to know that there are two types of check installation, each of them has its own breaking force:
- The sliding installation requires a sharp boost, if you pull smoothly, the boat will end up in the wrong direction at that time. The breaking load of a sliding installation is 10–15 kg, no more.
- Fixed installation. With this installation, the pin should not be destroyed by the force of the vessel's demolition. To break the pin, a breaking force of 30–40 kg is required. You can destroy a pin with such breaking force using an outboard motor. The pushing force of the motor at full speed is 2.5 hp. is 50 kg. Both methods are good, however, the best method remains the cable with a float (Buirep).
How to anchor a boat correctly to avoid it rocking and being “wobbly”?
Briefly, we can say this: you need to ensure that the front and rear cords (or ropes) with weights are tightly stretched in opposite directions. This means that they should go under the water not vertically, like that unfortunate fisherman, but at a significant angle. Only well-tensioned lines back and forth will keep your boat securely in a fixed position.
It must be remembered that the main load for holding an anchored boat falls on the rear weight and, accordingly, on the rear cord, especially in strong winds or currents. Therefore, the rear weight must be significantly heavier than the front one, because the front weight, one might say, only fixes the boat in a given direction, while the rear weight holds it in place.
And in order for the boat to anchor more securely, the rear cord should be one and a half to two times longer than the depth of the area of the reservoir where you decided to fish. For example, if the depth is about three meters, then the length of the rear anchor cord should be at least five to six meters. The length of the front cord can be significantly shorter, only slightly exceeding the depth of the reservoir.
When anchoring a boat, a certain sequence must be followed. Personally, I do the following. I lower the rear load first. As soon as it touches the bottom, I gradually swim forward, simultaneously unraveling the cord from behind from the load lying at the bottom. After moving away from the load at a distance twice the depth of the reservoir, I lower the front load so that the cord from it is not taut, but with significant slack (the length of the cord should be about a meter greater than the depth of the reservoir). Now, taking hold of the rear cord, I pull it, as a result of which the boat begins to move back towards the first weight. And as soon as I feel that the second cord is stretched and the movement of the boat has stopped, I immediately tie the rear cord to the boat. Now you can be calm: there is no danger of any looseness or rocking of the boat.
If there is a need to anchor the front weight more securely (for example, in crosswinds, strong currents), it is enough to use a longer cord. However, in this case, the rear cord must first be unraveled to a correspondingly greater length. To then tighten it again and achieve “balance” of the sides.
Of course, in ideal weather, when there is calm and no wind, you can simply lower the loads without any tension on the cords. But you know, such weather conditions when fishing are extremely rare. There is no need to stretch the cords even when fishing in shallow waters overgrown with algae.
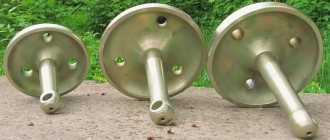
What is an anchor eye
The second name for this device is anchor roller. It is needed to securely fix the halyard of a lowered or raised anchor.
The device is designed in such a way that fixation is carried out instantly and holds the mount more than reliably. You can also easily remove the rope from the fastening.
If you have previously fished without a hook, you will highly appreciate this device, since your hands are quickly freed, and you do not have to tie a rope with ten knots and then untangle them.
Types of anchor eye
The fairly simple design of the anchor eye has several modifications, which go by the following names:
Duck - this modification for a PVC boat is one of the simplest, it looks like the nose of a duck with a cable clip in the middle. Different manufacturers have antennae for securing the loop with different protrusions, but otherwise they are identical.
A handle-eye and an eye-ring for PVC boats are the simplest of the options, and the modification in the form of a handle is well suited for carrying an inflated boat, if necessary.
There are other shapes, such as the Badger bow anchor eye.
Where to install
You can often find boats with an already installed eye, which is very convenient, since the manufacturer will firmly attach this device and accurately calculate the correct position for it.
But if the boat is not equipped with this device, and you really want to simplify the process of raising and lowering the anchor, you can secure it with your own hands.
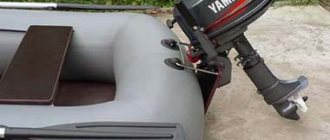
Usually the anchor eye is installed on the bow of the boat, it is called the bow. You should choose a place where the rope will not have any points of contact with the boat, or to be extra sure, buy a special anchor roller and glue it where the rope rubs the fabric of the boat.
Experienced fishermen often advise buying two devices and installing them in convenient places. This installation option is used for large boats.
How to properly install an anchor eye on a PVC boat
The conversation about installation rules should begin by considering the design of any eye:
- The largest in area and most in contact with the surface of the boat is the base; it has the shape of a platform made of hard PVC. This plate will hold the weight of not only the structure, but also, distributing the load, the weight of the anchor and its halyard.
- Shoe lock. It is this part of the eye that serves as a rope clamp. Depending on the connector between the teeth, you can choose the parameters of the rope, or rather, on the contrary - the anchor eye is bought for the already known cross-section of the halyard for the anchor.
- In some designs, a roller for lowering the rope is placed on the plate, or bulges are simply made that guide the halyard in the desired direction, playing the role of a barrier, a side protecting the boat from the slipping rope.
The installation itself is very simple and consists of gluing the eyelet to the side of the boat. Prepare the necessary materials and tools. To attach the eyelet, you will need:
- Polyurethane glue or any other for PVC surfaces.
- Hairdryer, any.
- Pump, pump up the boat.
- Pencil or marker.
- Acetone or other solvent.
- Rope.
- Loads.
- Cylindrical roller for rolling the eye for better adhesion.
- Rym.
It should be noted that, as for other work with glue, the optimal temperature for gluing will be 18-20 degrees. If possible, it is better to do this indoors.
Subsequence
- Before work, the boat will need to be pumped up.
- Heat the elastic base of the eye structure in front of a hairdryer and let it cool slightly.
- Place the eye plate on the surface of the boat in the place where it will be attached, bend it to the shape of the cylinder and trace the outline with a pencil or marker (this is necessary to mark the place where the glue should be applied).
- Degrease the surface of the boat inside the contour and the surface of the eye plate.
- Apply a thin layer of glue to both surfaces.
- After 15 minutes, spread the surfaces with a second layer of glue and leave them for another 5-7 minutes to harden.
- Gently press the eye against the boat's cylinder without going beyond the marked outline.
- Make sure that the plate is applied evenly and there are no bubbles between the surfaces, press the eye and roll it with a prepared cylindrical roller or a similar object at hand to seal the joint.
- Press the eyelet onto the boat with the prepared rope and two weights, leave the boat alone until it is completely polymerized (from 5 to 24 hours).
If desired, you can simultaneously glue the anchor roller if the design of the eye does not include it in the kit. The roller is needed so that the rope does not rub the boat's cylinder.
You can also purchase special coins in advance that will allow you to install many useful accessories for the boat - a fishing rod stand, a small table.
Anchor knot: how to knit?
To avoid misunderstanding among readers, step-by-step instructions without the use of marine terminology will be presented below:
- Wrap the rope twice around the object. Do the second carry without tightening, otherwise the rope will not fit under it.
- Lower the running end of the rope over the stationary one, pass it under the loose loop, and tighten slightly.
- Wrap the remaining section around the main part of the cable. Insert it into the resulting loop.
- Secure the free end to the fixed end with a tie or wire for additional security.
This is interesting: Hunting license - what is it, how to get it
As previously mentioned, the anchor knot is extremely similar to another one, the name of which is a simple bayonet with a hose. People not involved in the shipping industry usually confuse them. And this is not surprising. However, it is worth remembering: when performing serious work, this unit is much better suited.
Additional half-bayonets (actions described in paragraphs 2 and 3) make it safer. And if the knot with which the anchor is confused was actually used to fasten any parts of the ship, it would quickly receive new modifications. Otherwise, he could not be trusted with cables with strong traction.
Prices for anchor eye
Depending on the modification and technical indicators, the eyelet can cost from 300 rubles to 8,000. This variation is due to the complexity and equipment of the model, a large number of manufacturers, the region, sometimes even the color of the material from which the eyelet is made can determine the cost of the product.
You should choose from the price category that is more affordable, because high-quality things can be inexpensive.
The lack of space in a small boat is very noticeable, but if you look at it, all the things inside are necessary. You can free up space in the boat by removing the anchor overboard, securing it with a very useful device—an anchor eye.
A wide range of options, colors and prices will allow you to choose the right solution. Fish with pleasure and comfort!
Folk sign: A strong wind during rain means good weather!
How to anchor correctly in a current
All river vessels, from inflatable boats to large ships, must have the technical ability to stay on the current. In practice, this could be a forced stop caused by a breakdown, organizing towing, or stopping for fishing. Here the need arises for an action called anchoring.
It is advisable to note that river vessels have a broad classification. Therefore, within the framework of the article, only small vessels are considered, such as inflatable boats, boats made of PVC and duralumin, pleasure boats and sports vessels.
Successful anchoring of a watercraft largely depends on factors such as current current parameters, depth, type of anchor, and also on human experience. Preparation for it begins with the correct choice of anchor. What types of anchors are there?
Why do you need an anchor eye on a boat, which one is better to choose?
The elementary law of any market is based on the fact that supply is determined by demand. This laconic rule explains the variety of different devices and accessories that can significantly simplify human life and activities. Progress has not spared the area related to the use of watercraft for fishing, recreation or at work.
One such device is the anchor eye, although some skeptics consider it an unnecessary tuning. Those users who have to fish with their boat immediately appreciated this device. To form your own opinion, you need to take a closer look at the purpose and structure of the eye.
Why is it needed?
Imagine the most basic anchor. Perhaps even a child knows its purpose. Indeed, it is necessary to keep the boat in a static position relative to the shore. This is especially necessary when fishing in the current, although we know from practice that any ship can lower the anchor, and not only after mooring.
Let's return to our situation. A rope must be tied to the anchor; it is also called a halyard. Typically, the length of the halyard is calculated so that it exceeds the depth of the reservoir. If the anchor is sunk to the bottom and the remaining rope is laid on the bottom of the boat, then there will be absolutely no sense in such a procedure. To fix the vessel in one position, you will have to tie the halyard with several knots to a special bracket. In this case, lowering the anchor may take longer. You need to wait until it touches the bottom, then pull the halyard and secure it. If it is necessary to change the location, the knots are untied (with a taut rope this is very difficult to do), the anchor is raised, and then the whole procedure is repeated again.
An eye or anchor roller is a device that allows you to simply and reliably fix a halyard on board a ship, boat or boat. It holds the rope both when the anchor is lowered and when it is raised.
Its main feature is that fixing the halyard and releasing it takes only a couple of seconds, and it’s not even a matter of time. If there is an eye, the fisherman's hands are immediately freed after the anchor is immersed.
Note that most anchor winches have a lock, so there is no need to equip the boat with an eye, but given the high cost of these devices, a simple stopper becomes an integral attribute on almost every PVC boat.
What is needed besides an anchor?
In addition to the anchor, to install the PVC inflatable boat in a stationary position, you will also need a special rope or cable. It is best to choose them from synthetic materials. This is due to the fact that synthetics are stronger and more reliable, and secondly, they are more resistant to external factors.
The anchor cable also has certain requirements:
- Strength. To calculate it, you need to multiply the mass of the anchor by 70.
- Thickness. Cable, 7 mm thick. and withstands tensile forces of 1000 kg. Suitable for most anchors used for inflatable PVC boats.
- Length. There are also certain standards here. It is believed that this figure should exceed the depth in swimming areas by an average of 4-5 times. In addition, it is recommended to use special eye rings to secure the anchor rope.
It consists in the fact that the anchor cord itself is not passed through the nut earring - it is simply tied to it. The cord is attached to the anchor earring itself in the standard way and is additionally tied with fishing line or wire. In the current version, the risk of getting caught directly on any serious underwater obstacles also disappears. a loop that is formed by the cord itself between two earrings, but this also poses the risk of loss.
Types of devices
The anchor eye for a PVC boat is designed very simply. In principle, even an amateur can understand its actions. Despite this, there are several varieties that differ in the principle of the stopper design. You can find them without any problems in specialized stores or even order them online.
- The first type, better known as the "Duck" type, is made in the form of a slot clamp. Externally, the gap resembles the beak of a duck, hence the name. To be precise, such an eye is combined with a bollard, that is, it is made in the shape of a mushroom, around the leg of which a halyard loop can be tied. The gap in the middle has specific tendrils that prevent the rope from moving in one direction and allow it to slip in the other.
- The second type is a ring ring or a handle ring. A regular ring allows you to secure the halyard, and the handle ensures that the rope is locked after basic manipulation. The two-ring lock is used not only in this device. It is used in satchels, backpacks, and safety belts. The principle of operation of an eyelet made of two rings is identical. It is necessary to make a loop so that the rope tightens itself.
Installation
Most modern models are equipped with an integrated eyelet. It can be located on the transom, side cylinder, or bottom. Most often, the eye is mounted on the nose of the cylinder. If you had to buy a boat with an eye, then there is no doubt about the reliability of such a design. The manufacturer secures it properly and chooses the location of its localization wisely, because this area will bear a significant load.
The transom eye is used for towing or insurance. The anchor eye is installed on the bow. The kit may include rollers that allow the halyard to slide without friction. If these videos are not available, it is recommended to purchase them separately. Without them, when raising or lowering the anchor, the halyard rubs against rubber or PVC, which negatively affects both the material and the rope itself. Large boats or yachts are equipped with two eyes, as they have two anchors.
Installing an eyelet with your own hands requires the owner to have basic knowledge about the features of the device. With all alternative options, the most preferred mounting location is the bottom of the boat. This is especially true for payol watercraft. Depending on the wind speed or river flow speed, the load can be up to several tens of kilograms. The “Duck” eye has a shoe-type lock.
The width of the connector determines the maximum thickness of the halyard. Please keep this in mind when purchasing a device.
The roller can be replaced with plastic guides. They will save the surface of the boat, but the friction of the rope on the plastic will not go away.
Now you can begin to start the work itself. By the way, they are not difficult if you follow the recommendations. The eye handle and the “Duck” eye are attached in the same way, so in any case you will have to prepare tools and materials. You will need a special glue based on polyurethane foam (sold specifically for working with PVC surfaces), a hair dryer, a pump, a degreaser, a pencil or marker, and weights. Installation of the eye should be carried out at an ambient temperature of 18-20°C degrees.
- The cavities of the boat must be filled with air. Firstly, this simplifies the installation process, and secondly, it will avoid the load on the gluing site resulting from stretching of the material.
- We preheat the eye platform (the surface to be glued) with a hairdryer.
- Without adhesive, the eyelet is applied to the area where it will be installed and outlined around the perimeter with a pencil or marker.
- Surfaces must be clean. You can use fine sandpaper, and then be sure to degrease it.
- The glue must be applied in a thin layer, and on both surfaces.
- Follow the instructions for applying the adhesive. It is usually recommended to hold the parts to be glued for several minutes, and then press firmly against each other. Weights are used to create force. The glue will take approximately 24 hours to dry.
The anchor roller has already been written about. You can glue it in the same way as the eyelet. You should be interested in the idea of purchasing special coins for additional equipment on the boat. By the way, the eye-ring for a PVC boat and for hull ships have differences in fastening. If the first one is installed using glue, then the second one is secured with a special eye bolt.
Financial side of the issue
Financial costs are the most important component for making a decision. It often happens that the consumer is willing to sacrifice some aspects in order to save money. Now, having a computer with access to the Internet at hand, it is easy and simple not only to find out the price of the desired product, but also to buy it online. However, the issue of cost remains a pressing issue and is constantly discussed in various forums.
The price range for such a device as an anchor eye is surprisingly very large. The paradox is that we have completely forgotten about large ships and yachts. The anchor halyard on them also needs to be locked. Only the eye for such vessels has a more complex design.
The cheapest device can be purchased for only 300 rubles, while the price of some devices reaches 8-9 thousand rubles. Not only the design features and additional functions of the device dictate the pricing policy. Much depends on the material from which the eyelet is made. Many people afloat place the anchor in the boat, thereby reducing the internal space. With the help of a stopper, the load can be kept suspended, which simplifies subsequent anchoring and also optimizes the use of space.
Finally, it should be emphasized that the variety of manufacturers ensures that every boat owner can choose the most suitable device, both in price and quality.
average cost
The market offers a large number of products at different prices, which depend on the materials, quality and brand. The table shows the approximate prices of different types of anchors for PVC boats.
The table shows approximate prices for different shapes and weights of anchors used on inflatable boats.
| Type | Weight (kg) | Price range |
| Cat | 1,5 — 15 | 900 — 4000 |
| Admiralteysky | 4 — 20 | 1900 — 7000 |
| Danforth | 4 — 20 | 900 — 4000 |
| Matrosova | 3 — 15 | 1000 – 7000 |
| Plow | 7,5 — 20 | 2500 – 6000 |
| Mushroom | 1 — 15 | 1500 — 5000 |
The chosen option should be distinguished not by price, but by quality and necessary parameters.
Conclusion
So, knowing how to correctly approach the issue of such an important choice, you can safely begin calculations and prepare the boat for launching. If everything is done wisely, then on a large river, lake or canal, with or without a strong wind, it will be possible to achieve an iron fastening on the water.
muzhik.rf
There is a huge number of all kinds of fishing knots , which are used in various areas of fishing. But since our topic is “spinning”, in this article I will directly talk about those units that should be in service with any spinner. In fact, a spinner or a fisherman from another direction has one or two knots for a specific operation, which he has been using for many years. For example, I know ten knots, how to tie a fishing line to a leash, but I use one and I’m unlikely to change anything. And so, I'll start from the beginning. The first knot we need is a knot to tie the main line to the reel spool.
How to tie fishing line to the spool of a reel.
For these purposes, you can use many different units, from complex self-tightening nooses to simple household ones. Some people generally prefer to wind the fishing line onto the spool without fixing it. I would under no circumstances recommend doing this. Imagine this situation. You are fishing from a boat and somehow accidentally dropped the spool, leaving only the fishing line in your hands. It’s simple, pull the line and you’ll pull out the spool, but instead of the spool, only the other end of the line comes out. Whatever such oddities happen, for these purposes I would recommend the so-called “Bloody Knot”. At first glance it may seem a little difficult, but after a little practice everything should work out.
How to tie a spinning leash.
I found the answer to this question for myself a long time ago. This is a knot called “Grinner” , which I have been using in my fishing practice for probably 10 lats, and in all this time this knot has never let me down, not once. As an alternative, I can also use a knot called “Clinch,” but very rarely. In general, these two nodes are very similar to each other, but I liked the first one better. When knitting this knot, you must take into account the thickness of the fishing line, that is, the thinner the fishing line, the more turns around the axis you need to make. For a braided cord with a diameter of 0.16, I usually make five or six turns, which is enough.
How to tie fishing line together.
In the event that such a need suddenly arises and you need to tie together the two ends of the main fishing line, then for this I suggest knot photo 1. This knot is very easy to make and is also quite reliable. I recommend using it only for monofilaments and for tying together braided cords; it is better not to use such a knot. For tying a cord, an excellent option would be knot photo 2. This knot can also be used for tying a fluorocarbon leash, and for tying fishing lines and cords of different diameters.
photo 1
photo 2
How to tie an American girl.
When fishing with ultralight tackle, spinning anglers often use a leash made of fluorocarbon fishing line, and here there is a need to tie a carabiner (American) to the leash itself. To do this, I want to offer a couple of very reliable and simple nodes. I myself use these knots very rarely; to mount the American one, I use the Grinner knot. But I can say that many of my friends use these nodes, and so far without any complaints.