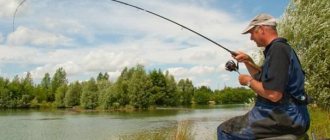
Legends of carp fishing in articles and interviews very often admit that if they began to re-assemble the carp arsenal, then, first of all, they would choose a marker fishing rod as the most versatile and in demand during the initial examination of an unfamiliar body of water or an unfamiliar fishing point. Why is it so important, how to use it and what equipment is required.
General information about the marker rod
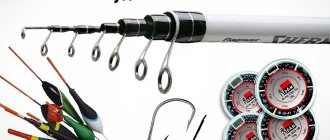
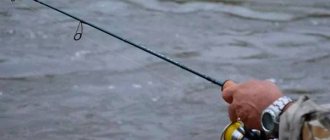
A marker fishing rod is required to study the bottom topography using a special marker weight and float equipment. The actual operation of the rod is simple: a marker tackle is thrown into the required place and, using suspenders, moving the weight along the bottom, the fisherman determines its characteristic features.
Marker sinker with steel pin
Unlike professional carp anglers, beginners try to use a working fishing rod instead of a marker. It seems that this option is quite justified, however, the carp blank is used to catch carp - large and powerful - and not to study the nature of the bottom, measure depths and determine, thanks to the collected information, promising places for fishing. If you use a working stick, the data obtained about the bottom topography will be inaccurate, so there is a huge risk of drawing incorrect conclusions and going home without fish.
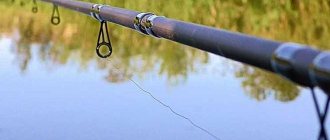
Marker fishing rods are loud, rigid, light, and therefore very sensitive. If you properly equip the rod, then any changes in the nature of the bottom will be reflected in the hand by corresponding vibrations. It’s difficult to describe this in words, but literally after a couple of casts even a beginner will be able to distinguish silted areas from dense areas, rocky and clay bottom.
Over time, the ability to distinguish obstacles at the bottom, edges, snags, etc. comes. So, it won’t be difficult to find out the area where carp may live. To make the rod even more noticeable in your hand, the markers are equipped with an elastic whip and flat bushings on the rings, which increases the surface of their contact with the cord and thereby makes the vibrations more sensitive.
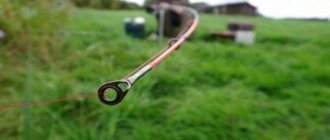
In addition, there are special marks on the markers at different distances, starting from the reel seat. They allow you to accurately determine the depth in the fishing area. In another case, marker rods strongly resemble working sticks.
Marking in carp fishing - fixing the fishing distance:
Types of marker cargo
It’s okay if you don’t have a special marker sinker. You can use a regular olive or a bullet with a soldered ring or swivel to secure it to the equipment. It is necessary to select the weight of the sinkers in accordance with the fishing conditions. For the near zone and picker - up to 40 g, for the middle sector - up to 80. For the far zone, sinkers of 100 - 120 g are suitable.
Read! Catching roach in the fall on a feeder
According to marker manufacturers, it is their sinkers that are the most reliable and ultra-sensitive, but this can only be considered a myth. The only thing that is important when taking measurements is to have your own feelings about the usual equipment. In the process, it is important to have personal experience in using this equipment.
The markers from the store are standard weights with side horns. According to the manufacturers, they are super sensitive. This purchase is unlikely to bring technical benefit, but is only suitable for replenishing a full-fledged feeder arsenal. In reality, long casting weights with wings may be necessary. The standard marking distance in the feeder does not exceed 80 m and only sometimes up to 120 m. A standard load can also be thrown at 80-100 m.
The use of special markers for long casts can be convenient when long-distance carp fishing at a distance of more than 120 m. However, this applies more to carp fishing.
It is possible to make marker sinkers yourself. In this case, you will need to cut the desired shape from plaster, caulk, or other material that can withstand molten lead. This is not tactically necessary, but only if there is a desire to make something. In real measurements, you can use a standard marker weight of the required weight.
Marker rod equipment and operating features
The main equipment of the marker includes:
- the rod itself;
- spinning reel;
- braided cord;
- shock leader tied at the end;
- marker weight and float.
Marker float
A shock leader, usually made of thick fishing line, is tied to a braided cord that is wound on a reel. Then, using a swivel with a ring, a marker weight is attached to the braid. A float is attached to the end of the leader. This completes the installation.
In very catchy areas, an extension made of leadcore without a core is installed between the swivel and the weight. One way or another, the equipment is very simple and does not cause any difficulties during assembly. However, it works effectively.
First, the cast is carried out into the supposed promising area. Then, when the weight falls to the bottom, the fisherman makes slow pull-ups, watching the rattling of the whip, feeling the vibrations that are transmitted from the weight along the cord and the fishing rod into the palm.
Naturally, rattling will not occur on a muddy bottom, unlike a shell. In general, the more experienced the fisherman, the more accurately he will determine the structure of the bottom. Having studied all the data obtained and correctly understood them, you can determine where the fish are feeding.
To measure the depth, you need to bring the float to the weight, which is located at the bottom, by pulling the cord. After removing the friction brake or switching the baitrunner, manually lower the cord to the set mark (usually 30 cm). And perform this procedure until the float appears on the surface. By multiplying the number of times by 30 when the braid came down from the spool, you can determine the depth in this place with an error of several centimeters.
Drawing marking
Marker float
What is it and most importantly - how should it be used? A “marker” is a fairly large / brightly colored float that is clearly visible even at a distance of more than 100 meters. Marker floats come in different shapes and displacements. The most popular models have a thin/long shape, somewhat reminiscent of a cigar. It must have a brightly colored top, on which stabilizers are located that do not allow the float marker to lose its trajectory during flight. Although, despite the fact that these products “fly” well, they still float up poorly (due to their small displacement). Therefore, strictly for certain situations, modern manufacturers also produce short/thick floats. Of course, they don’t fly quite perfectly, but they float up very well (thanks to their large displacement).
However, to work with a marker float you also need to have a special fishing rod. Why do we need it?
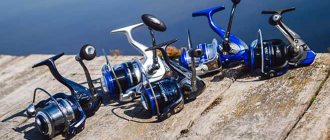
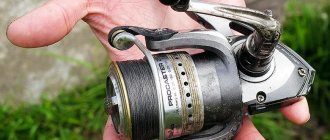
Coil selection
The marker spool must be:
- powerful;
- light
- be able to wind the cord (metal spool).
An important point is the geometry of the spool. Ideally, it should be classic or have a reverse cone. This shape will prevent tangles in the line and the appearance of beards, unlike Long Cast spools, which are mainly used for fishing lines installed for the actual fishing.
Next about the baitrunner. It seems that it makes it possible to easily release the cord when determining the depth. You just need to loosen the baitrunner, then just turn it on if you need to reset the braid. However, this mechanism itself makes the reel a little heavier, and also costs additional money, albeit small.
Products without a baitrunner are lighter, and, accordingly, the equipment is more sensitive. However, each time the cord is released, it will be necessary to loosen the friction brake, and this requires some time. Therefore, the fisherman needs to make a personal choice: sensitivity or comfort. Although today people still choose meat grinders with a baitrunner, since they are being made lighter and lighter.
Features and purpose of the marker for the feeder
At the bottom of a reservoir there can be many obstacles that affect not only the quality of fishing, but also the behavior of the fish. In holes and cracks, under stones and snags, she looks for food and hides from predators. These are the most suitable spots for fishing, so you should definitely look for them. Many people use an echo sounder, but if they don’t have one, a marker weight for the feeder will help.
You can buy it at any fishing store, and it’s also easy to do it yourself. It has a rounded shape with the addition of spikes, which are used to study the bottom relief. Passing through various obstacles, the device notifies the fisherman about them through vibrations and shocks and helps to determine the location of future fishing.
A marker weight is a common tool that will not be informative without certain skills and abilities. It may take a little time and effort to correctly interpret the signals coming from it. You also need to choose the right marker sinker depending on the fishing location and the nature of the reservoir.
We recommend reading
How to break through the bottom with a feeder and measure the depth to find a fishing point Catching fish on a feeder requires the fisherman to have an impressive amount of specific knowledge that will help him get serious…
Braid and shock leader
Reliable and thin cords are ideal for the marker. In this case, you immediately need to wind the required amount of braid onto the reel so that you can throw the tackle over a distance of more than 100 meters. Considering the likely arc that is blown by the wind, at least 150 meters will be required. Therefore, it is recommended to purchase a large reel, and then divide the cord for the spod and marker, or leave it in stock.
For the leader, a piece of thicker braid or fishing line is used. The latter moves the sinker better. At the same time, a little depreciation due to the stretchability of the fishing line sometimes helps.
Conical fishing lines are also often used, their thin part is tied to the main braid, and the thick part plays the role of a leader. By and large, you can do without this, but in this case there is a high risk of shooting off expensive floats and weights, as well as breakage of gear due to cutting off by shells.
We study the reservoir. Part 1. What is a marker? How to properly rig a marker rod?
Section: Articles about fishing
Hello, dear lovers of fishing and carp fishing in particular. Today we will talk about one of the most indispensable things in the equipment of a modern carp angler, like a marker.
In his fishing practice, perhaps every fisherman asked himself an insoluble question: where, and most importantly, at what distance to fish? And what is the bottom topography under the surface of the water at your favorite fishing spot? After all, upon arrival at a body of water (especially for the first time), the fisherman does not know either its depth or the composition and topography of the bottom at his chosen (or chosen by lot at fishing competitions) workplace. But good, I would say, thorough knowledge of the reservoir is the key to successful fishing, and in particular, if this is a “hunt” for large specimens of any fish, but, in my opinion, especially carp.
This fish very often stays in certain places, from where it is very often impossible to lure it out with the best food! Therefore, in order to successfully fish, you need to thoroughly research the place of the upcoming fishing, and correctly determine the working “tables” where you will feed and catch. To do this, you need to find at the bottom everything that is at least somewhat different from the general one. Such zones are promising places. This could be: a piece of hard bottom against a background of silt; depth difference (even not very significant); boundary of aquatic vegetation; a patch of snagged bottom; a section of the bottom covered with colonies of shells, and similar features and differences.
It is places like this that you should pay special attention to. Naturally, you can study the bottom of a reservoir from a boat using a sinker-lot, which sailors used in the old days (yes, often now) and also for measuring depths, or a more modern device - an echo sounder. Well, if for a number of reasons it is not possible to use a boat, and an echo sounder is still more of a toy, unaffordable for most of our fishermen, or at sporting competitions where the rules prohibit the use of boats and echo sounders, what to do in such cases? This is where a tackle with a special weight and a marker float will come in handy!
What is this float? The marker is a large and brightly colored float that is clearly visible even at a distance of over a hundred meters. But to work with a marker you need some equipment.
Marker rod equipment
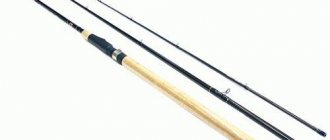
To work with the marker we will need: a carp rod 12 or 13 feet long (360 or 390 cm), with a test of 2.75 lbs for weights of about 85 g, or 3 lbs for a load weighing about 100 g, fast action. The rod blank is marked in the form of a kind of ruler with marks of 5-10 cm, and so on from 0 to 50 cm. Using these marks you will measure the distance until the float rises when measuring depths.
The rod is equipped with a spinning reel with a long and shallow spool (long cast). It would be useful to have a baitrunner, since when measuring depths and releasing the fishing line, you won’t have to constantly release and tighten the friction brake, but only work with the flag to turn it on and off. We wind braided fishing line with a diameter of 0.18-0.22 mm onto the reel spool.
The last 16-18 meters are a shock leader (depending on the expected depth in the reservoir) made of monofilament fishing line with a diameter of 0.40-0.45 mm (or we use a standard conical “leader”, which is commercially available).
And this is why a monofilament leader is needed: a braided cord practically does not stretch and, due to this, more clearly conveys the movement of the load along the bottom, but it is soft, and therefore during casting it can twist around its axis and overwhelm the float, which simply cannot float up, The monofilament shock leader is much more rigid and does not get tangled when casting. We will also need a marker float, a marker sinker and accessories.
Installation of marker equipment
Having assembled the rod and reel in the “fighting” position, we pass the free end of our shock leader into the eye of the sinker, put on a stop bead to protect the knot on the float and tie our float.
So, our tackle is ready for work. And here I want to remind you that the marker equipment should be as harmonious as any carp equipment, because floats and sinkers come in different designs. Markers vary in carrying capacity: light (they have a tall, elongated body and have a longer flight range) and heavy (they have a thicker body and fly worse, but due to their greater displacement they float faster). Therefore, when selecting a sinker and float, it is necessary to take into account their weight and carrying capacity.
Float and weight
The marker float comes in various designs, however, a prerequisite for any model is good flight characteristics. In other words, it must have excellent aerodynamics. For this reason, all products are equipped with stabilizers that balance the position of the float in flight. In addition, all designs are certainly painted in bright colors. This is necessary so that the float is visible from afar.
There are special illuminated designs for fishing at night, which are equipped with diodes and batteries. Certain models can be equipped with fasteners where “fireflies” are installed.
Marker weights also differ from their classic counterparts in the installation of very large spikes, designed to catch on any unevenness in the bottom, transmitting information about this to the fisherman.
Marker installation
We study the reservoir. Part 1. What is a Marker? How to properly rig a marker rod?
July 21, 2021 Avid fisherman Articles about fishing 135
Hello, dear lovers of fishing and carp fishing in particular. Today we will talk about one of the most indispensable things in the equipment of a modern carp angler, like a marker.
In his fishing practice, perhaps every fisherman asked himself an insoluble question: where, and most importantly, at what distance to fish? And what is the bottom topography under the surface of the water at your favorite fishing spot? After all, upon arrival at a body of water (especially for the first time), the fisherman does not know either its depth or the composition and topography of the bottom at his chosen (or chosen by lot at fishing competitions) workplace. But good, I would say, thorough knowledge of the reservoir is the key to successful fishing, and in particular, if this is a “hunt” for large specimens of any fish, but, in my opinion, especially carp.
This fish very often stays in certain places, from where it is very often impossible to lure it out with the best food! Therefore, in order to successfully fish, you need to thoroughly research the place of the upcoming fishing, and correctly determine the working “tables” where you will feed and catch. To do this, you need to find at the bottom everything that is at least somewhat different from the general one. Such zones are promising places. This could be: a piece of hard bottom against a background of silt; depth difference (even not very significant); boundary of aquatic vegetation; a patch of snagged bottom; a section of the bottom covered with colonies of shells, and similar features and differences.
It is places like this that you should pay special attention to. Naturally, you can study the bottom of a reservoir from a boat using a sinker-lot, which sailors used in the old days (yes, often now) and also for measuring depths, or a more modern device - an echo sounder. Well, if for a number of reasons it is not possible to use a boat, and an echo sounder is still more of a toy, unaffordable for most of our fishermen, or at sporting competitions where the rules prohibit the use of boats and echo sounders, what to do in such cases? This is where a tackle with a special weight and a marker float will come in handy!
What is this float? The marker is a large and brightly colored float that is clearly visible even at a distance of over a hundred meters. But to work with a marker you need some equipment.
Marker rod equipment
To work with the marker we will need: a carp rod 12 or 13 feet long (360 or 390 cm), with a test of 2.75 lbs for weights of about 85 g, or 3 lbs for a load weighing about 100 g, fast action. The rod blank is marked in the form of a kind of ruler with marks of 5-10 cm, and so on from 0 to 50 cm. Using these marks you will measure the distance until the float rises when measuring depths.
The rod is equipped with a spinning reel with a long and shallow spool (long cast). It would be useful to have a baitrunner, since when measuring depths and releasing the fishing line, you won’t have to constantly release and tighten the friction brake, but only work with the flag to turn it on and off. We wind braided fishing line with a diameter of 0.18-0.22 mm onto the reel spool.
The last 16-18 meters are a shock leader (depending on the expected depth in the reservoir) made of monofilament fishing line with a diameter of 0.40-0.45 mm (or we use a standard conical “leader”, which is commercially available).
And this is why a monofilament leader is needed: a braided cord practically does not stretch and, due to this, more clearly conveys the movement of the load along the bottom, but it is soft, and therefore during casting it can twist around its axis and overwhelm the float, which simply cannot float up, The monofilament shock leader is much more rigid and does not get tangled when casting. We will also need a marker float, a marker sinker and accessories.
Installation of marker equipment
Having assembled the rod and reel in the “fighting” position, we pass the free end of our shock leader into the eye of the sinker, put on a stop bead to protect the knot on the float and tie our float.
So, our tackle is ready for work. And here I want to remind you that the marker equipment should be as harmonious as any carp equipment, because floats and sinkers come in different designs. Markers vary in carrying capacity: light (they have a tall, elongated body and have a longer flight range) and heavy (they have a thicker body and fly worse, but due to their greater displacement they float faster). Therefore, when selecting a sinker and float, it is necessary to take into account their weight and carrying capacity.
To be continued…
Thank you all for your attention! No tail, no scales, fishermen!
on social networks: Catching a predator within the city. Interesting fishing Last week there was only one free day off, it was not possible to go somewhere far away, so I decided to take a friend and go to my favorite river within the city. On Friday I called my friend, he didn’t think for a long time, so we’re going. We meet at the place at 3:45 and slowly get ready.
Source: https://fishmanual.ru/statyi/1903-izuchaem-vodoem-chast-1-chto-takoe-marker-kak-pravilno-osnastit-markernoe-udilishche.html
What else you need to know about markers
As you can see, a sensitive, but at the same time powerful marker rod makes it possible to provide accurate information about the bottom topography and point out promising areas for catching fish. Often fishermen mark the bait point using a bright float as a guide. In fact, why bother reeling out the marker before baiting as the float is the perfect guide.
This point can be baited with rockets, thus creating a dense bait table using spod rods. In addition, in certain situations, the marker float is in its place the entire time of fishing, so as not to lose sight of the baited area. There is only one important point: marker equipment is sometimes confused with the line of a working fishing rod when fishing for carp.
Feeding rocket
In addition, it is quite possible to use a marker fishing rod as a working stick. There, more in the initial stages, if it is not possible to purchase all three types of carp rods at once:
- marker;
- workers;
- spod.
Making a marker map for beginners:
Using a marker fishing rod as a working one, you just need to replace the spool with braid with the same one, but with fishing line. This is not difficult to do, given that most reels today come with a second spool. Well, of course, it is necessary to take into account that a marker rod has a thinner whip, which sometimes breaks if excessive force is applied while casting the tackle. Therefore, you need to be careful and everything will be fine.
Homemade marker gear
Any fishing begins with choosing a fishing spot. In order not to make a mistake in this, you need to know the bottom of the reservoir. Nowadays, the bottom is most often explored using marker gear. But a real branded marker is quite expensive. Is it possible to replace this fishing device with something homemade made from cheap components? Let's consider this possibility in more detail.
How to examine the bottom with a marker
The idea of marker research is simple. At the end of the fishing line, a float is tied, and a sliding, heavy and horned sinker is installed on the fishing line. This equipment is thrown into the reservoir with a special powerful and long rod equipped with a reel.
The process of exploring the bottom with a marker
- After casting, the sinker falls to the bottom, and the float floats up, pulling the line from the reel.
- When the fishing line is pulled up by the rod, the float sinks and rests against the sinker at the bottom.
- Then the line is released until the float floats up, counting the number of turns that come off the reel. The number of turns (the float's ascent distance) determines the depth at the location of the sinker.
- Then the line is again reeled in until the float stops against the sinker (the float is drowned) and the sinker is slowly pulled along the bottom to a distance of 4 - 5 meters.
- Pulling up the sinker is done with a rod without the participation of a reel. To perform the reeling process, the rod is simply raised from a horizontal position to a vertical position. And the tip of the rod covers a distance of these same 4 - 5 meters.
What is being investigated, what is the result?
During the pull-up, the sinker, clinging and resting against the unevenness of the bottom, conveys the character of the bottom through the fishing line to the rod, and the fisherman can easily distinguish by its vibrations whether there is clay on the bottom or silt, shell rock or stone.
Thus, in one measurement cycle, the fisherman receives at least 4 approximate characteristics of the bottom patch under study:
- direction relative to your location;
- distance from the shore;
- depth at a point;
- characteristics of the bottom (subjective);
Then pulling up and measuring the depth and nature of the bottom is repeated along one line - from the casting point to the angler.
What is included in the marker equipment?
Such branded equipment comes with a hefty price tag. The set of marker gear for bottom research should include:
- special fishing rod 5 meters long or more,
- powerful reel, always with a bayrunner,
- network,
- special sinker
- specialist. float,
- as well as small installations.
But by installing the equipment, you can get an excellent marker fishing rod for carp fishing, allowing you to explore the bottom from the shore at a distance of 100 meters or more.
What can be used cheaply?
Now let's start simulating marker fishing equipment with cheap surrogates. We apply:
- “from an unknown manufacturer” the spinning rod is as powerful as possible with a dough of at least 150 g. 3 meters long
- simple inertial coil of the “Nevskaya” type,
- domestic monofilament fishing line, diameter 0.6 mm,
- foam float with an approximate load capacity of 20 g.
- installations, in particular a persistent buffer under the float, so that the line is not cut off by the sinker.
How to make a sinker for a marker
There's a problem with the sinker. It must be covered in pimples and horned. Just a round piece or plate will not work, since it will not have the desired effect when it is dragged along the bottom. You either need to buy a special sinker, or you can try to make it yourself.
You can use a grinder (hammer and chisel) to cut pieces of wire rod with a diameter of 6 mm or take long bolts. Then tie them with wire so that they form a hedgehog. For reliability, fill it with epoxy and wrap it with fishing line. The result should be something similar to an underwater mine weighing 100 - 150 grams.
The float is tied at the end of the fishing line, and a shock-absorbing limiter is put on between the float and the sinker. The sinker is installed on a 10-20 cm leash made of the same thick fishing line, at the end of the leash there is a swivel - which will slide along the main fishing line.
When making a homemade design, the important thing is that you can completely simplify and make a lightweight marker with a regular commercial sinker and a light spinning rod - such a marker can be assembled while fishing in a matter of minutes...
How to do bottom research in theory
The resulting gear can be used to cast 50 meters, and the thick fishing line does not scare you with a beard on an inertia-free reel. In addition, it is convenient to reel in the fishing line and calculate the depth when lifting the float on this reel without any baitrunner.
Now all fishing can turn into exploring a reservoir, since this activity is quite exciting and learning new things is always interesting.
Typically, research must be done from the fishing location in several directions. When dragging the marker, all measurement results are recorded on paper. By dragging the marker along several lines spaced 5 - 10 meters from each other, we will get 30 - 40 meters of the explored width, and a map of the bottom of this area will be drawn on paper.
Information about the bottom of a reservoir in practice
But the theory can be simplified. If you find a promising place, an edge, a boundary between clay and stone, a depression, then you can leave a marker at this place, tighten its line so that the float sinks exactly above the sinker, and cast with gear aiming at the marker float. Limit the distance on the tackle reel with a clip. You don’t have to remove the marker from the water at all, and bait and fish at a certain distance from the marker in one direction or the other.
The result of all efforts is new information about the reservoir. And information is the most valuable thing. In any case, such a homemade device will significantly enrich you with information and increase your chances of successful fishing.