How to install
First, stock up on tools and measuring instruments (you will need a long ruler and a square). Prepare a marker for marking.
We will need the following tools: wrenches (you can replace them with a ratchet with a head), high-quality drills, a screwdriver (check before use, there should be no runout, i.e. chuck play), sealant (a small tube will be enough) and, of course, an installation kit bolts Also prepare a small rectangular piece of plywood, it will be needed to avoid chipping. A vacuum cleaner will help remove dust after drilling plywood.
Installation of transom wheels
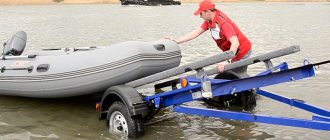
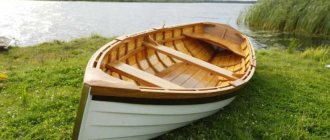
A necessary accessory for launching a watercraft, especially at a distance from the water.
All Navolne73 wheels are made of galvanized pipe and are available in the following modifications:
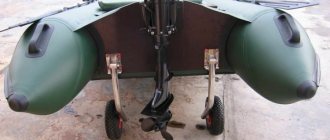
- Wheels - TR (transformer) is a system with a folding stand with wheels. The stand is attached to brackets to the rigid transom of the boat. When moving through water, the stand rises up 180 ̊.
- Wheels - M (mobile) The stand with wheels is fixed on brackets; it can be removed when moving on water.
Both modifications can be produced with twin wheels. The design of the wheels takes into account the features of boats equipped with an interceptor.
M, TR wheels are designed to transport boats with a maximum weight of up to 100 kg (boat+motor+equipment)
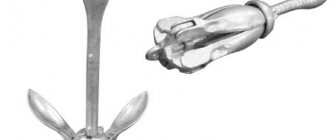
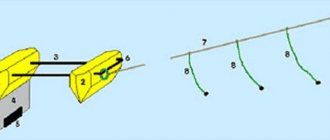
FIGURE 1.1 shows the working stowed position on the boat.
Mounting wheels on a boat
In order to begin work on installing the wheels, you need to install the fully inflated boat so that its transom is raised above the ground by 30-40 cm. This can be done using a suitable transom stand.
Next, on the transom of the fully assembled boat, it is necessary to determine and place the mounting locations for the wheel brackets. Places must be selected in such a way that:
- In the working position, the wheels stood as wide as possible; there was a gap of at least 20 mm between the upper edge of the wheel and the bottom of the boat (Fig. 2.1)
- In the stowed position, the wheels did not touch the boat cylinders (Fig. 2.2)
Draw marking lines along the inner and upper edge of the bracket (Fig. 2.1-2.3). The line along the inner edge of the bracket should be perpedicular to the top plane of the boat (Fig. 2.1). Symmetrically mark the installation location of the second wheel bracket on the other side of the transom.
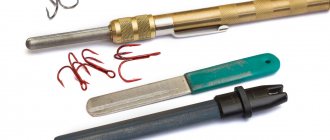
To install you will need:
- pencil
- ruler or tape measure
- triangle (corner)
- drill
- wood drill bit D8
- Phillips screwdriver (PH/PZ 4 or 5)
- key for 13
- moisture resistant sealant.
After marking, you need to once again check the gaps between the wheels and the boat hull on both sides.
Using a D8 drill, drill a hole according to the markings (it is better to use a special wood drill; this way you will eliminate the possibility of damaging the top layer of the transom at the drill exit).
Before installing the brackets, treat the hole with moisture-resistant sealant.
Using the screws provided, install the brackets in the sequence shown in Fig. 3.
ATTENTION! Standard M8*50 screws are suitable for installing wheels on boats with a transom thickness of 35-37 mm. To install wheels on boats with a thinner transom thickness, the screws must be shortened. To determine the required length of the screw, you need to add 15mm to the thickness of the transom. For example, if the transom is 25 mm, the length of the screw should be 25+15=40 mm.
ATTENTION! Wheels are not designed to tow a boat by any means other than human power.
Damage to parts of the transport wheels caused by towing the boat with a vehicle or other unauthorized means is not covered by the warranty.
Best models
Below are some models of transom wheels that have received the most positive reviews from anglers:
- Sun Marine 260 mm - on straight stands made of stainless steel; the design is powerful and reliable, suitable for moving the boat on any surface.
- Laker Transom Wheels - have a convenient design, installation and fastening are carried out quickly, after which even a heavily loaded boat can be easily moved by one person. The main advantage that distinguishes this model from its analogues is improved transportation over rough terrain.
- Horizon KN-260 – removable transom wheels on curved racks of domestic production with the possibility of fixing in the upper and lower positions. The model is highly durable, the design can withstand loads of up to 450 kg.
- Horizon KNU-330 is an enlarged and additionally strengthened version of the previous model. The ability to change the position of the wheels allows you to conveniently move the boat when in the water or on land.
- TKM is a manufacturer that produces various versions of transom wheels, including a model for PVC boats. This design is of a removable type; it can be fixed in two different positions for water or land, and the absence of bearings has a positive effect on the service life of the system.
Advantages of homemade wheels
Today on sale are various quick-release, folding wheels for PVC boats, as well as other types of designs. They are made of materials that are not subject to corrosion. If the wheels are made of metal, the surface must be treated with special compounds. The presence of defects on the material indicates low quality of the product.
Read Techniques and tactics of fishing with an elastic band and its installation with your own hands
The cost of purchased structures for transporting a boat can reach 10 thousand rubles. Not every fisherman can allocate a similar amount of money from the family budget to purchase wheels. Homemade structures cost about 2 thousand rubles.
These wheels are ideal for a PVC boat. When creating them, you can take into account the configuration and features of the vessel. In this case, you can create a stable, durable structure. It will serve its owner for many years. Wheels can be purchased at specialized stores. But you can make the frame and supports yourself.
For PVC Viking boat
The Viking boat is the younger brother of the Kasatka boats from the Poseidon company. It has less deadrise. When installing transom wheels, you should take into account the placement of the brackets above the holders (stops) of the floorboards. On the Viking and Kasatka boats there are triangular aprons between the upper edge of the transom and the cylinder. If the wheels are too close to the cylinders and long racks will rest against these aprons.
Installing transom wheels is a simple operation that can be performed by any water-powered boat. It will significantly lighten the load when moving a boat with a motor alone on the surface, launching it into the water and lifting it ashore.
Functions
The functional tasks of transom wheels include:
- Simplify the process of delivering a boat from shore to water.
- Make the craft mobile.
Considering the significant weight of a boat equipped with an outboard motor, lifting and moving it to the right place is already difficult for one person.
Of course, you can call for help, but why, when transom wheels are provided for such purposes.
They are the ones who make it possible for the owner to save strength, to freely deliver the vessel to the reservoir and to provide a good mood for fishing.
The name of the accessory determines their mounting location; they are installed on the rigid transom of an inflatable boat. Thanks to such a simple device, one person can easily do without outside help to launch an equipped vessel into the water and then lift it ashore.
The main thing is to correctly fix the fastenings to the transom once, so that you can use them without problems in the future.
Advantages
Do-it-yourself transport wheels for PVC boats have a fairly large number of advantages:
Save time. Of course, everyone understands that wheels will help significantly speed up the process of unloading the boat. If this is an inflatable boat, then you won’t have to carry a heavy load from the car to the pond, but you can simply take it out, inflate it and bring it. It's much more comfortable.Read here - Do-it-yourself fishing gear: making equipment, catchy models and practical advice from experts (105 photos and videos)
Unlimited service life. These devices can last for a very long time, you just need to take care of them. Try not to run into screws or other sharp objects, otherwise the tires will require replacement. Typically, such structures last quite a long time.
Comfort. Naturally, this advantage is one of the most important. Many people simply love it when everything goes smoothly and without difficulties. These wheels allow you to do everything perfectly.
Mobility. Such wheels, as a rule, take up extremely little space, which allows them to be considered mobile. They can be stacked on top of each other, then you won’t even notice that they are in the trunk.
Check it out here too!
How to make a fishing screen: description and step-by-step instructionsFishing knots diagrams: the best fishing knots for all occasions
How to make a fishing hook at home: master class with photos
Comfortable handling of the boat. The transport wheels have very good controllability, which makes it easy to turn and radically change the direction of the boat.
Ease of construction. If you look at the drawings of boat wheels, which, fortunately, are abundant on the Internet, you can be convinced that the design is quite simple to manufacture and does not require any special skills.
How to do it yourself?
First of all, you need to decide on the available dimensions of a particular boat so that the installed chassis does not interfere with the control of the vessel.
Required materials and tools:
- 2 wheels with a diameter of 35 cm and a width of 60-80 mm.
- Square profile with a cross section of 25×25 mm made of stainless steel.
- A tube with a suitable diameter for installing wheels.
- Cotter pins, washers, bolts, and nuts are suitable as fasteners
- Hacksaw , pliers, wrench, electric drill.
Step-by-step manufacturing guide:
- We determine a place for mounting on a square profile transom (without compromising the operation of the outboard motor).
- We measure the section down , taking into account that the wheels should be placed slightly below the lower edge of the transom by the length of the radius with the addition of 5 cm. This size will allow you to achieve the desired level of safety and reduce resistance while the vessel is moving.
- The bracket for installing the chassis can be either straight or at an appropriate angle. The first version is considered the most reliable and affordable in production. There is less welding work and the one-piece bracket can withstand heavy impact.
The second design, where the bracket is welded at an angle, assumes that the wheels are located under the bottom of the boat, without interfering with the operation of the outboard motor.
Here you need to cut off 4 pieces of suitable length from the profile for a specific watercraft. Using welding, weld the tubes (for attaching the rings) to the bottom of the profile.
Drill a through hole in the tubes to secure the rings using a cotter pin. In addition, a nut with a suitable diameter must be welded to the inner ring of the tube to prevent the product from being pressed against the fasteners.
It is better to install a plastic or rubber stopper at the outer end to prevent moisture from getting inside.
In the upper part, an electric drill is used to make 2 holes through which the chassis is mounted on the transom.
2 finished parts of the fastening are connected by welding. The permissible angle between them is 35-45 degrees. If necessary, the ends can be trimmed.
Upon completion of all work, the chassis is mounted on the tubes and secured with washers. The product is ready. If possible, fasteners can be painted.
Drawing:
Design elements: