//More details here//
Reinforcing the boat with film
Lifetime Promotion! One patch as a gift! You can come to us and we will repair your boat absolutely FREE!!!
Terms of action:
The promotion applies to minor (up to 2 cm) damage to the bottom or cylinders of the boat. If necessary, in accordance with the price list, diagnostics, removal of old glue, and other additional work are paid separately. The promotion does not apply to repairs of seams and damage exceeding 2 cm.
Honest answers to frequently asked questions:
When can I come?
Any day, from 10 to 20.00, by calling us in advance.
Where are you at?
You can get to us from Otkrytoe Highway by turning onto Tagilskaya Street, reaching its end, turning right, again to the very end. You will see a barrier on the right. From it, 20 m to the left is our gate (second in a row). .
Working hours?
We work seven days a week from 11-00 to 20-00 on weekdays. Saturday from 11 to 18. Sunday - CLOSED!
Is there an entrance from Shchelkovskoye Highway?
No! To get to us from Shchelkovskoye Highway, you can use Montazhnaya Street or a temporary storage warehouse. There is no direct passage along Tagilskaya Street.
Do I need a pass?
No, entry into the territory is free. If they ask, you can say that you are going to a boat repair service!
Is there access by car?
Yes, right to the workshop gates.
Do you have parking?
Yes, we have our own parking for clients!
Can you be reached on foot?
20 minutes to us. walk from the metro/MTSK Rokosovskogo Boulevard (formerly Podbelskogo Street). Exit from the last car from the center..
Can you help me with loading and unloading the boat?
Yes, sure! We help everyone.
Can you come to me?
Yes, we provide on-site repairs.
Can you take my boat?
Yes, we have a boat delivery service. 1000 rub. in Moscow, 30 rubles/km for the Moscow Ring Road.
What form of payment?
Cash or transfer to card.
Do you work with legal entities?
Yes, we work using non-cash payment.
Is it possible to bring a boat on a trailer?
No problem. Bring it and, if necessary, leave it with the trailer.
Do I need to register?
There is no need to register, but it is better to notify about your arrival.
Is there a queue?
Yes, we fulfill orders in the order they are received.
How long will the repair take?
The average repair time is from three days to 2 weeks and depends on the complexity and queue at the moment.
Do I have to leave the boat or can I just wait?
Depends on the complexity of the work. One or two patches, replacement of valves and other minor work will be done quickly and in front of you!
Are the prices on the website current?
Yes!
How much will the repair cost?
Prices for standard work are available on our website. We are also ready to advise you by phone.
When I arrive, will the price quoted over the phone change?
We always give real prices over the phone!
How will I know that I have not been deceived?
It’s very simple - we diagnose the boat in front of you. We fix all prices.
My boat is launching, but I don't know where! What to do?
Bring it to us for diagnostics.
What is included in the diagnosis?
Loading - unloading, pumping up the boat, identifying ALL damage, full assessment of the work, filling out the form, consultation, stowing the boat.
Will the cost of the work change after the boat is delivered to you?
Don't change a single item on the list. If complications arise during the work, or additional work that affects the total cost, we will notify you about this.
Will there be a guarantee?
Yes, depending on the type of work from 6 months to 2 years.
What is your guarantee?
In conclusion, you will receive a warranty card on company letterhead, with a stamp and a list of all work.
What glue do you use?
We use a wide range of specialized two-component hot and cold cure adhesives.
Do you repair boat motors?
Yes!
Are accessories available?
We always have a large assortment of domestic and imported accessories for boats.
Is it possible to buy glue and pvc fabric?
Can. We sell two-component glue and boat pvc at retail.
Can I make a special order?
Yes, we do custom orders.
If I bring my own glue/accessories/material, will there be a discount?
It will be, but significantly less than the price you paid for them, because... We buy materials in bulk.
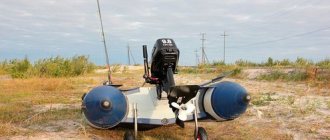
Repair in the workshop
Damage occurs of various types. Many people logically ask whether the workshop can handle complex and rare cuts or punctures? If the problem takes up more than half the ship, there is always a solution.
Below is a list of work that is usually performed by almost every repair company:
- repair of cuts;
- transom repair and replacement;
- manufacturing a new transom from “marine” plywood (bakelite);
- seam repair;
- repair of inflatable bottom (low and high pressure);
- keelson repair;
- installation of a new valve.
The damages listed above are the most common. However, companies often offer not only to restore integrity, but also to modernize.
Among the new qualities that a ship acquires after tuning are the following:
- reinforcement of the bottom with special PVC tape;
- armoring the bottom by covering it with a PVC cord layer;
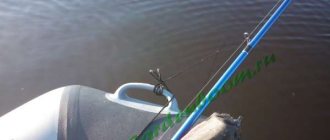
- equipped with mounts for echo sounder and fishing rods;
- installation of an anchor eye;
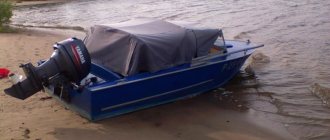
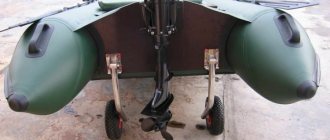
- installation of transom wheels for moving on land;
- number marking;
- installation of additional accessories (handles, towing rings, guard washers);
The transom is considered the main part of a mobile watercraft. This is a flat cut on the stern for mounting the motor. Due to the heavy load, over time it begins to break, rot, become loose or peel off. If the transom board is still in good condition, then the entire mechanism can be repaired. If the board is damaged, it can also be successfully replaced.
Replacement work includes the following:
- dismantling all accessories on the transom;
- dismantling (disposal in case of breakdown) of the transom board;
- preparing the seat for installing a new transom (cleaning, degreasing);
- making a new transom;
- installation of a new transom board;
- installation of reinforcing elements;
- sealing joints;
- installation of fittings and nameplate.
DIY PVC boat repair
You can eliminate cuts, burns and punctures on your own. True, if this is not serious damage, the repair of which requires sophisticated equipment. These are mostly minor violations.
To fix the bot yourself you will need:
- repair kit (comes with the boat upon purchase);
- metal roller or plate;
- scissors;
- a hair dryer (a household hair dryer is also suitable if it is powerful enough);
- brush and pencil;
- solvent.
If the problem takes you by surprise far from civilization, then in the field you can deal with it with a repair kit, a lighter and a knife.
The gluing procedure is quite simple:
- prepare a patch of the required size;
- straighten the damaged area;
- clean the gluing area from dirt and build-up;
- degrease with solvent;
- apply a patch;
- apply glue with a brush along the edges of the patch;
- repeat the procedure again after 15 minutes;
- for good adhesion, the patch is heated;
- applying a patch to the puncture site;
- leave to dry for at least 24 hours.
Avoiding mistakes when repairing a PVC boat yourself
In general, simple repairs to a PVC boat, such as patching a hole, are not such a difficult task.
But even here, it is necessary to follow some rules so as not to make things worse.
Remember that you do not need to clean the damaged area with rough material (sandpaper, scraper), use glue that is not suitable for polyurethane, or try to heat the glue, trying to set it on fire.
And it’s better not to undertake repairs if you don’t have invisible tools or self-confidence at hand.
The best decision is to trust the professionals and be calm about your safety while fishing.
Types of damage to PVC boats
PVC boat cut
However, a hole in a boat is not the only problem that can happen to it.
PVC boats are also equipped with various spare parts and mechanisms that can also fail.
This may be due to either the negligence of the owner of the product or mechanical damage that a person does not expect to receive.
The main types of damage are punctures, cuts, scratches, snags, holes, burns, rodents.
Causes of damage to PVC boats
The main reasons why a boat can fail are:
- puncture or cut of the boat, which may occur due to careless handling of hooks or a knife;
- a scratch on a boat can be dangerous because if ignored, the fabric can come apart and create a hole at the most inopportune moment;
- a large hole can form when, while moving, you accidentally run into sharp fittings or a stake sticking out of the water;
- burning a boat due to careless handling of cigarette butts or matches and a lighter;
- damage resulting from attacks by mice or rats, or improper storage of the boat in a garage or shed.
Special repair of PVC boat
From time to time, every boat owner experiences special damage. Large cuts, jagged and torn edges.
Various severe injuries
In case of large damage and tears, when it is difficult to connect and seal the edges of the cut, experienced fishermen recommend:
- Wash and dry the damaged area well;
- For convenience, spread on a flat surface and degrease;
- Pre-sew the edges of the tear, and then begin preparing and gluing the damaged area.
Complex damage requires complex repairs. However, even one can cope. You will have to install two patches at the same time. One is placed inside the damage, the second is glued to the outside. To make it easier to glue the patch inside the boat, use a special device, a clamping hook .
PVC boat tuning
Tuning a PVC boat
After updating the boat, some owners want to make their vessel more modernized.
So, for example, some reinforce or even armor the bottom with special PVC tape for greater reliability.
Also, if desired, you can install transom wheels to allow movement on land or attach numbers to the boat.
And for convenience and comfort, some people prefer to install additional handles, guard washers, towing rings, equip the boat with a mount for fishing rods, etc.
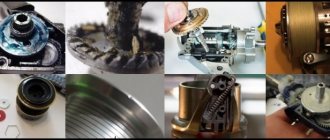
valves
As you know, there are no minor breakdowns in the design of an inflatable boat. Each damaged part will sooner or later lead to the scrapping of the entire vessel. To prevent this from happening, it is necessary to promptly pay attention to “signals” about required repairs. One of these is the permeability valve. Do not rush to seek the help of a specialized repair service. Repairing valves yourself is an intimidating but doable procedure.
Important! Check the valve for leaks before each trip to the water. Lubricate it with soapy water and place it in water. Bubbling is a sign of poor sealing.
Main causes of valve damage:
- Detachment of connecting tissue;
- Destruction of valve parts;
- Adverse weather conditions (low temperature, accumulation of moisture);
- The human factor of careless exploitation.
To repair the valve you will need:
- Solvent;
- Automotive lubricant;
- Sleight of hand.
Valve repairs are carried out in the following order:
- Bleed the boat.
- Grab the base of the valve and secure it firmly.
- Insert the wrench supplied for repair into the valve base and slowly turn it clockwise.
- Disassemble the valve.
- Clean the valve from dirt, dust, and natural debris.
- Lubricate with automotive lubricant.
- If cleaning does not help and the valve is poisoning, the valve must be replaced.
How to seal a rubber boat with your own hands: step-by-step instructions
Gluing a boat requires preparing the necessary tools, materials and the boat itself.
The process is labor-intensive and painstaking, but it costs much less than buying a new boat. All work can be divided into:
- Preparation of the required tools;
- Identification of the gap;
- Surface cleaning;
- Sealing.
We will consider each point below in more detail.
Required Tools
- Pieces of rubber that exceed the size of the hole;
- Specialized glue that meets all requirements;
- Scissors;
- Marker;
- Sanding paper;
- Brush.
Determining the location of the rupture
First you need to determine the place where the boat allows air to pass through, this can be done this way:
- It's good to pump up the boat;
- Send her into the water.
Carefully inspect all sides for the formation of bubbles; if they are absent, then the boat can be turned upside down; mechanical damage may have occurred on top.
Once the spot has been discovered, it should be circled with a waterproof marker so that when the boat is deflated it will be easier to spot the hole.
The corners of the material must be rounded.
Surface treatment
Having discovered the rupture site, it should be carefully treated to remove dust and other types of contamination:
- Sand the edges with sandpaper and treat the area with a specialized product;
- The area must be dry, otherwise there will be no effect.
Only after all stages can you proceed to gluing.
Gluing
- Apply glue to the surface of the boat and to the material that you plan to use as a patch;
- Fix tightly for 1 minute;
- Then leave until completely dry.
If gluing occurs with the appearance of excess glue, it can be removed after drying by rubbing with your finger.
How to find the damage location of a PVC boat
Inspecting a PVC boat for damage
The main and first rule in case of problems with a boat is to correctly determine the location of the damage.
The surest way is to lower the area where the product is supposed to be damaged in water and look carefully. Where water is leaking or air bubbles are coming from, there is a problem.
Then, you can fix the hole yourself (carrying out the necessary repairs on site) or lower the boat and go to a workshop.
PVC boat repair at home
There are no difficulties in repairing a boat at home. There are general recommendations that need to be taken into account and followed. Let's not talk or write much, let's move on to step-by-step instructions for gluing.
We have a PVC boat in front of us and our task is to glue the cut together without resorting to the help of professionals.
We also recommend reading:
Features and technical characteristics of boats of the “Crimea” series Russian outboard motors for a boat Which plastic boat to choose for a 5 and 10 liter motor with The structure of an inflatable boat Badger
- We prepare the boat: thoroughly clean all the dirt, wash the surface and dry the area of fabric that needs repair. It is not advisable to treat the puncture site with sandpaper. Sanding will damage the material and reduce its wear resistance. Lay the boat out on a flat surface.
- For degreasing, a solvent is best suited. As a last resort, if there is no solvent, you can clean it with alcohol or acetone.
- We decide on the size of the hole and cut out a larger patch, with a margin of a couple of centimeters all around. For the patch, we use the material from the repair kit, if available, or select its equivalent.
- Using a pencil or ballpoint pen, mark the border of the patch on the hull of the boat, placing it on the place planned for gluing.
- We collect glue with a small brush and carefully coat the entire surface of the future connection. Well lubricate the surface on the boat hull and the patch itself.
- The first layer is like a primer. We wait 15 minutes until the base hardens. Then we apply a second layer of glue on both planes of contact.
- Now all that remains is to warm up the glue base with a hairdryer. We wait five minutes and warm up the patch and the cut itself a little with a hairdryer. There is no need to dry the glue, you need to heat the surfaces.
- We combine the surfaces along the previously drawn contour. We carefully ensure that they match. It is necessary to iron it with something heavy in order to expel any possible air bubbles from under the patch.
- A cut larger than five centimeters is considered large. To eliminate it, two patches are installed. In the above way, only one inside the other. This is done to better guarantee strength, thus ensuring a sealed and durable repair. The first patch is 2 cm larger than the cut, and the second is 2 cm in circumference, larger than the first patch.
For what problems is it possible to repair a PVC boat yourself?
Repair kit for a PVC boat
The degree of complexity of the problem and the possibility of repairing problems that occur depend on the nature of the damage to the boat.
If this is an ordinary scratch, snags or a small puncture, then you can easily cope with it with the help of a repair kit, but if the transom is out of order, other elements are damaged or a large hole is obtained, then most likely there is no way around it without contacting a specialist.