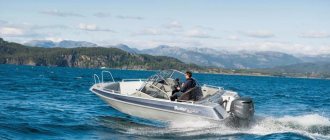
How to properly install a motor on a PVC boat
This season was very busy with motorized fishing, we managed to go around the river and reservoir on different motors, both by name (these are different brands) and by the number of horsepower! It is clear that each of us has our own fishing conditions, preferences, tasks, opportunities, but the issue of choosing and installing a motor if you want to use it cannot be done anyhow, this is a very serious issue that requires great attention, since it carries a lot of serious aspects on which not only the quality of fishing and comfortable movement on the water, but also safety depend. In order not to overload the forum, I decided to start a dialogue on these issues in this short article, and then with pleasure and with the help of other fishermen, discuss these subtle issues in the forum
I think this will be useful not only for beginners, but also perhaps for experienced fishermen. The question is very serious, with a huge number of nuances, so I think it would not be superfluous for us all to explain and advise each other, to share our experience...
When you purchase a boat motor, as a rule, it comes with an instruction manual/passport, which explains and shows how to install the boat motor! But as practice has shown, as in any business, in fact there are a lot of nuances, because, as I said earlier, everyone has different opportunities, conditions, tasks, and it is simply impossible to find an ideal option that will suit everyone - we are all different...
To understand, let’s look at the necessary concepts that you need to know:
Transom –
comes from the English word “transon”, which means a flat section of the stern part of a boat, yacht, or any other vessel.
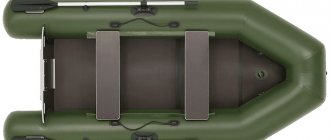
PVC boats are used:
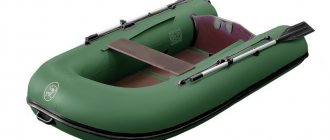
stationary transom - made of plywood that is not exposed to moisture, already when gluing the boat it is glued into the stern part of the PVC boat; The height of the stationary transom is not adjustable, and the engine model is selected according to the overall height of the transom board.
When purchasing a boat with a stationary transom, you should pay attention to the angle of its installation, which should have the angle of inclination necessary for optimal immersion of the outboard motor's legs in the water.
When operating a PVC boat with a stationary transom, you should avoid hitting the engine foot on rocks, the bottom, and other underwater obstacles, this leads to the transom being torn out from the boat hull, and is also dangerous to the life/health of people in the boat.
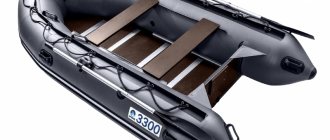
suspended transom - used, as a rule, on small boats and is used for installing outboard boat motors of low power, usually consists of a transom board and a fastening system to an inflatable boat.
I would like to note right away that now in most cases the transom has a smooth surface, although it is much better when the surface is not ideal, but has a slight roughness, in which case the fixation of the outboard motor improves, because the outboard motor is attached to the transom using clamps with flat supports, and for better contact, a rough surface is much better. When installing powerful outboard engines, the transom can be reinforced with a special motor board, which adds additional rigidity to the entire transom structure.
When operating a boat, you should prevent possible damage to the transom, as this may make it impossible to use the outboard motor.
Trim
- this is the angle of inclination of a ship, boat or other vessel in the longitudinal plane, the difference in draft of the stern and bow.
Simply put, if the ship has one of the sides higher or lower, this is called a roll, and if the bow or stern is higher, then this is trim. The ability of a ship to maintain balance on water is called stability.
Stern trim is when the stern drops lower than the bow. Bow trim is lower than the bow of the ship. When the draft of the bow and stern is the same, that is, the ship has no trim, the ship is said to be “sitting on an even keel.”
A list or trim can occur due to improper placement of cargo in the hold or due to their displacement, from the effects of waves, wind, or due to a change in course. In small vessels (PVC boat) even due to the movement of people.
Daywood
— designates the connecting element of the main components of an outboard boat motor: engine, gearbox and suspension. Outboard motors of the same power can have different deadwood lengths (popularly called “boot” or “leg”), there are three types: S (short) short -15 inches. L(long) long - 20 inches. UL(ultra long) very long - 25 inches.
How can you determine which motor with a deadwood, short, long or ultra long, is needed for the boat you are using? To do this, you need to inflate the boat, set it on a solid surface and measure the distance from the top of the transom to the bottom of the boat. The resulting measurements should be approximately 367 mm, 490 mm or 612 mm. (approximate figures, since there are a great many modifications of boats and, accordingly, transoms). This corresponds to short, long or ultra long deadwood.
This is a very important point both when installing the motor, and in compliance and in the future when obtaining maximum results from it. This includes the time to reach the glider, the speed of the boat in different modes of motion, stability during movement (the bow will bury itself or, on the contrary, it will shave, lifting the nose, or the boat will move smoothly and, accordingly, steadily). Playing with the height when installing the motor, distributing the load in the boat at a certain angle of the motor installation can show a result that no one expected. So, for example, in my practice, this year, I was able to put a fairly large boat with a motor of only 6 l/s on a stable glider, which easily sailed against the flow of the river. Ob, not to mention standing reservoirs. I repeat that if the outboard motor is properly configured/installed, the result can be very impressive.
Ps Photos and drawings are taken from the Internet. The alphabet of the Russian language was invented by Cyril and Methodius!))
If you liked the article, then subscribe to our fishing portal! To go to the portal, click the button at the top of the article “Article on the RNarod portal”
Source
Jet motor for PVC boat
Assembling a homemade motor for a PVC boat is no more difficult than for other types of boats, but on the contrary, it is somewhat simpler. This is due to the fact that any outboard motors with a power of 15 to 20 horses are suitable for this. In addition, purchasing such outboard motors is not problematic, and their reliability is quite high. You should pay attention to the wide range of similar products, which allows you to choose the appropriate option.
At the same time, attention should be paid to models with the lowest weight, which is especially important. In this regard, preference should be given to imported models, although similar outboard motors are also produced by domestic manufacturers. At the same time, it’s no secret that domestic models are not as reliable as foreign ones. In addition, they are characterized by quieter and more economical operation.
To build a jet engine for a PVC boat, you should purchase the following components:
- Outboard boat motor.
- Special gearbox.
- Special flange.
- Hub.
- Welding machine.
- Development of the water collector.
- Engine drawing.
- Fittings.
- Waterproof glue.
The technology for converting a regular boat motor into a water jet engine is the same as for making a water jet for a regular boat.
PVC water cannon
Preparatory procedures
This is a very important stage in creating a water jet for a PVC boat, since its operational capabilities will depend on correct actions. At the same time, you need to take into account such things as the availability of special tools, as well as the availability of materials that meet the stated technical characteristics.
As a rule, such work is not considered particularly difficult and almost any boat owner can handle it if they wish.
Manufacturing process
As a rule, the inlet part of the pipe should be 1.5 times larger in diameter than the conduit itself. When crossing very shallow areas, 0.1-0.15 meters deep, rare tremors are possible, which indicates an insufficient amount of water entering the water cannon. It is at this moment that it can clog. This is due to the fact that in particularly small areas the pipe can capture silt or sand, along with the presence of other objects. To prevent this from happening, it is necessary to provide an input filter.
In order for the structure to work properly, it is advisable to manufacture it according to the drawings. Finding them will not be difficult, especially if you have the Internet. Although options with unfinished drawings are possible. That is, there are possible drawings according to which the water cannons were not manufactured and their performance was not tested. Such work requires special tools and special skills in working with materials and tools.
The water jet for a PVC boat operates in a normal transition mode, capable of bringing the boat to planing at a speed of 13-17 km/h. The efficiency factor (COP) of such structures is no less than 50%, which is quite acceptable and something that the classic type of outboard motor cannot boast of.
Safety precautions when installing the motor
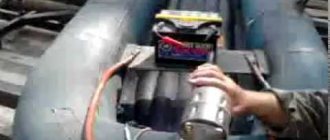
A boat motor is a heavy machine. Low-power devices weighing up to 20 kg are easy to install alone. It is better to install heavy motors weighing 30–50 kg on the transom of the boat together with an assistant in order not to break your back. To transport the motor from the car to the boat, a special cart for PLM is used.
All work on installing, setting up and moving the outboard motor is carried out with the engine turned off and the remote gas tank hose disconnected.
Do not smoke or use open flames near the boat while connecting the gas tank hoses and starting the boat engine.
Outboard Motor Registration Guide.
Everything you read below fully applies not only to boat engines, but in general to inflatable boats with a load capacity of over 225 kilograms:
1. The first step should be to determine the technical characteristics of your existing motor or the watercraft itself (if we are talking about registering a boat). If their parameters are higher than those that do not require registration, you will have to spend time registering the motor or boat with the State Inspectorate for Small Vessels (GIMS).
At what strength do motors require registration? Motors that have a power of 10 hp. / 8 kW and more - subject to registration.
2. To find out exactly what package of documents is required, where to go at your place of residence and how to prepare the engine and vessel for registration, you should go to the official website of the department.
List of required documents
- passport and TIN of the owner;
- documents of purchase and sale or cash and sales receipts from the store where the items required for registration were purchased, as well as invoices and cash receipts;
- registration certificate for a boat or motor with mandatory indication of the serial number, dimensions and specifications;
- acts of acceptance and transfer of an engine or vessel from the selling organization to the current owner.
Homemade boat motor from a drill
In most houses and apartments you can find an old drill or screwdriver. Even in their new form, they are more affordable than an industrial motor. If they run on batteries and have a button to control the speed, then the principle of operation with an electric motor is similar.
- Availability of battery as a power source.
- A propeller with a gearbox sets the craft in motion.
- The engine controls are a reverse button and a rotation speed control knob.
Most factory-made boat products are sealed, and therefore can be used in water. This fact is excluded when choosing a drill or screwdriver as a homemade boat motor, because they are not sealed.
But it is worth remembering that moisture penetration into the controls of an electric drill is fraught with trouble. The engine will stall and the ship will stop. The advantage is that it is very easy to find spare parts for the drill.
We recommend reading: How does a jet boat motor work?
Another significant point is that it is not intended to operate continuously. This is not very suitable for boat engines. Therefore, it is advisable to create a power reserve to avoid overheating of the homemade product.
- You need to start from one hundred and fifty watts and more.
- In this case, it is realistic to choose a propeller with a diameter of one hundred and thirty millimeters.
- The total weight of the vessel is no more than three hundred kilograms.
The voltage of drills and screwdrivers can be different, as well as their batteries. But the capacity of the latter is not enough to control the boat. Then a car battery that produces twelve volts will do. It is better to choose a drill with the same voltage.
Of course, a battery of batteries for any voltage will save the situation. But the cost of such a device can be expensive.
Required components
To make homemade motors for boats from a drill, you need to assemble a set of accessories and tools:
| № | Helpful information |
| 1 | slats for mounting the engine |
| 2 | when hanging on the transom, a mechanical part from an angle grinder will do |
| 3 | a pipe with a diameter of twenty millimeters is suitable for making a rod, and a frame made of a twenty by twenty millimeter profile is suitable for installing a motor |
| 4 | metal rod to create the shaft and sheet metal for the screw |
| 5 | hand scissors for tin |
| 6 | electric drill with drill bits |
| 7 | angle grinder with cutting and sharpening discs |
| 8 | self-tapping screws if there is wood in the device |
If you need to quickly remove the propeller, it is advisable to make a lifting mechanism to control the motor in a vertical and horizontal position.
To create the mechanism, you need to equip the clamps with rings and pass a tube through them. This articulated device ensures the reliability of the steering wheel.
Gearbox and propeller
The rotation speed of the drill is slightly higher than that required to operate the propeller. The gearbox will adjust the difference.
- The upper gearbox is capable of reducing speed from one and a half thousand to three hundred. In this situation, a homemade motor will allow the boat to move smoothly.
- The lower gearbox is important for horizontal positioning of the propeller. If it is taken from an angle grinder, just clamp it in the screwdriver chuck.
To make a propeller, you need to select certain sections on a steel sheet. A square of two hundred by two hundred millimeters and a thickness of three is enough. Stainless steel is much more difficult to cut, but it is preferable and lasts longer. You can also use a blade from a household exhaust fan.
You need to make holes in the center of the sheet. They are necessary for the landing screw. The slits are made diagonally, leaving a circle of thirty millimeters in the center.
We recommend reading: How to increase the power of a boat motor?
The blades should be round and equal. Each one must be rotated at a certain angle and direction of rotation so that there is no vibration of the screw.
A test swim is done in any container of water that will fit the propeller. You can go to a small pond and lower the propeller into the water without a boat. Such a test will show whether the completed motor is ready for swimming.
A properly assembled electric motor will return a stream of water, but without vibration. If something goes wrong, a design made for a boat with your own hands can always be improved with the help of a larger angle of inclination of the blades.
Before you make a motor for a boat, you need to understand how it will move with its help. It is important to take into account the weight of the vessel with all things, engine power, current strength and operating voltage. The motor power for a rubber or PVC boat must be at least twenty percent greater than the load power. This advantage will be useful in case of force majeure.
It is advisable to measure the voltage under load and during idling using a special device.
How to install an outboard motor on a PVC boat - a little theory and safety rules
Knowing a few simple rules and following general recommendations regarding the installation of PLM on an inflatable PVC boat will allow its owners to achieve optimal results in both operating comfort and speed performance.
You can install a small PLM on the transom yourself, but for the first time it is better to involve an assistant in this matter. Most importantly, do not ignore the manufacturer’s instructions, which contain a detailed description of the process. Violation of the instructions can result in serious consequences - loss of control when accelerating or braking, while driving or turning. Forced unwanted swimming and pulling a sunken ship out of the water is the least of all possible evils. In a worst-case scenario, the engine may catch fire, the vessel may be lost, and passengers may be injured.
IMPORTANT - any installation or adjustment work is carried out only with the engine turned off!
Correct installation of the motor on a PVC boat guarantees high performance, so it would be advisable to approach this issue scrupulously and responsibly. The following points must be taken into account:
- Cavitation effect. The process of formation and further collapse of air bubbles in a fluid flow, accompanied by water hammer, can cause serious damage to the propeller and outboard motor. An anti-cavitation plate is designed to protect it from gas bubbles.
- Transom mount. This element can be mounted or stationary, and, accordingly, has its own characteristics, advantages and disadvantages that must be taken into account when purchasing a PLM and installing it on a boat with certain technical characteristics.
- Tilt angle. If the motor is not ideally mounted on a rubber boat, its bow may rise too high while moving, or, conversely, sink into the water, reducing the overall stability of the vehicle on the water and threatening to capsize.
Now let's look at the key aspects of engine installation in more detail and from a practical point of view.
Making a boat motor with your own hands
Making a boat motor is not at all difficult - it is enough to prepare all the parts necessary for this and assemble the device in such a way as to eliminate the possibility of damage to the boat when operating such a unit, and to ensure safety for people.
The simplest option for making a homemade motor from a trimmer. For assembly you will need the following materials and tools:
To make a working version of the outboard motor, you will need to purchase a trimmer. You can use any model, but the more powerful the device, the higher the speed characteristics of the boat.
Making a propeller is the first thing to start with. For the screw, a duralumin plate measuring 100 - 30 mm is used. Exactly in the middle of such a plate it is necessary to make a hole to install it on the trimmer shaft. The diameter of the hole depends on the thickness of the gearbox shaft and is usually 17 mm. Before bending the duralumin plate, it must be annealed. Then each side is slightly bent with pliers so that when such a plate rotates axially, its pitch is no more than 10 mm.
Then the reel is removed from the mower and a screw is installed in its place. It is necessary to tighten the nut well so that the screw does not turn during operation. The trimmer discs are secured with a nut with a left-hand thread, so when operating the outboard motor you do not have to worry about losing the screw due to the nut being unscrewed.
Then you need to make reliable fastenings with which the trimmer will be installed on the boat. On the trimmer body at the junction of the two halves there is a ring for attaching a belt. It is this part that will connect the trimmer body to the boat. It is necessary to make a mount that will reliably connect the boat hull with the trimmer “eye”. For this purpose, you can use a mechanical meat grinder, in which the lower part is separated using a grinder or a hacksaw. Then a hole with a diameter of 12 mm is made in the body of the resulting clamp. The hole must be located in the transverse plane of the screw clamp.
From a metal pin with a diameter of 12 mm, you need to cut a piece 100 mm long. On one side, this section of the pin is slightly flattened and a hole with a diameter of 6 mm is made in it. A 6 mm bolt is threaded into this hole, onto which the trimmer “ear” is installed. The bolt must be tightened with a self-locking nut.
The process of installing a motor on a boat occurs in the following sequence:
The engine can be started and controlled by holding the outboard engine body level, and, if necessary, tilting it in the opposite direction of the boat's turn.
How to install a boat motor so that it works economically and reliably
Before you begin installing the motor on a PVC boat, be sure to insure it against falling into the water - attach it with a strong cable to the eye bolt or transport handle (Fig. 1).
Fig.1
Next, install the engine along the centerline of the boat (Fig. 2), tighten the fastenings well (Fig. 3) and check:
- ● location of the exhaust hole - it should be above the surface of the water;
- ● buoyancy and stability of the boat with maximum load;
- ● boat trim (angle between the keel line and the water surface): the optimal value is 3÷5°;
- ● the angle between the propeller axis and the waterline - the smaller it is, the lower the water resistance and the more economical fuel consumption;
- ● height of the motor position - the distance between the anti-cavitation plate and the bottom of the boat should be within 0÷25 mm (Fig. 4).
Rice. 2
Rice. 3
Rice. 4
If everything is in order, start driving at low speed, gradually adding gas. If the boat's stability and/or controllability deteriorate, stop to balance the boat by redistributing the load and/or adjust the engine trim angle.
To raise the bow of the boat above the water, shift the center of gravity to the stern and/or tilt the motor “leg” back (Fig. 5, a). To lower it, move the weight to the bow of the cockpit and/or allow the “leg” of the motor to tilt forward (Fig. 5, b).
When the propeller is immersed too deeply, the engine power decreases due to an increase in the water back pressure at the exhaust and the resistance of its underwater part increases - this prevents the boat from reaching maximum speed and leads to excessive fuel consumption. In this case, adjusting plates will help to install the outboard motor correctly.
When the outboard motor is set too high, the propeller takes in air. For this reason, the speed and efficiency of the engine decrease, cavitation wear of the blades occurs, and the pistons may jam due to overheating. If the situation cannot be corrected by shifting the boat’s center of gravity to the stern and changing the angle of the motor, you will either have to carry additional weight with you or make a haul in the transom.
What can a boat motor be made from?
A boat motor can be made from many mechanisms that gather dust in a barn or garage and are not used for their intended purpose.
It often happens that equipment breaks down, and to repair it you need to spend more than half the cost of a new device. In this case, it is much easier to purchase a new device, put the old one aside and use it as a source of spare parts and various bolts and nuts. It is from such devices that a boat motor can be made.
If such devices are not available, then you can inexpensively purchase such a mechanism on the secondary market. The main thing is that in such devices the engine is working properly.
Boat motor from trimmer
By minimally changing the trimmer design, you can create an excellent traction unit for a boat of any design. Such a device already has an engine and transmission; it is enough to make a mount for the boat, and instead of a reel with fishing line or a disk, install a propeller.
Before making a boat motor from a trimmer, you should understand that the power of such devices is very low, and it is unlikely that you will be able to move against a strong current.
The trimmer as a boat motor is ideal for use on a lake or pond.
The disadvantages of using this device include the high noise level. In addition, at a low speed of movement you will have to breathe absolutely all the products of the “life activity” of this system.
Boat motor from a screwdriver
Electric-powered boat motors have excellent performance in terms of noise production and environmental friendliness. You can make a motor for a boat from a screwdriver, but the power of the device should not be less than 300 W. To transmit torque to the propeller, which is located underwater, you can use a flexible shaft from a trimmer.
A small aluminum propeller from a car fan is used as a propeller, and to ensure long operating time of such a device, car batteries with a capacity of 60 A/h are used.
The disadvantages of such designs are the need to carry a fully charged car battery with you. The mass of such a part is more than 20 kg . The disadvantages include the limited stroke of such a motor; after the battery is discharged, it will be necessary to manually set the boat in motion again.
Boat motor from a walk-behind tractor
The most powerful of the homemade boat motors is considered to be a device made from a walk-behind tractor. Equipment for processing personal plots is equipped with durable and durable four-stroke internal combustion engines, which, when installed on the craft,
will allow him to develop decent speed both with and against the current. Such engines have a significant mass and are usually not used on PVC boats .
The easiest way to install a boat motor of this design involves minimal modifications to the main structure. It is enough to attach a walk-behind tractor to the hull of the boat and install aluminum blades instead of cutters. The blades must be located in the same plane with the shaft, which in this case is located perpendicular to the movement of the craft. The blades have the form of rectangular plates, the lower half of which must be lowered into the water, and the upper part must move freely through the air. This paddle wheel device will allow you to move at high speed even in places where the depth does not exceed half a meter. A boat engine made from a walk-behind tractor with a fast current does an excellent job.
Other options
You can make a homemade engine not only using trimmers and screwdrivers as a basis. If you want to design a boat motor yourself and have a significant supply of time and money, then any technical device equipped with an internal combustion engine or driven by an electric motor can be used as a power unit.
Many craftsmen install motorcycle engines on their boats. In this case, it is possible to regulate the propeller speed by shifting the gearbox. Powerful 12-volt motors, which are used in various mechanisms, can be successfully used as boat engines.
Installing the motor on the boat transom
After the boat is fully inflated, the motor is hung on the transom. The newly purchased motor is hung in the middle of the transom and secured with clamps from the suspension system. The clamps are tightened all the way with the same force. After installation, the motor is additionally tied to the transom with a safety rope.
For reliability, the attachment of the motor to the transom is additionally checked twice: after it warms up and 5 - 10 minutes after the vessel starts moving. If necessary, tighten the clamps more tightly.
Hospital at "Progres"
#1 alex_sushko
Passengers 16 messages
- From: Republic of Belarus, Bobruisk
- Vessel:
Motorboat
#2 Ayrton
Engineer
13,236 messages
- From: Novosibirsk
- Vessel:
Assol No. 198 - Title:
Tamara
Gentlemen, tell me how to install a stationary VAZ 2101 engine on a Progress boat
Why do you need it. As a result, you will get a huge scope of work, a bunch of headaches in fine-tuning this water jet, a cockpit cluttered with a stationary water jet, problems with lifting/launching, and a long list of other problems and disadvantages. The budget of this enterprise will exceed the cost of purchasing a good, new, bourgeois four-stroke engine of equal power, under which your “Progress” will fly like a swallow! Well, your idea will be of no use, believe me.
“The woman had no troubles - the woman bought a pig. "©folk wisdom
#3 oleg-239
Main crew 7 messages
- From: Krasnoyarsk
- Name:
north 420
#4 lionbob
Helmsman 1st class
Main crew 950 messages
- From: Dzerzhinsk
- Vessel:
Homemade carthop - Name:
Karapuz
“The woman had no troubles - the woman bought a pig. "©folk wisdom
I agree with Ayrton 100%.
Hello. Dear Ayrton, are there really no options with a hospital for progress? Is it possible to pair an AMUR water cannon with a VAZ engine?
#5 goralex
Helmsman 1st class
Passengers 523 messages
- From: Nikolaev
- Vessel:
P-ss, RIB, CT, w/w 420 - Title:
unnamed
#6 Sapiens
Captain
1,821 messages
- From: Arkhangelsk
- Vessel:
dinghy - Title:
Finn
Hello. Dear Ayrton, are there really no options with a hospital for progress? Is it possible to pair an AMUR water cannon with a VAZ engine?
I’m developing my thoughts further: paired with the Amur water cannon and the Amur corps.
Then everything will fit together perfectly!
#7 lionbob
Helmsman 1st class
Main crew 950 messages
- From: Dzerzhinsk
- Vessel:
Homemade carthop - Name:
Karapuz
There are always options. In the book Boats, Boats and Motors - it seems like it sounds like this - the Directory - there is a mention of such an alteration. With a simultaneous extension of the stern by 1.5 meters. .
#8 alex_sushko
Passengers 16 messages
- From: Republic of Belarus, Bobruisk
- Vessel:
Motorboat
With such dimensions it is almost “Amur”-“Vostok”. Is it worth building a garden if you have a ready-made boat?
#9 SKR
Watchman
7,994 messages
- From: Moscow
- Vessel:
no
If you want to do it, do it and listen to those who can and want to help you, and let the rest continue to doubt. The water jet is simply taken outside the boat and the motor is placed almost close to the transom. The eight engine has a length of only 56 cm, taking into account all the layout problems, the total length of the engine compartment will be 75-80 cm. The engine is covered with a hood, and there are passages on the sides where seats can be installed. I do this on all boats. As a result, the motor takes up less space than a recess under the PM. An acquaintance of mine from Angarsk installed a figure-eight engine with a water cannon in the Crimea and has been driving along the tributaries of the Angara for many years now.
#10 DDD
Engineer
1,197 messages
- From: Ukraine, Kharkov
- Vessel:
rib “Falcon-450”
#11 alex_sushko
Passengers 16 messages
- From: Republic of Belarus, Bobruisk
- Vessel:
Motorboat
If you want to do it, do it and listen to those who can and want to help you, and let the rest continue to doubt. The water jet is simply taken outside the boat and the motor is placed almost close to the transom. The eight engine has a length of only 56 cm, taking into account all the layout problems, the total length of the engine compartment will be 75-80 cm. The engine is covered with a hood, and there are passages on the sides where seats can be installed. I do this on all boats. As a result, the motor takes up less space than a recess under the PM. An acquaintance of mine from Angarsk installed a figure-eight engine with a water cannon in the Crimea and has been driving along the tributaries of the Angara for many years now.
#12 SKR
Watchman
7,994 messages
- From: Moscow
- Vessel:
no
I didn't do it, because... abandoned him immediately in favor of the Japanese. Made by Dima from Angarsk. He made a water cannon with my tips and installed a figure-eight engine in the Crimea. If he doesn’t appear here, I’ll give you his soap; he won’t refuse to help his fellow hobbyist. In general, if everything is done correctly, then Progress can not be lengthened.
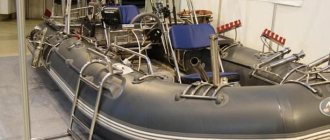
How to take it out can be seen in the picture. In my hands is a straightening apparatus of the Bratishko and RK type.
Attached images
#13 alex_sushko
Passengers 16 messages
- From: Republic of Belarus, Bobruisk
- Vessel:
Motorboat
I didn't do it, because... abandoned him immediately in favor of the Japanese. Made by Dima from Angarsk. He made a water cannon with my tips and installed a figure-eight engine in the Crimea. If he doesn’t appear here, I’ll give you his soap; he won’t refuse to help his fellow hobbyist. In general, if everything is done correctly, then Progress can not be lengthened.
How to take it out can be seen in the picture. In my hands is a straightening apparatus of the Bratishko and RK type.
#14 alex_sushko
Passengers 16 messages
- From: Republic of Belarus, Bobruisk
- Vessel:
Motorboat
I didn't do it, because... abandoned him immediately in favor of the Japanese. Made by Dima from Angarsk. He made a water cannon with my tips and installed a figure-eight engine in the Crimea. If he doesn’t appear here, I’ll give you his soap; he won’t refuse to help his fellow hobbyist. In general, if everything is done correctly, then Progress can not be lengthened.
How to take it out can be seen in the picture. In my hands is a straightening apparatus of the Bratishko and RK type.
#15 SKR
Watchman
7,994 messages
- From: Moscow
- Vessel:
no
#16 Majesty
Main crew 30 messages
- From: Orenburg
Frankly speaking, I am surprised by the desire of a person to ask a question but who is absolutely unwilling to look through the information on the forums a little, which is enough to independently see up to 90% of the answers to all the questions he asked. Look through the SKR forums a long time ago and answered all these questions superbly. Well, in Progress the 5a-fe engine with a power of 100 hp fits perfectly and no extension is needed, all this was done according to the information given by SKR, just be curious before asking a question
#17 alex_sushko
Passengers 16 messages
- From: Republic of Belarus, Bobruisk
- Vessel:
Motorboat
Frankly speaking, I am surprised by the desire of a person to ask a question but who is absolutely unwilling to look through the information on the forums a little, which is enough to independently see up to 90% of the answers to all the questions he asked. Look through the SKR forums a long time ago and answered all these questions superbly. Well, in Progress the 5a-fe engine with a power of 100 hp fits perfectly and no extension is needed, all this was done according to the information given by SKR, just be curious before asking a question
#18 Majesty
Main crew 30 messages
- From: Orenburg
With your answer you just killed me 1. You look carefully at the Motolodka ru forum for the last 5 years 2. You are on a forum that you also didn’t deign to at least read carefully, there is a lot of information here.
Before this progress, I had never dealt with water-engine issues, but when in 2 seasons my friends ruined two expensive imported engines, I had to search for information on water cannons for six months, and it was the excellent school that I made from the SKR forum that helped me a lot. However, I have never contacted the forum. Only now, when the water cannon and boat are almost ready, questions arise that I can at least competently ask. Alexander
#19 alex_sushko
Passengers 16 messages
- From: Republic of Belarus, Bobruisk
- Vessel:
Motorboat
With your answer you just killed me 1. You look carefully at the Motolodka ru forum for the last 5 years 2. You are on a forum that you also didn’t deign to at least read carefully, there is a lot of information here.
Before this progress, I had never dealt with water-engine issues, but when in 2 seasons my friends ruined two expensive imported engines, I had to search for information on water cannons for six months, and it was the excellent school that I made from the SKR forum that helped me a lot. However, I have never contacted the forum. Only now, when the water cannon and boat are almost ready, questions arise that I can at least competently ask. Alexander
#20 Majesty
Main crew 30 messages
- From: Orenburg
#21 oleg-239
Main crew 7 messages
- From: Krasnoyarsk
- Name:
north 420
quote=Sapiens,30 Aug 2006, 21:16] I’m developing the idea further: paired with the Amur water cannon and the Amur corps.
Then everything will fit together perfectly!
#22 oleg-239
Main crew 7 messages
- From: Krasnoyarsk
- Name:
north 420
#23 SKR
Watchman
7,994 messages
- From: Moscow
- Vessel:
no
#24 alex_sushko
Passengers 16 messages
- From: Republic of Belarus, Bobruisk
- Vessel:
Motorboat
Not yet, but by spring there will be, and not one, but three. I promise you will fly.
Source
Horizontal motor position adjustment
Correct installation of the motor on the transom of the boat increases the speed and controllability of the vessel and saves fuel. According to the instructions, the outboard motor is installed on the center of the transom. Standard installation of the motor is not difficult, but in order to get maximum speed and efficiency from the motor, it is necessary to find the optimal position of the device at the stern of the vessel.
While the motor is running, the propeller rotates and creates a vortex flow behind the stern of the boat, shifting the boat from its straight trajectory. To compensate for propeller torque, the motor can be moved slightly to the starboard side of the boat. Shifting the position of the motor by 30 - 50 mm relative to the longitudinal center of the boat increases the stability and controllability of the vessel. The length of the offset depends on the bottom profile of the boat:
• for models with a convex V-shaped bottom, the motor is shifted by 5 cm;
• for boats with a flat bottom, the motor on the transom is shifted by 3 cm.
On boats of well-known brands, the profile of the stern and bottom compensates for the vortex flow from the propeller, so the outboard motor is installed strictly in the center of the transom. On boats in the mid-price category, to increase speed, improve ship controllability and save fuel, it is necessary to adjust the horizontal position of the motor on the transom.
Characteristics of outboard motors
First of all, you should pay attention to the size and power of the engine. To prevent the stern of the boat from sinking under the water, you should not use too heavy devices. Two-stroke models are easy to maintain and lightweight. Four-stroke options are installed on large boats.
Power
A high power engine can capsize the boat during launch. To prevent this from happening, you need to know how much power the device should have. An 8-9 liter motor is installed on a boat up to 7 m in size. With. For a small boat 5 m long, an engine of up to 5 hp will be sufficient.
What to do if the PVC boat moves to the side when moving under the motor
Since the steering is mounted on the side of the inflatable boat, it may be pulled to one side. A slight shift of the engine from the centerline will save you from having to constantly turn the helm (to prevent the boat from going to the right, move it to the left, and when pulling to the left, move it to the starboard side).
You can install a motor on a PVC boat not only on a stationary one, but also on a mounted transom. To find out how to do this correctly, take advantage of a free telephone or online consultation with experts from the MARLIN MOTORS online store!
Replacing a boat motor (stationary engine)
For technical inspection you will need to provide the following documents:
- Certificate
- Application coming directly from the owner
- Ship's ticket
If the vessel is not provided for technical inspection by the owner, then the power of attorney will be submitted in the usual written form.
There is no state fee for technical inspection.
Important points when registering a motor
Even if the motor was purchased during your trip abroad, you will still have to document the legality of this purchase, so pay attention to the fact that when shipping the goods, they do not forget to give you all the necessary accompanying documents. Including customs declarations.
It is important to know! You can register a motor or boat not only at the place of registration of its owner, but also at the place where the vessel is moored. The owner should prepare in advance the OKATO code (All-Russian Classifier of Objects of an Administrative-Territorial Branch), as well as the full name of the municipality where it is permanently registered. This data is available on the official websites of the Russian Migration Service.
Determining the height of the motor mounting
The engine will be mounted taking into account the placement of the anti-cavitation plate. Approximately, the location of the screw will be approximately a few (up to five) centimeters below the bottom. The exact position is determined:
- empirically - testing the control of a PVC inflatable boat on the move with each change of attachment;
- based on and maintenance of a specific engine and boat model.
If you fix the motor unit higher than required, cavitation can occur. From the outside it looks like boiling water, with the formation of many gas bubbles. If the propeller rotates in a thin mixture of water and air, the speed will increase beyond the permissible limit and it will overheat. In the best case, the safety valve will work, but it’s better to insure against the worst by properly connecting the engine and the vehicle.
The low landing of the PLM also does not promise anything good. Water resistance will increase, the speed will correspondingly decrease and power will be wasted. If things go wrong, you risk losing control of the boat.
Note that all outboard motors on sale today have several modes that allow you to sail in shallow water. This way you can better protect the propeller and power unit gearbox from mechanical damage.
Jet engine design
The main elements of such a mechanism, as in the classic version, are the internal combustion engine and the propeller, only the latter is located inside a long pipe laid along the hull of the boat. Of course, “pipe” is an oversimplified term. The correct name for this part of the engine is the water conduit, and it consists of the following components:
- water intake: the front part through which water flows to the propeller;
- straightening apparatus: thanks to this element, the rotational movement of the water flow twisted by a screw is transformed into a rectilinear one;
- nozzle apparatus: the final part of the “pipe” from which water is thrown out.
Another important element of the water cannon is the reversible steering device, thanks to which the boat can change the direction of movement and also reverse.
Water jet engine design diagram
Screws (also called impellers or impellers) come in several types:
- Axial: the simplest to manufacture, but they provide the lowest efficiency and, due to the pronounced cavitation effect, can only operate at low speeds.
- Axial-diagonal: have higher efficiency and are designed for medium-speed engines;
- Diagonal and screw: the most modern and extremely difficult to manufacture varieties, they are characterized by the highest efficiency and are capable of working with high-speed engines.
Among all the components of a water cannon, propellers are in first place in terms of manufacturing complexity. For this purpose, the method of precision casting followed by grinding is used.
You should not purchase a water cannon with an impeller whose blades are welded to the hub and do not form a single whole with it: such propellers often have an imbalance, which leads to their destruction at high speeds.
Adjusting the engine angle
Correctly setting the angle of inclination of the outboard motor relative to the stern of the vessel increases the speed of the boat and saves fuel. The position of the deadwood relative to the boat transom depends on the following factors:
• the structure of the vessel, its contours and stern;
• propeller pitch;
• motor power;
• number of passengers and weight of cargo in the boat;
• current speed;
• wind speed and direction, wave heights.
To change the inclination of the deadwood of a boat motor relative to the stern of the boat, there are holes in the outboard bracket of the motor into which a pin is inserted. Moving the pin into the adjacent hole changes the angle of the motor by 3 - 4°.
To adjust the angle of the motor, stop the engine, pull out the pin, move the brackets relative to each other, and insert the pin back. They start the engine and swim a section of the route at different speeds. After testing, the motor position adjustment is repeated.
If the boat motor is set too far from the transom, the torque from the propeller lifts the bow of the boat and sinks the stern. The speed of the boat increases, it goes into planing mode faster and easier, and controllability decreases.
With a slight deviation of the deadwood from the stern of the boat, there is no bow-pushing effect, the boat goes smoothly, and fuel consumption increases.
With a negative engine tilt angle, the boat begins to bury its nose into the waves, speed and controllability decrease.
How to properly attach a motor to a boat
The motor unit is mounted using special clamps and transom brackets. Usually fastening takes place taking into account the keel line. When mounting the engine on the transom, make sure that it is placed strictly in the center, which will prevent a decrease in speed and excessive splashing during movement.
The clamp screws are tightened manually with equal forces until they stop. Subsequently, they should be tightened from time to time, monitoring the strength of the connection during operation. Under the influence of vibration, connections can weaken; the risk of this phenomenon is especially high with increasing loads:
- if the boat hits a sandbank;
- when overcoming large waves;
- making sharp turns, etc.
The engine can move completely imperceptibly and slightly from its normal place, but the helmsman should not lose vigilance. Some models of rubber boats are equipped with special eyelets for additional fastening of the PLM (and holding it during self-unscrewing) using a steel cable.
Having installed the PLM on the vehicle, walk it through flat water, focusing on the wake, which should be smooth and absolutely symmetrical. If you observe excess spray behind the stern, the power unit will have to be raised, but if the propeller grabs air and breaks into cavitation, it needs to be lowered.
Compliance with the universal rules and recommendations set out in the instructions allows you to securely fasten the motor. Of course, cases cannot be ruled out when the search for the optimal engine position will be crowned with success only after long, many-hour experiments. Sometimes it seems like a simpler solution for the owner of a motor boat to contact service center specialists who will help to correctly install the motor on a PVC boat.
Never forget about water safety rules and be sure to stock up on life jackets.
Good luck and good catch!
Vertical adjustment of an outboard motor on the transom of a boat
The position of the anti-cavitation plate of the motor relative to the bottom is of great importance for the speed of movement of the craft. Depending on the shape of the bottom and the model of the vessel, the plate should be located 10 - 50 mm below the bottom.
A high installation of the motor relative to the bottom of the vessel leads to the fact that the propeller begins to rotate in the upper layer of water, while capturing air bubbles. To the naked eye, the process looks like boiling water in a kettle. The resistance to the movement of the propeller in a rarefied environment decreases, the number of engine revolutions spontaneously increases, and with prolonged operation in this mode, the outboard motor fails.
A lowered motor setting increases water resistance to propeller rotation and reduces the speed of the vessel.
The vertical position of the outboard motor is adjusted by several test runs in calm weather. To raise the motor to the end of the transom, wooden blocks are placed under the suspension system; to lower it, a recess is cut out in the transom using a jigsaw.
Installing and setting up a boat motor on the transom of a boat is not difficult and is quite feasible for a physically developed man. A boat with an optimally located motor on the transom handles well and gets into planing mode faster.
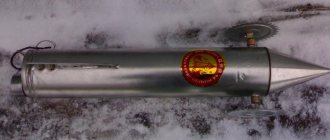
How to build a jet engine for a boat yourself?
The best version of a water-jet engine is obtained by using the Veterok 12 outboard motor as a base one. This is due to the fact that this engine is provided with the necessary range of spare parts. It is not difficult to purchase them at the city market or via the Internet.
After upgrading a conventional outboard motor, the total weight of the water jet will increase by only 1 kg, which is not at all significant for a boat of any type.
A working water cannon is capable of accelerating a boat with a displacement of 450 kg to 20-25 km/h, which an outboard motor of similar power is not capable of.
To upgrade a conventional outboard motor, you will need the following parts:
- Outboard motor “Veterok 12” with a special flange.
- Gearbox.
- Reamers of the water collector.
- Welding machine.
- Hub.
- Special glue (waterproof).
- Fittings.
- Engine diagram (drawing).
Preparatory operations
Preparatory work should be carried out responsibly and carefully, otherwise you can easily damage the motor. You should not resort to using unreliable materials other than those that meet all requirements.
Manufacturing
The design of the water collector provides a recess, which provides the boat with the necessary maneuverability and maneuverability, and also reduces hydrodynamic resistance. This is achieved due to the fact that the upper leading edge is 35 mm below the bottom level.
To assemble the motor yourself, you need to have a regular gearbox, which is fixed to the engine using a special flange. After this, you need to take a metal blank on which to draw a development of the shell, water collector and six blades.
To make workpieces of the required shape, a file and bending rollers are used. Despite this, they can also be made manually, using a mandrel. After this, welding work begins to weld the longitudinal and transverse seams of the drainage system and the water jet chamber, which have different shapes.
The design of the water jet includes a hub located on the boss of the product.
The assembled water cannon reaches a mass of 20 kg. At the same time, a drawing of such a water cannon is extremely rare. But this does not mean that such a design cannot be made yourself. If you turn to the Internet, here you can find any drawing, choosing the appropriate option from a huge variety. The main thing is that a boat with a jet engine has much better performance characteristics.
DIY water cannon stx.avi