| Place | Name | Characteristics in the rating |
| TOP 10 best adhesives for PVC boats |
| 1 | Bostik NE486 | The best choice |
| 2 | Vial I-900 | The most reliable one-component adhesive |
| 3 | Rogneda UR-600 | The best all-purpose glue |
| 4 | Three whales | Attractive price |
| 5 | PVC moment | Most Popular Brand |
| 6 | Reaktor liquid patch | Lots of positive reviews |
| 7 | KLEYBERG | Best for professionals |
| 8 | Super NN | Good value for money |
| 9 | Bravo SP17 | Powerful adhesive for synthetic materials |
| 10 | WAKOL MS 552 | Wide purpose |
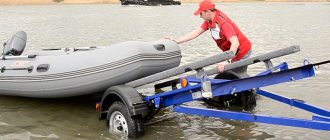
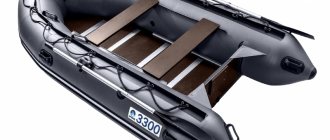
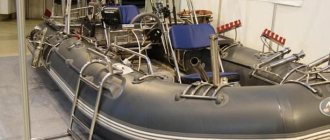
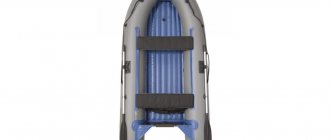
A boat made of polyvinyl chloride is the most affordable, convenient and practical option for fishing or hunting from the water. It does not take up much storage space. It has a flat bottom, which allows you to go even into shallow bodies of water, and also makes it possible to handle it alone due to its relatively light weight.
But there is also a drawback, which is the low strength of PVC, which often leads to cuts and punctures. Fortunately, they are easy to fix. In most cases, unless the cut is more than 15 centimeters in length, you can handle the repair yourself. The main thing is to choose the right glue, which should have the following qualities:
- high adhesion with any subtypes of PVC and plastic;
- homogeneity;
- resistance to contact with water;
- resistance to ultraviolet exposure.
It is worth noting that not every glue can boast of such a set of qualities. In addition, many transparent products turn yellow over time, which looks unattractive and also indicates a low service life of such adhesive. We have selected only the best PVC adhesives that will perfectly restore your boat, and it will last for many years.
Popular brands of glue for rubber boats
One of the most popular adhesives today is rubber adhesive brand 4508. It is made on the basis of natural rubber.
The main features of this glue:
- good stickiness;
- elasticity of connections;
There is also polyurethane glue, which has quite strong adhesive properties. Gummi glue is made from rubber and provides excellent water resistance.
Radical
Radical glue is popular among many owners of inflatable rubber boats. It can withstand fairly low temperatures, heavy loads and even salty sea water.
It is based on a solution of rubber mixed with other solvents.
Step-by-step repair of punctures in rubber boats
So, we have found out which glue is better, now let’s move on to a detailed description of the repair work. The process is simple, but requires delving into certain nuances.
Preparing tools
Naturally, to repair a rubber boat at home you need to have the appropriate tools on hand. In addition to the patch and glue, the list of things needed for work should include the following items:
- Scissors;
- A brush for carefully applying glue;
- Fine-grained sandpaper;
- Self-adhesive tape;
- Solvent (acetone, alcohol, etc.) and rags;
- Marker;
- Hairdryer;
- Roller for smoothing patches (can be replaced with a rolling pin, bottle, round handle);
- Durable nylon threads and needle.
Please note that some points depend on the nature of the damage. For example, tape will be needed to seal a seam on a rubber boat, and thread and a needle will help patch up a torn hole. But it’s still better to have a full set of items so that, if necessary, you can cope with the repair of any malfunction.
You might be interested: Choosing glue for PVC boats - a review of the best products
By the way, there is a separate article on how to seal a boat with PVC
Damage Search
Repairing a PVC boat with your own hands begins with a thorough search for damage. It is necessary to identify even the smallest punctures, because... over time they will turn into large holes and cause much more problems. Therefore, we inflate the boat, arm ourselves with a water-soap solution, pick up a sponge and begin to look for air leaks. This is done simply: just apply the solution to the rubber hull of the boat and monitor whether characteristic air bubbles appear in this area. If there are any, then mark the punctured area with a marker and continue working until we check the entire body.
Surface treatment
After all the punctures, holes and holes on the boat have been identified and marked, we begin preparing the repairs.
First, you need to cut out a corresponding patch for each hole. They are made from a material similar to a boat hull, with each patch being 3-5 cm larger than the diameter of the puncture. Note that the shape is also important: the patch must have rounded edges, because right angles easily cling and peel off.
When all the parts have been measured and cut out, we deflate the boat and move on to the next stage - cleaning the surfaces to be glued together. For this work we will need sandpaper, rags and solvent.
Treatment begins with “sanding” the damaged area from talc residues. We work with sandpaper carefully, but carefully. Next, our task is to degrease the cleaned areas so that the glue “lays down” better and adheres more tightly. We will use the solvent already stored in the tool kit as a degreaser. Carefully apply it with a rag to the already cleaned areas, coming into contact with the material for no more than a couple of seconds.
After processing, wait for it to dry. At this time, by the way, it wouldn’t hurt to do the same work with patches. Thanks to this manipulation, the strength and wear resistance of the future adhesive joint will significantly increase.
Patches from a ready-made repair kit (left) and a homemade patch (right)
Cleaning bonded surfaces
Applying glue to the surfaces to be bonded
Gluing
After all the preparatory work has been carried out, the most crucial moment comes: it’s time, in fact, to seal the rubber boat. We talked about glue and its preparation above, so we move straight to applying the solution to the hull of the boat (glue is rarely added to the patch). For this operation it is better to use a brush, then the layer of glue will be uniform and not thick.
After the first application, you need to wait until the adhesive composition has completely dried (usually takes 10-15 minutes), and then add another layer on top. Allow no more than 5-7 minutes for it to dry, after which a patch is applied and the glued area is carefully smoothed using a roller. This procedure helps get rid of air bubbles trapped under the patch and also improves the adhesion of the elements.
Drying
In order for the patch glued to the rubber boat to adhere well, you must wait until the glue has completely dried. This usually takes several hours (the manufacturer indicates the exact time in the instructions for the adhesive), but experienced inflatable boat owners recommend allowing it to dry for at least a day. Of course, this period is only suitable for boat repairs at home. If the boat needs to be repaired urgently, then a couple of hours will be enough for drying. However, upon arrival at the base, such a “quick fix” will need to be corrected in good faith.
This is what the stages of repairing punctures and small holes in rubber boats look like in general terms. Next, we suggest considering the nuances of correcting larger damage.
II.Choice of glue. What glue is best for gluing a PVC boat?
The best glue for PVC boats is the glue that comes in the repair kit. It is designed specifically for PVC boats and should not present any unpleasant surprises. Usually it is "Uranus" or "Desmacol". True, “Uranium” tends to soften when heated, and then the patch may peel off.
If you have to choose glue separately, then you should purchase only one that is intended specifically for PVC.
There are two types of glue that you need to pay attention to first:
How to seal a PVC boat with your own hands
For a quality repair, follow the instructions for using glue and prepare your tools.
Tools and tools
For minor damage, only adhesive is sufficient.
When gluing a patch, scissors are used to cut it out from an old camera or from the fabric included in the repair kit.
At different stages of repair the following are used:
- when cleaning - sandpaper;
- when degreasing – alcohol, white spirit, toluene;
- a rag for wiping off excess glue;
- construction hair dryer, lighter - for heating surfaces;
- nylon threads - for sewing up large damage;
- rubber roller - for pressing the connected parts;
- pencil, chalk, marker - for drawing the outline of the patch.
Determining the location of damage
If the puncture size on a boat is more than 5 cm, it is better to take it to a workshop or tire repair shop.
Minor punctures are discovered when the boat is inflated or after launching. Such damage can be repaired yourself, but you need to accurately determine the location of the puncture.
- The inflated boat is immersed in the water. Air will come out of the hole in bubbles. The method is ineffective in muddy water.
- The surface of the boat is lubricated with soap solution. At the puncture site, air will begin to blow out bubbles.
The detected puncture is outlined with bright chalk, marker or pencil. Even the smallest holes are sealed, since under air pressure they will only increase.
Repairing damage
No matter where the inflatable boat is damaged, the principle of its repair will be almost identical.
Stripping
The damaged area is cleaned of dirt, dust, and grease stains.
There is no need to use sandpaper, this will only damage the surface of the boat. Only heavy dirt can be removed with sandpaper.
Degreasing
For ideal adhesion of the adhesive to the base, the cleaned surface is degreased. Acetone, alcohol or any solvent will do.
Preparation
- A patch is cut several centimeters larger than the hole.
- Apply the patch to the puncture and outline it with chalk or marker.
- The adhesive mixture is applied to the patch and the prepared area of the boat.
- The layer dries in about 10 minutes.
- Both surfaces are treated with glue again.
- Wait a couple of minutes for the layer to set but not dry.
Gluing
- Both surfaces coated with glue are heated with a hairdryer. This is done quickly so that the layer heats up but does not dry out.
- The patch is applied to the surface strictly along the previously drawn contours. You need to make sure that there are no air bubbles left underneath.
- They pass over the glued surface with a hard roller or place it under a press to improve adhesion.
- The boat is left for 2-3 days until completely dry.
Bonding technology depending on the size of the damage.
- To eliminate a small scratch, just fill it with an adhesive mixture. To be on the safe side, a patch is installed.
- A hole larger than 50 mm is sealed with two patches. One is glued from the inside, the second from the outside.
Large damages of more than 15 cm are difficult to repair on your own, especially since the repair kit does not contain enough material.
Adhesive “Moment”, for boats and PVC products
75 rub.
Buy now ozon.ru
Characteristics
- Type : Glue
- Works : External, Internal
- Scope of application : Universal, For wood, For furniture, For windows, For floors
- Country of origin : Russia
- Packing : Box
Description
Adhesive for boats and other PVC products is suitable for both professional and DIY repairs. The adhesive seam is transparent. The connection is resistant to water, oil and gasoline. Suitable for gluing various combinations of soft and hard PVC, rubber, leather, metal, fabric,…
Polychloroprene adhesive
– a one-component composition that is created for gluing inflatable boats, wetsuits and rubberized materials. Not particularly suitable for PVC, but in the absence of fish, as they say...
- Water resistant
- · Elastic
- · High strength
- · Sets quickly
- Ensures seam durability
- Durable
- Heat resistant
Polyurethane glue
for boats, PVC has the same qualities as polychloroprene , the only difference being transparency and the fact that it does not turn yellow. Designed specifically for PVC boats and this is its significant advantage over other adhesive compositions.
When repairing a PVC boat, you should not use “Moment” and similar adhesives, despite the fact that many advise using them. The tightness and strength of such glue in this situation is questionable. And durability too. But cleaning it off from the place where it was glued in order to apply a new adhesive composition will be more than problematic. Most likely you will have to glue it over it, and this reduces the quality of the patch.
Two-component adhesive for PVC boats Bostik Vinycol 1520 (Bostik Vinykol 1520) is based on polyurethane (with the addition of wax) in an organic solvent.
This PVC adhesive can be applied by brush and dries quickly. Vulcanized glue Bostik for PVC boats has high resistance to water and humidity. It is precisely intended for the production of inflatable boats.
Want to know the secret? How to avoid getting tired at the tiller? How to protect yourself from rain, wind and splashes? Creating a PVC boat awning
Rips in the bottom of the boat
For rubber and PVC boats, these defects pose the greatest danger (risk of sinking). Such damage cannot be successfully repaired in field conditions, since visual control of the repair process is necessary.
Instructions on how to glue a boat with a defect in the bottom:
- Two patches of the same size are cut out from the prepared piece of rubber.
- Each part is sequentially coated with the selected glue, and then applied to both sides of the bottom.
- On the reverse side, another patch is attached to the detected damage, but its dimensions should exceed the previous parts by 2-2.5 cm.
If, instead of a pinhole defect, a heavily torn hole is found on the bottom, you should first sew up the existing damage. Only after this action can the prepared patches be glued.
Replacing an old patch
Existing patches should be replaced periodically to avoid accidental peeling of the rubber.
Sequence of actions to replace the old coating:
- The old tape is carefully removed from the surface of the boat. It is important to ensure that the surrounding material is not covered with cracks or torn defects.
- To apply a new patch, it is necessary to especially carefully clean the surface of the rubber or PVC from glue residues. If you cannot remove the adhesive base, you can use gasoline, acetone or toluene. Solvents perfectly exfoliate dried glue, allowing you to easily remove all old coatings.
The new tape should exceed the old patch by 2 cm. It should be applied to the surface of the boat 5-6 minutes after removing the old layer.
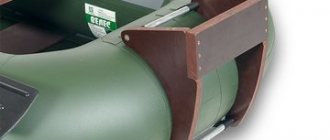
Choosing transom adhesive
One of the practical questions is what glue to use to glue a PVC boat with a transom. Given the important role of the retaining fastener, preference should be given to polyurethane adhesive with a high degree of adhesion.
In addition, the surface of the selected area must be thoroughly cleaned and degreased before applying the adhesive base.