Catching a predator with a spinning rod gives the angler true pleasure from the fishing process, filled with excitement, fascination and completely indescribable sensations. However, for fishing to be successful, you need to know some tricks and follow the rules of spinning fishing.
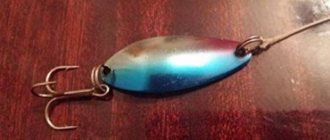
Before you start fishing, you need to study the reservoir and find out its features. But the most important factor for success remains correctly assembled gear. Currently, on the shelves of fishing stores there is a huge assortment of different baits that are used when catching predators. Here you can find both wobblers and poppers, but the most universal bait remains the spinner. In order for fishing to take place, first of all, you need to know how to tie a spoon to a fishing line.
Many fishermen use leashes with a carabiner, on which they attach the lure. This is very convenient in that replacing the bait becomes a matter of a few seconds. But there are situations when the fish is not actively biting, and various foreign objects simply scare away the predator. In this situation, the leash becomes redundant and you have to tie the bait to the fishing line.
Every person who is a fan of fishing has his own secrets and methods in this matter. But there are also methods common to all anglers, which will be described in this article.
Basic methods of attaching a spinner to a fishing line
As mentioned above, there are a huge number of methods used to tie a spoon to a fishing line.
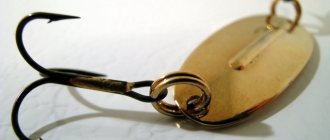
Loop to loop. One of the common methods that has become widespread and has won the hearts of fishermen with its simplicity and strength. This knot is made with several simple manipulations:
- the cord that will be used as fishing line is folded in half and tied with a double knot to form a loop;
- the prepared loops are thrown over each other, and the spoon must be passed through the loop obtained on the fishing line;
- All that remains is to moisten the fishing line with water and tighten the knot very tightly.
a ring located on the base of the spoon is used as the second loop;
This method is very effective, since the loop tightens well and does not weaken the fishing line at all, the strength of which in the place of the formed knot does not decrease in any way.
- thread the end of the fishing thread into the wire ring at the base of the spoon, and leave the working end approximately 15 cm long;
fold it in half and then form a regular loop;
At first glance, it may seem that this is very difficult, but, having gained experience, fishermen tie spoons in this way even in the dark.
- take the end of the fishing line and fold it in half to form a double thread at least 10-15 cm long;
pass it through the bait ring and tie it with the main fishing line with a regular knot;
It turns out to be a triple strong knot, which is very difficult to untie, so you can be completely sure that the spoon will remain in place, even if you catch a trophy specimen when fishing for a predator.
- thread the tip of the fishing thread through the ring of the spoon;
fold the fishing line into a double thread and form a spiral from it;
This knot is very suitable if the angler goes after a trophy pike, since its strength allows it to withstand a very large mass.
- pass the end of the fishing line into the bait ring 2-3 times and form the first loop;
pass the fishing line through the ring one more time to form a second loop;
The ability to tie a spoon is not a decisive factor in fishing, but at the same time it plays an important role. To successfully catch fish with a spinning rod, there is still a lot to learn, but a start has been made, and you can gather a group of friends and go to the pond to hone your acquired skills in practice. Happy fishing!
tvoyarybalka.ru
Attaching the spinner to the braid
There are several main attachment points for attaching the spinner to the braided line:
- "Palomar".
- Double clinch.
- Rapalovsky knot.
Palomar
Palomar is a simple and durable knot that is suitable for all types of fishing lines and can withstand a load of more than 10 kg. Disadvantage of the knot: when tying it, the leash is significantly shortened due to the use of folded fishing line.
The knot tying technique is as follows:
- Pass the line folded in half through the eye of the spoon and form a simple knot with the main line.
- Throw the elongated loop from the knot over the bait and tighten tightly.
- Cut off the remaining free end of the fishing line.
Rapalova knot
The Rapal knot, which ensures freedom of “play” of the bait, is as follows:
- Form a simple knot on the fishing line.
- Pass the end of the fishing line from the loose knot through the eye of the bait and return it inside the knot again.
- Next, make 4-5 turns around the main line with the free end.
- Return the end of the fishing line back inside the original loose knot and immediately thread it into the resulting loop.
- Tighten the knot, after wetting it, and cut off the excess end.
The disadvantage of this type of knot is that it somewhat reduces the strength of the fishing line.
Double clinch
The double clinch is a fairly simple knot with high efficiency, making it versatile and unique.
The technique of knitting it consists of sequential actions:
- Thread the end of the fishing line into the bait ring twice, but do not tighten it (first loop).
- With the free end of the fishing line, make 3-5 turns around the main fishing line (second loop).
- Next, pull the end of the fishing line through the two previously formed loops and tighten the knot, after moistening it.
- Trim off the excess part of the free end of the fishing line.
The advantage of the double clinch, in addition to the ease of tying, is its ability to withstand up to 10 kg. The disadvantage is that it is impractical for lures with a wide eye and large line diameter.
Rod
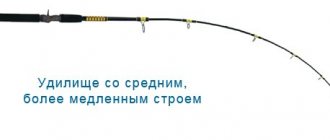
Fast action spinning rods are best suited for pike fishing . If you have to fish from a boat or covered with bushes and forests, you need to choose among rods with a length of 1.8-2.4 m . These spinning rods are easy to handle when fishing from a boat, and they also make it easy to get through thickets.
If you have to fish from an open shore , it is better to use spinning rods 2.4 or 2.7 , and in some cases 3 m long . This rod will allow you to make long casts, reaching promising points.
The greater the weight of the baits used, the depth and strength of the current test should be . For pike fishing use :
- spinning rods with a dough of about 5-15 g - used mainly for hunting small predators from the shore;
- spinning rods with a dough of about 7-28 g - the most universal, used for both coastal and boat fishing for pike;
- spinning rods, the upper limit of the test range of which exceeds 40 g , are used mainly for fishing on rivers and reservoirs from a boat.
Once a suitable rod has been selected, it needs to be equipped with a reel.
Coil selection
For pike hunting with a spinning rod, spinning reels . They are easy to use, and even a beginner can master the technique of casting and retrieving them. At the same time, inertialess reels allow you to work with equipment of any scale, the main thing is to choose the right reel size .
- 2500-3500 — medium-sized spinning reels, which are most often used in pike fishing with a spinning rod;
- 1000-2000 — such models are suitable for hunting with ultralight and lightweight equipment for small fish on ponds and small rivers, in the coastal zone of lakes, large rivers and reservoirs;
- 4000 and more - reels of this size are used for catching large pike with heavy baits at great depths and strong currents.
You can also use multipliers. These reels are best suited for hunting trophy fish with large bait rigs. They are durable and confidently withstand heavy loads for a long time . Also, thanks to their power, multipliers allow you to catch trophy-sized fish with minimal effort .
Attaching the reel to the spinning rod
The reel is fixed on the spinning rod by means of a reel seat, which is located in the area of the handle. One of its elements is a nut that needs to be tightened. It must be tightened carefully so that the coil is securely fixed.
What knots to tie a wobbler to braided cords
It is preferable to attach these types of artificial baits to the braided line using the following types of knots:
- double clinch,
- rapala manufacturer's assembly,
- palomar.
These types of knots, with the peculiarities of their knitting, most closely match the physical properties of the fence. As you know, braid is rougher in relation to the qualities of monofilament and fluorocarbon and is able to withstand, without any harm, such a knitting, without fear of creases, overtightening and burnout. The use of these units is used directly in the installation of bait directly, through a leash and using winding rings.
Winding line
It is important to securely fix the braid on the spool of the spinning reel so that it does not rotate. This can be done in two ways:
- make a noose loop , put it on the spool and glue a small piece of plaster on top;
- place a noose loop on the spool , then pass the fishing line through the fixing clip on the side and reel it in.
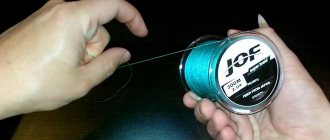
As a rule, for spinning it is necessary to use monofilament backing to fill the spool to the end. First, monofilament is wound onto a spool, then a cord is tied to it. After winding is completed, the distance between the braid and the side of the spool should be 1-1.5 mm .
In the case of monofilament, it is enough to tie the fishing line to the spool, make 3-4 turns and tie another knot. After this, the monofilament is securely fixed due to its extensibility. Having wound a sufficient amount of monofilament onto the spool, you need to tie the braid to it .
What knots to attach the wobbler to monofilament fishing line
Attaching any type of bait to a fishing line without losing its strength, meaning the strength of the fishing line, is much more difficult than attaching to other types of main cords in fishing. If purely technically there are no problems in tying a knot, then due to the physical properties of the material from which the fishing line is made, it has a number of negative aspects when tying. In particular, she is afraid of burns that occur as a result of friction when tightening the knot.
Important! When tying a knot on a fishing line, in order to avoid burnout, it is imperative to lubricate it.
Another very unpleasant point is the loss of strength at the knot site. Based on these features, it is recommended to tie the equipment elements to the fishing lines with knots that can have the least impact on the material in terms of friction and clamping force. These types of knots include the Pitsen and the Lindemann .
Having mastered the technique of knitting the presented types of fishing knots, the angler will ensure the safety of his baits from breaks due to loss of fishing line quality when using other types of knots for fastening.
Types of spinning equipment
How best to equip a spinning rod for pike fishing depends on the conditions in which you will be fishing and the mood of the fish. Standard spinning equipment for pike fishing consists of a metal leash to which the bait is attached. This installation is used both for fishing with wobblers, spoons and spinnerbaits, and for jigs.
Also, when equipping a spinning rod for pike fishing, you can use so-called spaced rigs. They are used for fishing with jig baits; their peculiarity is that the sinker is located at a distance from the hook.
- Drop-shot - when making this equipment, the sinker is tied to the end of the main line of the spinning tackle, and the hook is placed directly on it a few tens of centimeters higher. The installation is suitable for fishing for pike vertically, for casting fishing from a boat, bridge or high bank.
- Retractable leash - to assemble such a rig, the sinker must be attached to the end of the main fishing line, and the hook must be attached to the leash, which is tied to it above. A retractable leash is used for hunting passive pike from the shore or from a boat.
- Texas rig - a sliding sinker is placed on a metal leash-twist. This spinning installation device reduces the likelihood of snags to a minimum. The Texas rig is well suited for fishing thickets of grass and snags.
- Carolina rig - a sliding sinker is put on the main fishing line of the spinning rod, then a leash made of monofilament or fluorocarbon is tied to it, at the end of which there is a metal leash. This rig is also used for spinning fishing among grass and snags. The Carolina rig gets caught more often than the Texas rig, but at the same time it provides a more active and lively play of the bait.
Bait selection
Most often used for pike fishing:
- spinners;
- oscillating spoons;
- silicone baits;
- wobblers.
Spinning rods are best suited for catching pike with a spinning rod in the coastal zone at shallow depths. They perfectly attract predators of any size. Models axle loading deep areas , including currents. Such fishing, as a rule, takes place from a boat, since rotating spoons have poor flight qualities and it is impossible to cast them far.
Oscillating spoons have remained one of the most popular lures for pike fishing for several decades. They can be used for fishing from the shore and from a boat in shallows, medium and deep depths, selecting models that are suitable in weight. An important advantage of oscillators is that they have excellent flight qualities.
Silicone fish on jig heads or spaced rigs are the best option for fishing in great depths. They are affordable, easy to use and still produce great catches. You can catch pike in the coastal zone with unloaded tires.
Wobblers are universal baits that can be used at shallow, medium and deep depths in currents and in still water, choosing a model that is suitable in size, weight, buoyancy and depth level. But fishing with them requires a certain level of technical skill, so they are not suitable for beginners.
How to properly tie a wobbler to a fishing line
Before throwing a wobbler, you need to tie it correctly to the fishing line. This task is not as simple as it seems. The fact is that some wobblers (especially small ones) are quite finely balanced - and any “extra” element (steel leader and even a rough fastener) can upset the correct balance and worsen the performance of the bait. Fortunately, for most medium and large wobblers this issue is not critical. Although here, too, a rough, heavy leash can interfere with fishing - for example, creating unnecessary sagging of the line during pauses. Therefore, the shorter and lighter the wobbler leash, the better for playing and guiding. But it’s also worth remembering about the size of the prey – so the best option will always be a compromise.
This means that for each wobbler it is advisable to choose its own optimal option for tying to a fishing line.
Top 10 schemes for how to tie a leash to the main fishing line
Fluorocarb
Its distinctive feature is that its refractive index of light is almost the same as that of water. This equipment causes a lot of controversy in the fishing community. It is believed that such a leash can compete with steel in strength, while it is transparent and, for the most part, invisible to the fish.
It is believed that it acquires the required degree of rigidity only when its thickness exceeds 0.5 millimeters. The use of a fluorocarbon leash has become most popular when using light baits on those fish that are unable to chew through it (this applies, for example, to perch).
Visually, it is a braided cord made of several very thin steel wires. Each of them is covered with a layer of protective material. Usually we are not talking about ready-made leashes, but about the material for making them yourself. The technology for their manufacture is quite simple.
When purchasing, choose a cord that can withstand a given load. For it you need to purchase two crimping tubes with fastening loops, which are put on at both ends of the leash. The swivel should already be attached. We crimp the tubes with pliers.
- The advantages of such leashes include the following.
- Softness of the material. It is such that it practically does not interfere with the play of the bait.
- Lack of memory for bends. After repeated bending, there are no residual bends.
The disadvantage here is that sooner or later individual steel strands will begin to separate from the entire cord. In this case, the leash will need to be replaced.
Steel
In a way they are classics. They are most convenient when working with large bait and when catching predators that can easily gnaw through regular fishing line. At the same time, its use sharply increases the bulkiness of the entire structure, which can lead to problems when catching, say, chub.
Titanium
The titanium leash is not only the most fashionable and modern, but also the most expensive type of leash. At first glance, they look rough and quite noticeable. But at the same time, they have an important advantage, which is that such leashes have practically no memory for bending.
It is not very common, but there are fishermen who prefer to use just such a leash.
These leashes have, in addition to strength, another important property. If it is twisted or bent, the leash tends to return to its original position. It does not rust over time and is very durable. To catch fish, you can use a thinner leader than when using other materials.
Tungsten
It is quite durable, although thin. Can be used when fishing for pike. But it has one serious drawback. After two or three bites it gets twisted and it can no longer be fixed; you have to buy a new one. But, since it is quite cheap, this circumstance does not create any special difficulties.
How to tie a wobbler directly to a fishing line
Manufacturers of wobblers assure that baits must be tied directly to the fishing line with the “correct” knots, and even specially develop them. The latest versions of such nodes are shown in Fig. 1. and are suitable for both monofilament and braid.
Fig.1. Knots for tying wobblers: a) directly behind the eye, b) behind the winding ring.
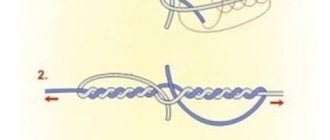
The manufacturer strongly recommends using a loose loop knot rather than a tightening one, which less restricts the wobbler’s play. For greater clarity, Fig. 2 shows the sequence of knitting a knot-loop from RAPALA:
Fig.2. Sequence of knitting the Rapala loop knot.
Often, for greater mobility, the front eye of the wobbler is immediately equipped with a winding ring, to which the fishing line (mono or braid) is tied with its usual knot. A similar option is to attach via a clasp.
To the fishing line
Many fishermen are abandoning the use of braided lines in favor of classic fishing line. There is a lot of different information on how to tie a spinner to a fishing line, but only some knots are considered suitable for this type of connection. Fishermen mainly use four:
- Homer knot.
- Gripping unit.
- Lindemann knot.
- Uni node (very often called Grinner).
Homer node
This unit is highly reliable and durable. It is suitable for tying on any type of fishing line, but is best suited for regular fishing line. Despite the simplicity of knitting, you can get a strong connection between the spinner and fishing line in a matter of seconds.
You can tie it like this:
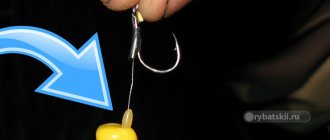
- First you need to form a loop by threading the fishing line through the winding ring or eye of the spinner.
- Now you need to make a few turns around the main line and tie a regular knot.
- Then you need to repeat the second step, only without forming a repeat node.
- Now all that remains is to pull the working end through the loop, moisten and tighten the knot.
- Remove excess line.
Gripping unit
One of the most effective and simple knots used by fishermen. Any bait or carabiner can be securely connected to the fishing line using such a knot. Tying it is quite simple and is done as follows:
- First you need to form some kind of loop by threading the fishing line through the winding ring of the bait.
- Now make three to five turns around the main line with the free end.
- Pull the loose end through the loop you made in step one, moisten and tighten the knot.
- Remove excess line.
The success of the entire fishing will depend on whether you can correctly and firmly fix the bait on the fishing line. If you know how to tie a spoon to a fishing line correctly, then you will never be upset about lost baits, because even a lively and strong fish will not be able to go back into the pond.
Lindemann
Lindemann is not used by fishermen too often, but despite this it has every right to exist. It is very easy to knit and allows you to get a high-quality and reliable connection very quickly and easily.
- Thread the end of the fishing line into the winding ring and return it back.
- Make a loop and re-pull the end of the line through the ring.
- You should now have a loop with double line on one side of the winding ring.
- Now you need to wrap the loop with free fishing line. The number of turns is not less than 3.
- Tighten the knot.
- Remove excess line.
Grinner knot
A very simple and reliable knot, it is knitted as follows:
- Form a loop by threading the working end of the fishing line through the spinner's winding ring.
- Make a loop around the line and pull the tip through the resulting loop, as shown in the picture above.
- Now make about 5 turns around the main line.
- Moisten and tighten the knot.
The advantage of the knot is its strength and the fact that it is not capricious to the diameters of the winding rings and the thickness of the fishing line, unlike the above knots. So with this connection you can combine different lures and lines.
Do you need a leash for a wobbler?
Manufacturers, at best, stubbornly ignore this issue in silence. At worst, they say that the leash is harmful, as it disrupts the “ideal balance” of the bait and its action.
One could agree with this if there were no pike in our reservoirs. It is this very toothy predator that easily cuts both regular and braided fishing lines. And here the question must be posed head-on: a wobbler for pike should initially include a leash.
For example, in every fourth case my small bait ended up entirely in the insatiable mouth. And one day a completely curious thing happened: a 5-centimeter wobbler slipped halfway through the gill slit and hooked the pike from the outside.
Therefore, if you are ready to lose a quarter of your wobblers, and at the same time pikes, then you do not need a leash. I believe that if a “toothy” bite is likely, a leash is a must!
Without a leash, it is justified to catch only asp and chub in a fast current, where there are no pike. In other cases, I personally always use a leash. Without a leash, your record pike hasn't bitten yet, but it's already gone!
Although, indeed, a steel leader changes the balance of a wobbler, especially a small one. In this case, the floating bait may even become sinking. But most medium-sized and all large wobblers allow the use of a “standard” spinning leash with a swivel and fastener without noticeable consequences.
To make the rig easier, you can take the thinnest and shortest (10 cm) leash, you can remove the swivel from it, and if there is already a winding ring in the nose of the wobbler, you can also remove the clasp. Well, for small wobblers you have to use the lightest leash made of special leash material.
If the balance of a wobbler with a leash has changed significantly, you can try to slightly adjust the bait, which will be discussed below.
We attach the wobbler to the fishing line through a leash
Of course, theoretically, the leash to some extent disrupts the balance and play of the wobbler. But which one? In each case, you need to look and draw conclusions. In addition, leashes are also different.
Standard leash
Such a flexible leash with a small swivel and a neat clasp is convenient in most cases, which is why it is used most often. The length of the leash depends on both the wobbler and the intended prey - usually 10-20 cm is enough. Pay special attention to the fastener lock - self-unfastening or forgetfulness lead to the unfortunate loss of both bait and fish.
String leash
A wobbler, unlike a spinner spoon, does not twist the line, so a swivel on a leash seems to be not necessary. Therefore, rigid leashes made of thin elastic wire (strings) are often used.
Such a leash may have a blind loop that twists behind a single bait, an unwinding loop and a special clasp. The last two options allow you to quickly change wobblers if necessary. Such lightweight leashes are usually used with small wobblers.
But a rigid leash can also be very useful when jerking a wobbler, when the bait moves in an active zigzag. A semi-soft leash here often gets caught in the hooks, but a hard wire leash - much less often.
rybalkaspinning.ru
What are the methods for attaching a wobbler?
Every self-respecting fisherman who is keen on hunting for predatory representatives of water bodies should imagine how to tie a wobbler without subsequently having problems with its loss. You need to have a clear understanding of when, in what way and with what knot, depending on the material of the main cord, you need to fasten it.
There are a number of ways this manipulation occurs:
- The wobbler can be attached to the main cord through a leash with a clasp or by direct connection to the cord.
- The wobbler can be secured using a winding ring.
Attaching the bait through a leash is useful when fishing exclusively for pike. Her teeth do not spare either fishing line or braid. Here a steel leash is a mandatory precaution. As a rule, steel leashes are sold equipped with a swivel on one side and a metal fastener on the other.
To give the bait greater degrees of freedom, and it is no secret that the leash seriously inhibits the play of all wobblers, it is recommended to remove the swivel and make special demands on the fastener.
Important! Unlike spoons and especially spinners, wobblers do not twist fishing line or braid. Consequently, the swivel does not provide any useful component in the equipment and can not be used.
The fastener is selected based on the size of the bait. The best option would be a fastener made of strong wire in the form of a hairpin. The fastener is attached directly to the eye, mounted into the body of the wobbler, without any kind of transition elements. The leash itself is tied to the main cord with a blind knot, the types and features of which we will talk about below.
How to properly tie a wobbler directly to the cord, without limiting its movements, can be understood by considering the knots that ensure the formation of a tight loop at the end of the braid or fishing line. Using these features of some nodes, you can tie a wobbler, leaving it all degrees of freedom absolutely without restrictions. As a result of fastening through a tight loop during retrieving, and especially during their pauses, the wobbler for these moments is completely deprived of connection with the rod and cord, showing the maximum of qualities invested in its ability to play by the manufacturer. According to the presented type, baits are knitted for catching fish such as perch, asp, rudd and even pike perch. The absence of a toothy mouth gives confidence in the integrity of the bait and line during the bite.
Important! When the bait is tied directly to a fishing line or braid, its most vivid and expressive game is ensured.
The use of a fastener to attach the bait can be considered only a conditionally direct method of fastening. After all, the fastener during wiring, no matter how miniature it may be, will in any case affect the freedom of operation of the wobblers and limit their capabilities. But many fishermen, omitting this nuance, are happy to use this method of equipment. After all, it is convenient for quickly changing the used artificial fish to another, without wasting time on tying knots and saving the length of the main cord on the edges. If you frequently change bait and retie during one fishing trip, you can lose from one to three meters of the useful length of the cord.
To tie a wobbler, minimizing the restriction of its freedoms and, in addition, avoiding constant tying, you can attach an artificial fish using winding rings. With this method, a winding ring is knitted to the end of the braid or fishing line. The same ring is inserted into the fastening loop of the wobbler; experienced fishermen have probably noticed that some models of wobblers are initially equipped by the manufacturer with this accessory for fastening this type.
The winding ring on the cord is knitted according to the principle of a tight loop. The fish is secured by inserting one ring into another. When the bait is working, the rings do not affect its game, rolling freely over their surfaces, relative to each other, at 360 degrees. The inconvenience is the not very quick change of baits. Although, once you get the hang of it, this manipulation is quite doable within a couple of seconds, and the inconvenience, especially during passive fish activity, pays off with more frequent exits due to the more natural play of the wobbler.
How to tie a leash?
Very often, anglers attach the bait not directly to the main line, but through a leash. Depending on the direction of fishing, this allows you to give the gear the necessary qualities. For example, in ultralight, using thin monofilament or fluorocarbon, you get a more sensitive equipment that is invisible to fish. And when hunting for pike, by tying a steel lead or a piece of thick “flurika”, you can avoid cutting off the bait when fishing for a spotted predator.
If nylon is used as the main line and the leash is also made from it, then experienced fishermen use the Albright knot. It works like this:
- The main thread is folded in half.
- We thread the end of a piece of fishing line intended for a leash into the resulting loop.
- The free end of the future leash, threaded into a loop, is wrapped around the main fishing line folded in half five to ten times.
- After this end is threaded back into the loop, both lines are moistened and smoothly tightened.
This knot allows you to attach not only two pieces of monofilament fishing line. It is suitable for braid and fluorocarbon. It is best to use Albright for threads of similar diameter. If you need to attach a thin leash to a thick main monofilament thread, then the optimal choice would be a clew knot:
- The main scaffold of large diameter is folded in half.
- A thin thread is threaded into the resulting loop.
- Several turns are made around the double main nylon.
- The free end of the future leash is passed under the turns and threaded into the loop.
- All that remains is to smoothly tighten the line and remove the excess ends.
When fishing with an ultra-light rod, a combination of “main braided line + fluorocarbon leader” is often used. In this case, it is better to tie the fishing line using a “Carrot” knot. It's done like this:
- A simple single knot is tied, but not tightened, on one side of a piece of fluorocarbon line.
- The end of the braided fishing line is inserted into the resulting loop.
- Up to a dozen revolutions are made around the “flurik”, and the turns do not lie tightly.
- Then the same number of turns is made back, holding the turns of the braid with your fingers.
- All that remains is to thread the free end of the cord into the loop.
The threads are wetted and tightened smoothly. For reliability, a locking knot can be made at the free end of the fluorocarbon to prevent spontaneous unraveling. A thin leader made from fluorocarbon line can be attached with a shallow or swivel clasp to which you can attach a miniature spinner, a wobble, a wobbler, a micro spinner, and a silicone bait.
There are many more options that allow you to knit together the main fishing line with a leash, but the ones listed above are the most popular and easiest to learn.
How to tie tackle to monofilament fishing line?
All of the above knots are good for braided fishing line. However, they are not reliable if monofilament line is used. It has its own nodes:
- "Lindemann" (suitable for monofilament thin and medium line);
- "Pitzen" (thick forest).
Both fastenings are knitted almost identically using the following technology:
- the line is passed through the ring, then comes back and forms a new loop;
- it turns out that the tackle is tied with a loop, one of which has a double side, we wrap the free end around it, the number of turns depends on the thickness of the line, for a thin line the number of turns is greater;
- after that you just need to tighten the knot and trim off the excess;
- For “Pitzen” at the end, before you tighten everything, you need to pass the free end through the loop formed by the first turn.
This is only a small part of all the ways you can tie gear, but these loops are the simplest and most reliable. They are perfect for both novice fishermen and true professionals.
Source: ulov.guru
How to tie to a fishing line?
For fixing spinners on monofilament fishing line, we can recommend the Grinner knot. This option has the following features:
- The bait has a degree of freedom, which allows it to open up as much as possible when retrieving.
- The strength at the knot does not actually decrease and corresponds to the breaking load of the straight section of the main line.
- Easy to learn, suitable for beginners.
- With some experience and the necessary skills, this option can be knitted within a few seconds.
“Grinner” is most optimal for elastic soft nylon fishing lines. It is not so good with fluorocarbon or rigid monofilaments. It is advisable to replace it with the Rapala knot shown below. The method under consideration is knitted in the following way: 1. The end of the nylon is threaded into the eye of the bait.
2. The thread is folded in half, the optimal length of the double line is up to 15–20 cm.
3. We wrap the thread folded in half with the free end approximately five to seven times.
4. The free end of the monofilament is threaded into the resulting loop.
All that remains is to slowly tighten the thread, after wetting it. The excess end of the monofilament is cut off.
Attaching the spinner to the fishing line
There are several main attachment points for attaching the spinner to the fishing line:
- Captivating knot.
- Homer knot.
- "Grinner" (or Uni) node.
- Lindemann knot.
Capturing knot
The catching knot is a universal and not labor-intensive method of attaching a spinner to a fishing line and consists of the following:
- Thread a fishing line into the eye of the spinner and use the formed loop to wind the free end around the main fishing line in 3 turns.
- Pull the free end into the gap formed at the base of the bait and tighten it.
- Cut off the excess part of the fishing line from the free end.
Homer knot
The Homer knot is universal in use for all types of fishing lines. Characterized by high reliability.
It's done like this:
- Insert the fishing line into the eye of the spoon and pull it out 10-15 cm, forming a simple loop.
- Wrap the free end of the main line and make another simple knot.
- Wrap the free end of the main line again, making about 5 turns.
- Pull the working end into the original loop and tighten, after wetting it.
- Trim off the excess part of the free end of the fishing line.
Grinner knot
The Grinner knot is a very simple knot to perform, consisting of the following:
- Thread the free end of the fishing line into the eye of the spoon, forming a simple loop.
- Make a loop over the main line and bring the working end through the resulting loop.
- We wrap the main thread again with the free end of the fishing line, making 5–7 turns.
- Tighten the knot.
Tip: when fishing in reservoirs with strong currents, in addition to the strength of the fastening units, the weight of the bait is important: the larger it is, the more productive the bait.
Liedemann knot
The Liedemann knot, the formation of which is typical for monofilaments, is not inferior to other knots in its strength.
The algorithm for knitting it is as follows:
- Pass the end of the fishing line through the eye of the bait several times, forming a loop.
- Again, thread the free end of the fishing line into the eye, forming a double loop together with the original loop.
- Pass the free end of the fishing line through the loop and make 3–5 turns, the number of which depends on the thickness of the fishing line and will increase as the radius of the fishing thread decreases.
- Tighten the knot after moistening it.
How to tie to a cord?
Attaching the spinner to a braided thread can be done using two main knots - “Clinch” and “Palomar”. The first is somewhat more complicated, but is considered more reliable. The second one is easy to knit, but reduces the strength of the tackle. Let's consider a simple option that can be recommended for beginning spinning players. You can secure the bait using the Palomar knot as follows:
- A piece of cord folded in half is threaded halfway through the loop of the bait, clasp, eye of a swivel or leash. The length of the folded section is 15–25 cm, depending on the size of the spoon.
- A single knot is made, which is not completely tightened.
- The bait is threaded into the resulting loop.
- The braid tightens.
All that remains is to cut off the extra piece of fishing line. That's it, Palomar is ready.
How to tie a spinner
6 minutes Author: Dmitry Tishchenko 1
The strength of spinning tackle depends not only on the strength of the thread wound on the reel and the power of the selected fishing rod. The weak link may be the knot that secures the bait, leash, swivel and other equipment elements. Therefore, the question of how to tie a spoon to a fishing line is important; it needs to be given special attention, especially to novice fishermen, so as not to lose a trophy or an expensive bait during the fishing process.
Modern spinning rods use both monofilament fishing line and multi-filament thread. They have different performance characteristics, so the nodes used have their own characteristics. Some bait attachment options are suitable for nylon, while others are suitable for braid. Below we will consider how to correctly tie a spinner in all cases, which knots are most suitable for this.