Which fishing knots are better and why Albright is attractive
A modern fisherman cannot allow his equipment to fail him when taking a bite, which may become the most important and largest of his life.
Of course, it is important to choose a good fishing line, because it is responsible for the weight of the caught fish. The quality of the fishing rod is also considered equally important - it is responsible for the size of the caught trophy. It is important to choose the right bait, hook, equipment - all this will help in fishing and increase its efficiency. But if you don’t choose a high-quality and durable knot for attaching a hook, spoon, or leash, then your trophy may fall off and you won’t be able to fish it out. These include the Albright fishing knot and its varieties. Let's figure out how to choose a suitable knot, what its knitting pattern is, and how long it will last you.
What knots are popular today
High-quality connections are necessary in almost all types of equipment, so it is important for a real fisherman to know as many components as possible and the characteristics of each of them. Of course, there are a huge number of different types of ties for equipping fishing rods, but we will look at the most popular and high-quality knots
“Palomar” is very popular among modern fishermen. It is used when tying various hooks, baits, and fasteners. First, fold the end of the fishing line in half and thread it inside the ring of the hook. We make a regular knot and thread the hook inside the loop of the fishing line. We tighten the Palomar, it is ready. Interestingly, despite its simplicity, it is very durable and can withstand heavy loads.
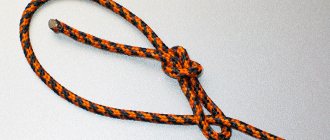
“Grinner” is also used no less often, but let’s consider one of its versions, which is simpler and can withstand greater loads than “Grinner”. To begin, we thread the tip of the fishing line through the ring of the hook, and form a loop with the main fishing line, returning the tip back towards the ring. Thus, we get a triple thread, around which we make 6-8 turns, and then we put the tip into a loop and tighten the resulting system.
If you use a cord, then you will not be able to use the Clinch knot connection, but when connecting the equipment to the fishing line, such a device is convenient and holds it quite well. First, the fishing line is threaded inside the ring, several turns are made around the main fishing line, at least five, then the end is threaded inside the loop near the ring of the equipment. All this is tightened and trimmed.
When fishing without a sinker, use the no less popular Rapala knot, which is also popular for securing wobblers and poppers. First, a single regular knot is knitted on the fishing line, but it does not need to be tightened. The end of the line is passed inside the ring and then inside the knot. The same end is wrapped in four turns, around the main line and again, drawn inside the knot, and then inside any turn. Now it needs to be tightened.
But, despite all the popularity of the above knots, the Albright and Carrot bundles are considered the highest quality and most durable, let's look at these connections.
Carrot and Albright
A fishing knot such as the Carrot Knot is most popular for tying braided lines with a fluorocarbon leader or fishing line. On fluoro (fluorocarbon), we make a regular single knot, into which the cord is threaded. Then we wrap the cord around the fluor several times, preferably 9-10. Then we make the same number of turns in the opposite direction and, having wetted it, tighten it. This is the famous “Carrot”.
A knot such as Albright is often knitted together with a cord and fluor, but it can be used with any equipment, because it is very high quality and durable. We bend the flyer into a loop; if you use a hook, then, of course, you don’t need to bend it - we use a ring. We thread the cord inside the loop and, wrapping it back, press it to the flare (hook). Then 10 turns are made around the shank of the hook or around the tips of the fluorescent hook. The end of the cord is threaded back through the hook ring or through the fluorocarbon loop. We wet and tighten it. Of course, it is better to use the pictures below to understand how to knit the Albright knot.
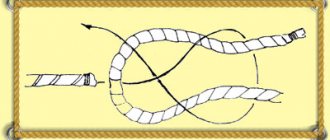
Step 1. We pass the end of one fishing line into the loop of the other.
Properties of fluorocarbon
This type of fishing line has a number of very important advantages that each angler must be able to use. The most obvious advantage of fluorocarbon material is its camouflage; it is completely invisible in water. This factor is explained by the refractive index, which is almost the same as that of water. But not in all cases this particular property is positive. For example, in a huge number of cases, experienced fishermen buy regular monofilament lines or cords. And in some cases, an ordinary noticeable fishing line allows you to observe and control the wiring.
One of the positive properties of such a fishing line is that it has no mechanical memory. Due to this, it is possible to create retractable leashes specifically for fishing with a spinning rod. In this case, the number of overlaps will be significantly reduced, and after it is untied, it will quickly return to its original state.
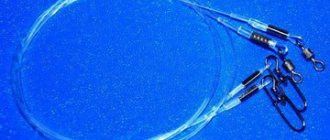
Photo 1. Fluorocarbon leaders.
Fluorocarbon fishing lines have such a wonderful parameter as invulnerability to abrasion. They are also used as liners for fishing on the bottom with a lot of stones or algae. The fishing line made from this material is endowed with such an excellent property as moisture resistance. Due to this, when left in a humid environment for a long time, it does not swell at all, since water molecules are not able to change the structure of this material. In addition, there is no increase in diameter either; from this fact it is clear that the fishing line is always invisible.
Read List of river fish
The best knots for connecting the hook and swivels
Before considering the most reliable fishing knots in this category, we note that we do not recommend tying fishing line to hooks, swivels or rings made of thinner material (wire) than the fishing line itself; this will negatively affect the quality and reliability of the knot.
Knot "Palomar" or "palomar" Area of application:
- a bunch of main fishing thread with a swivel;
- for tying fishing line and hook;
- for attaching a weight, swivel, carabiner, etc.;
- for attaching silicone baits to a leash or fishing line.
The disadvantage is that you need to fold the line in half, which increases the volume of the knot and shortens the leash.
Node advantage:
- a bunch of not only monofilament fishing lines, but also braided cord and baits used both in spinning fishing and fishing with feeder gear;
- the ability to attach many equipment elements (swivels, hooks, flies, etc.);
- easy to knit.
Classic Palomar
“Double Palomar” is knitted like this
The “Triple Palomar” knot provides for the installation of fishing accessories and lures with a large eyelet to a braided fishing line. This is how the knot is tied
Palomar drop shot knot
Knot “Clinch” or “improved clinch knot” Let’s consider two types of this knot:
- normal clinch;
- clinch reinforced.
This knot is widely used, but has proven itself especially well in spinning fishing. The first version of the knot is used mainly for mounting sinkers, since it is inferior in strength to the “reinforced” knot, which cannot handle even the most complex hooks.
Scope of application: artificial baits, jig heads, weights, hooks, swivels, sinkers, feeders, carbines.
Where such a node is not used:
- for mounting sinkers with a transverse or longitudinal hole;
- for mounting tubes and factory rings.
Important! The size of the ear of the above accessories should not be more than 1.2 mm, since at diameters above the specified indicator the knot does not hold securely. Learning to knit an improved knot model
Learning to knit an improved knot model
Homer knot or homer knot
The knot tying pattern is shown in detail in this video.
Grinner knot or universal Uni knot This knot is also known as the Uni knot or ukni not. Uni means universal.
What is knitted with a universal knot:
- hooks (for example, offset), fasteners, baits;
- braided line to the spool;
- lines between each other.
For which lines is it applicable:
- monofilament;
- network.
This is how the universal Uni knot, aka Grinner, is knitted
The double universal Uni knot is knitted like this
Figure Eight Knot This fishing knot is designed for attaching both hooks with and without an eye. It is also suitable for making mobile loops, tying feeders, sinkers, and leashes. In a word, it has wide application and can be used anywhere.
It is not complicated in execution and is suitable for beginner fishermen.
This knot can have several weaving options, for example, by folding the fishing line in two you will get a double figure eight.
Who needs to know how to tie this knot?
You should definitely know how to tie an Albright knot:
- Fans of carp fishing. The requirements for gear for carp have always been higher than the requirements for gear for any other white fish. It is the carp that most often, with an unexpected maneuver, breaks the leashes in the most vulnerable place - at the knot.
- Trophy hunters in feeder fishing and carp fishing. The shock leader will not be reliable enough if any other connection method is used in the rig.
- Fans of float fishing at long distances (Bolognese match fishing method), as well as spinning anglers who use heavy baits in their arsenal. In these fishing methods, if the equipment is unbalanced, it may overlap. Excessive load on the monofilament during casting leads to its damage and breaks. The theory requires a complete replacement of the main line. But you can splice the main line by tying it at the break point. The Albright node is ideally suited for these purposes.
Recommendations
The fact is that when tightened, different (and even identical, for example, fluorocarbon) fishing lines noticeably rub against each other. This means that they can overheat, which can lead to their rupture, which begins with the formation of nicks and microcracks. Novice fishermen often underestimate this feature of “line” gear, for which they pay with a smaller load reserve during hooking when the bite begins.
The main line should be thicker and stronger than the leader line. It's all about the main line taking the main share of the tensile load. Having mixed up the leading line with the main (carrying) line, fishermen risk losing a larger spoon along with a broken fish. Braided fishing line (cord) is not prone to frequent breaks - due to its performance and structure, it is noticeably stronger than any other monofilament used as a leash. The same is true: the braid (cord) should not be cut into pieces for leashes - as a result, the same imbalance is formed. A large fish can carry it away with it at the moment of failure when hooking the entire tackle.
The increased thickness of the second (lead) line requires more turns. If both fishing lines are equal in thickness - this is an extreme option, it should not be abused - the number of turns in one “pass” should reach 10. It is not recommended to tighten less than 5 turns - in all cases the knot holds the tackle weakly. This medal also has a reverse side - it is difficult to lay 10 turns around the main line, which is equal in thickness to the leader line. It is still recommended to use a thinner fishing line as a secondary line.
To learn the Albright knitting technique, practice on laces or rope. In this case, the beginner will not lose part of the fishing line if the tying fails. The fact is that it is impossible to untie the “albright”, like any other complex knot, without a significant loss of strength, reaching more than half of the original value. Don't neglect trimming the excess ends. If you don’t have scissors, you can carefully melt them with a match or lighter. The cutting point is at a distance of no more than 2 mm after the final tension of the knot. If you cut the ends close to the knot, after a while it will completely untie or lose the strength it has been given.
How to properly tie the Albright knot, see the video below.
How not to miss a big fish?
- Do not touch the reel, do not even reel it in if there is no hooking after the bite. Hooking will be mandatory with any tackle, if it provides for hooking;
- Don't hook too hard to avoid tearing the fish's lips. There are fish with very soft lips, which can be seriously deformed when powerfully hooked. Such fish, for example, include perch. In addition, with such a hook, the hook may not catch in the mouth at all and fly out. When determining the hooking force, take into account both the size of the hook and the strength of the fish's lips. The smaller the hook and the weaker the lips, the less effort should be made by the fisherman when hooking;
- Hook on time. When there is a clear bite on the rod or float, it’s time to hook. At this moment, the fish has just taken the bait and swims away with it;
- Use a sensitive float. In this case, the fish will not have time to get scared;
- Don't strike too late. You should not hope that if you wait time, the hook will be successful, since the fish will swallow better. Please note that the fish can spit out the bait if it suspects something is wrong;
- Well, and most importantly, use the Albright knot when fishing.
Types of locking knots, knitting techniques
The sliding limiter is made independently in different ways. It is not difficult to learn one or more techniques for knitting and installing a float stopper.
Practice has shown that there are only four reliable and functional techniques suitable for bottom fishing. The scheme of each of them is simple, memorized during short training sessions at home.
Duncan
The practical compact knot is difficult to loosen. For knitting, take a woolen thread 20 cm long. It is better to train on fairly thick laces and ribbons.
Dunken technique step by step for right-handers:
- Lay the wool thread along the fishing line. Pinch with the thumb and index fingers of your left hand four centimeters from the beginning.
- Place the free end of the thread behind the fishing line with your right hand. This movement creates a large loop in front of the fingers.
- Pinch it with your fingers.
- Pass the long end of the thread through the loop in front of the fishing line. Pull until the first turn is formed. Next, make 3-4 more of the same, placing them sequentially one next to the other.
- Moisten the resulting structure with water.
- Pull the ends of the thread in different directions until you feel secure.
- Leave 2 cm at each end, trim off the excess.
A small and soft knot is capable of limiting the movement of a sliding float and weights spread along the braid.
Clinch
To knit a stopper using this method, take 30 cm of wool thread. Make sure that the diameter of the thread and fishing line match.
Clinch
Algorithm for knitting fishing knots using the clinch method:
- Fold the thread like a woman's hairpin, but not strictly in half. Leave one piece slightly longer than the other.
- Attach the resulting “hairpin” to the fishing line with the short end. Hold the line and thread with your fingers in the place where the loop formed from the bend of the thread.
- Take the longer end and wrap it around both the fishing line and the short part of the “hairpin” at the same time. Do this 5-6 times to form a spiral.
- Lay the turns evenly one to one.
- Now return the long end to the beginning, thread it through the loop formed by the fold of the thread.
- Wet the resulting knot.
- Pull the ends of the thread in opposite directions until they are fixed.
- Leave the ends 2 cm long free, cut off the rest.
An important condition that experienced fishermen observe is 2 cm tips at the knots. There are explanations for this. Shorter ends become stiff: when they touch the ring, they interfere with accurate casting
In addition, during prolonged fishing, the locking assembly for the sliding float may weaken. You will return the device to its former elasticity by simply pulling the ends in opposite directions,
Shorter ends become stiff: when they touch the ring, they interfere with accurate casting. In addition, during prolonged fishing, the locking assembly for the sliding float may weaken. You will return the device to its former elasticity by simply pulling the ends in opposite directions.
Kremkus
Using this technology, a double heavy stopper is knitted - an attribute of feeder equipment. But fishermen also use it for a sliding bite indicator.
Take a woolen cord 33-35 cm long, then work step by step:
- Fold the thread in half.
- Step back 6-7 cm from the ends and wrap the main line in a circular motion.
- Make 4-6 wide turns. After this, a free piece of double thread 6-7 cm long remains.
- Pull the other end of this double thread to the outermost turn and make a few more - with a long piece in the opposite direction.
- Wet the knot with water.
- Pull the loose ends.
Feel the fixation, cut off the excess pieces of thread, leaving two-centimeter ends.
Improved
To make a modified stop knot, take a gypsy needle and thread and place them parallel to the fishing line. Wrap one end of the needle: 5-6 turns are enough. Next, insert the same end into the eye of the needle. Pull the needle towards its point. Moisten the thread and tighten.
The tightening force should be greater than that which the float will exert on the stopper.
"Carrot" or "Albright"
Both of these knots are used to fasten cord to fluorocarbon or fishing line, as well as fishing line to thinner fishing line. The “Carrot” knot is used only when fishing with a spinning rod, to splice the cord with the liner. The cord is quite noticeable in the water, and there is a risk that a cautious fish, for example, an asp or a chub, will swim away.
To avoid this, it is recommended to use thin transparent monofilament or fluorine, from one meter to one and a half meters long. "Carrot" is in many ways similar to "Albright".
But in “Albright” the line turns in one direction, and in “Carrot” the thinner braided line turns right and left.
And the turns overlap each other. Thus, the ends of the knot differ significantly in thickness.
The Albright knot is excellent for creating a long leader from the most invisible line and cord.
In addition, it is very durable and has a small size, which is extremely important when passing into rings. “Carrot” is somewhat larger and, accordingly, it is difficult for it to pass through the rings when casting
However, the reliability of this unit is also excellent.
"Albright" knits much faster and is indispensable in situations where the knot is needed urgently. In terms of breaking load and quality, these units are the same. But competition participants, for obvious reasons, prefer Albright. Node benefits
The main advantage is simplicity and speed of production. For this knot, you can use both uniform and monofilament fishing lines, as well as braids. Flawless passage through the rings and high breaking load make this unit universal in use.
In addition, with the Albright it is easier to reach the backing if the fish is pulling out a lot of line. In other words, backing can be called an extension cord or an extension line. It is used when catching large fish, to increase gear. The size of ordinary cords, as a rule, rarely exceeds three tens of meters.
While the fish is capable of pulling from one hundred fifty to two hundred meters of fishing line. As a backing, it is customary to use twisted cord, consisting mainly of synthetic materials.
It is recommended to first wind an extension line onto the reel and attach a fly line to it. In addition, thanks to backing, the cord is closer to the edge of the spool.
Using Albright
The Albright node is relevant in various situations. This is especially true when it is necessary to fasten two fishing lines together. Let's look at this advantage with an example. If you have a spinning rod, then you need to connect braided and thin fishing line. In this case, this type of node will help perfectly. The reliability of this will be at the highest level, and fishing will be pleasant and comfortable.
In the same case, if the fisherman prefers so-called float fishing, then “Albright” will also be of great help here. In this case, the knot is used as a so-called swivel. It promotes positive rotation of gear, as well as the longest casting of bait. This is justified by the fact that with its help the fishing line can travel much longer.
The Albright fishing center also provides direct assistance for sports fishing. In this area it is used as a so-called micro-swivel. As for the usual type of fishing, such a knot should be somewhat larger. The inside diameter of the ring should be two and a half millimeters. Due to this size, changing the hook is easy and quick, which cannot but please fishermen.
If you use this type of knot, the gear becomes smaller and less noticeable to fish.
Features of the node
Many novice fishermen wonder how to tie an Albright knot, but do not know the main features of this product.
The most important advantage of this type of node is its simple and comfortable use. It makes no difference to him what kind of fishing line he knits; he can master various products. For this type of knot, you can use both uniform fishing lines and various braids. In addition, the unit is universal in the application of various types of loads and passage along certain rings.
The “Albright” knot, a photo of which is in the article, does its job perfectly when pulling out fish with a large weight.
It is necessary to understand that when fishing with a spinning rod, a fish can pull out up to two hundred meters of fishing line. In this case, a node of this nature shows positive characteristics in this process.
Experts advise beginners to first wind a special extension line on a particular reel. You need to attach a so-called fly cord to it.
How to tie an Albright knot
There are 3 main Albright options that you need to pay attention to
Standard
To link a regular Albright, you need:
- fold the first line in half, forming a loop about 10 cm long, and thread the second one through it;
- twist the second thread around the base of the loop;
- make several revolutions – usually 5-10;
- insert the end of the second line into the loop in the same direction in which the main part goes, and pull the 2 threads to tighten the connection, after wetting it.
Important! After the installation is tightened, it is worth checking its strength by making a few good jerks, holding on to the two connected fishing lines, and only then cutting off the excess ends.
To tighten the Albright before such testing and trimming, it is enough to grasp only the two connected lines. There is no point in pulling on the two short ends.
Improved Albright
This Albright variation can withstand heavy loads better. It is this type that is increasingly used today in heavy feeder and carp fishing for tying a shock leader to the main line.
To link Improved Albright, you need:
- fold the first line in half, forming a loop, and pass the second line inside it;
- make a few turns around the first thread with the second thread;
- then make a few more turns in the opposite direction;
- pass the end of the second fishing line into the loop;
- wet and tighten the connection.
Thus, the installation process is very similar to knitting a regular Albright. Once the basic version is memorized, mastering Improved Albright is not difficult.
There is another variation of the Improved Albright, with which the installation will be even stronger.
To tie it, you need to make several turns of the second fishing line in one direction, then in the opposite direction, and then make another 5 turns inside the loop.
The finished Albright, connected according to this scheme, seems to consist of two nodes. This connection is very reliable.
Similar and alternative nodes
There are quite a few knots that are similar to Albright when knitted or do not resemble him very much, but can become a replacement for him. The main ones that are worth paying attention to are Carrot, Snake, Double Uni (Double Grinner), Leader Knot and PR Connection.
Carrot (Mahin Knot)
Well suited for tying two different types of fishing line with comparable diameters. Most often used in spinning.
The Carrot knot got its name because when it is mounted on a fishing line, a connection is obtained that is close in shape to a cone. Its thickness is less in the front and increases in the back.
Thanks to this shape, the connection passes through the guide rings more easily. In many ways, this explains the popularity of carrots in spinning. But Albright, due to its compactness (that is, small diameter), flies through the throughput rings even better.
Which of these two nodes should you choose? If we are not talking about spinning, then preference should be given to Albright. In float, donk and other types of fishing, with the exception of spinning, it will be more appropriate. You can use both Carrot and Albright in a spinning rod - the choice depends more on personal preference.
This video explains what mistakes fishermen make when tying these knots and their advantages:
Snake, Bloody, Blood Knot, Snake (Blood Knot)
A strong and reliable knot that is used to tie two fishing lines.
The snake is best suited for knitting monofilament lines. This knot is especially relevant if you need to tie two threads of the same diameter (the ideal option is to connect two pieces after breaking). If the fishing lines differ noticeably in thickness, the thinner one can be folded in half to make installation more reliable.
Double Uni knot, also known as Double Grinner Knot
Allows you to connect two fishing lines of the same type or different ones.
Double Grinner provides reliable installation, but it should only be used for tying two fishing lines of approximately equal diameters.
Grinner knot, or Uni
Leader knot
As you can easily guess from the name of the knot, it is designed primarily for knitting shock leaders.
Also, the Leader knot would be a good choice for mounting leashes.
PR Connection
Provides a reliable and durable connection, but it must be knitted using a special tool.
There is also a simplified version of PR Connection , for which no tool is needed, but it is inferior to the standard one in terms of reliability.
Why is a shock leader necessary?
When fishing with bottom tackle, when casting heavy weights and feeders, a large load falls on the fishing line or braid. During casting, when swinging, the mass of the feeder can increase tens of times. It is necessary to strengthen the reliability of the fishing line or braid, which will certainly lead to an increase in their diameter. And this is not very good for feeder fishing.
Whether a special feeder line or cord is installed, their size has a great influence on the windage of the equipment. During the current, the fishing line and cord pull the feeder with their resistance, and this leads to the need to increase its weight.
But small diameter lines can also be used. You just need to attach an additional “shock” section with increased strength to the end of the fishing line - a shock leader.
For example, to the main line with a cross-section of 0.22 we knit a shock leader with a cross-section of 0.30. Or if the cord has a diameter of 0.12, then a leader made of fishing line with a cross-section of 0.26 is tied to it.
The shock leader gets its name because it takes on a “shock” load during casting. Let's assume that the main line holds a load of 4 kg, and the shock leader holds a load of 12-15 kg - you can safely throw a heavy load.
Installing a shock leader allows you to use small diameters in the main line, which reduces its resistance in the water. But this is not the only advantage of mounting a shock leader.
When feeder fishing, you often need to fish on edges and shells, since these are the areas that the fish like so much. Even a simple fishing line, not to mention fluorocarbon, is significantly resistant to abrasion on the edge with a shell. A thin cord can be easily cut in these areas. And if you consider that even a special fishing line for a feeder is much cheaper than a cord, then it is better to lose a couple of meters of fishing line than cord.
It is safer to cast the feeder with a shock leader from the fishing line. Thin braid can easily cut your finger while casting, but with a shock leader made of fishing line, this will not happen.
Due to its stretchability, the shock leader provides shock absorption when fishing for fish. Which plays into the hands of novice fishermen or when catching truly trophy fish.
Many fans of feeder fishing prefer to knit tackle on a monofilament fishing line. For example, an asymmetrical loop is only made on a fishing line. When installing a shock leader, the feeder tackle can be knitted directly on it, without wasting part of the braid each time.
As you can see, there are many advantages, and therefore many feeder fishing enthusiasts always use a shock leader. But not all, and let's find out why.
A little about the disadvantages
We’ll talk about optimal knots later, but for now we’ll tell you that no matter how the knot is crocheted, it still exceeds the cross-section of the lines used by several times. And on feeder spinning rods, light, small rings are used to give better action. Moreover, this applies to light (“light”) feeders. The situation is simpler on “heavy” feeders, on large-diameter rings.
But all the same, this unit collects various dirt when fishing, and when winding, it stops with debris on the upper ring. If feeder fishing takes place at night, then because of such debris, you can accidentally break the tip. Therefore, you need to constantly monitor the node and clean it.
Let's summarize the above and determine what the leader's shock montage gives?
Advantages:
- The main line or cord can be installed with smaller diameters;
- Allows you to throw a larger load;
- Does not cut your hand while casting;
- Shock leader made from monofilament has greater resistance to abrasion;
- Feeder tackle can be tied to the leader without wasting cord;
- Due to its stretchability, it forgives some mistakes when fishing.
Flaws:
- The knot gets caught in debris that remains on the feeder tulip;
- The albright assembly does not fit well through the narrow feeder rings. This greatly reduces casting distance;
- The windage of the fishing line also increases;
- A shock leader made of monofilament line reduces sensitivity.
As you can see, there are pros and cons to mounting a leader. You need to approach your choice wisely, choosing your main priorities.
How to knit
To begin with, let us recall an important rule: a shock leader is tied one fishing trip, and a new one is mounted on the next. To do this, leader, we will need a piece of monofilament
What fishing line is used for installation
As a rule, diameters used are: 0.24-0.36 mm. For throwing loads weighing up to 100 g. The video recommends a shock leader with a cross-section of 0.24-0.26 mm. For loads over 100 g, the cross-section of the line is 0.32-0.36 mm. You can choose almost any fishing line. When fishing in difficult areas (shells, riffles, edges, etc.), a shock leader can be made from fluorocarbon fishing line.
Size
Most often in all videos, the recommended size is 2-3 spinning rod lengths (approximately 10-15 m). Plus or minus the meter doesn't play a big role. But if fishing is at short distances, for example, 30 meters, then the leader is set to the minimum for good sensitivity.
Features and purpose of the Albright node
Albright is used to tie two lines together. With it, you can reliably connect two threads, even if they are of different types (monofilament and fluorocarbon, monofilament and braid, fluorocarbon and braid) and with a large difference in diameters.
In particular, it is good for:
- for mounting a shock leader in a feeder and carp fishing;
- for tying undergrowth in fly fishing;
- in order to attach a leash to the equipment of a float rod, donkey, spinning rod and any other tackle;
- to connect two pieces of fishing line after a break has occurred.
In general, today Albright is used in all types of fishing - float, bottom, spinning, fly fishing and so on.
Of course, Albright’s scope of application is not limited to fishing alone. Although it remains primarily a fishing knot, while in other areas other methods of tying are used.
Albright's main advantages:
- allows you to reliably connect two fishing lines of different types, including those with a diameter difference of more than 1 to 3;
- it is reliable, strong and durable, the strength of the connection is almost 100% of the initial strength of the one of the two lines being connected that is weaker in tensile strength;
- Albright is compact, so it easily fits through the guides of the rod and does not greatly reduce casting distance.
Albright has no shortcomings as such. But, on the one hand, it is not well suited for all situations, on the other hand, you need to knit it correctly so that it provides a reliable connection. It will take some time and a little practice to learn this installation method and get the hang of it.
In addition, Albright collects dirt and small debris, which should be cleaned periodically. It also inevitably reduces the casting distance if it passes through the guide rings at the moment of casting. But these two disadvantages are also typical for any other fishing knots.
This video describes the use of the Albright knot and shows how to knit it:
Albright node
Every element of a fishing rod's rig is important. In extreme conditions, any of them can fail. Naturally, during fishing, a fishing rod can be broken or a reel can be damaged. However, most often fishermen have problems with fishing line.
The most vulnerable element of the equipment remains the fishing line knot, which usually has to be knitted:
- at the connection points of the main line and the leash;
- at the connection points between the line and the hook (or artificial bait);
- at the points of connection of two types of main line (for example, monofilament and braid or two monofilaments of different sections).
Knots have always been the Achilles heel of any fishing tackle. Statistics say that in 95% of cases the fishing line breaks precisely at the connection points. But in most gear, at least two types of line are used: main and leader. And they need to be connected somehow.
The fisherman doesn’t have a lot of choice - either tie knots or use knotless connections, which are especially relevant for fans of trophy fishing and fans of carp fishing. One of the most reliable knots, which practically does not affect the reliability of fishing equipment, is the Albright knot.
Advantages
The advantages of the Albright Knot include:
- Ease of manufacture. This knot is surprisingly easy to knit.
- Reliability. Properly tied Albright gives an almost 100% guarantee of the reliability of the connection of two monofilaments. The connection point perfectly withstands the maximum permissible loads.
- Compactness. Any knot on the running tackle leads to a significant reduction in casting distance. Often ordinary, simple - it does not pass through the passage rings well and clings to them. Albright is compact and has an elongated, oblong shape, so it does not interfere with the main line moving freely through the guide rings. In case the assembly is filled with a special sealing adhesive.
The order of connecting fishing lines using the Albright knot
The most reliable knots for braiding
Research has shown that each type of cord requires a specific (its own) version of the knot. From the total number of nodes, several main ones can be distinguished:
Palomar knot
The Palomar knot is one of the simplest and, at the same time, the most effective knitting methods. To attach one of the fishing accessories to the fishing line, you need to make a few simple movements.
- The piece of fishing line must be folded in half.
- The fishing line, bent in half, needs to be threaded into the eye of the hook.
- After this, you should tie a regular knot without tightening it. The eye of the hook should be in the center of the loop.
- A hook is pulled into the resulting loop.
- At the site of the knot, the braid should be moistened and the knot should be carefully tightened. Excess line is trimmed using scissors.
The length of a piece of fishing line depends on the length of the leash, and can be in the range of 20-50cm.
Uni (Uni knot, Grinner knot)
This knot is used in cases where it is impossible to stretch a double line into the eye of the hook: the eye is either very small, or a very thick line. Power Pro recommends using this type of knot for tying their products. It is more complex, and to learn how to knit it, you will have to practice:
- Tying a knot begins by pulling braided line through the eye of the hook, after which a loop is made.
- Then the end of the fishing line is wrapped several times around the main fishing line and after that a second loop is made.
- The end of the fishing line is passed through the second loop (the first), and 5-7 turns should be made around the double fishing line.
- After this, the line is wetted and the knot is tightened. If there is excess fishing line, cut it off using scissors.
It is recommended to master the technique of knitting a Uni knot by using, to begin with, long pieces of fishing line, about 60cm.
Clinch (Improved Clineh)
This type of knot can be recommended for knitting braided fishing line. It is quite simple and can be mastered by any beginning angler.
- A piece of braided fishing line, about 10-15cm long, is pulled into the eye of the hook.
- After this, the end of the fishing line is wrapped around the main fishing line (along with the hook shank), and 5-6 turns can be made.
- The free end of the fishing line is pulled through the small and large loops formed as a result of such manipulations.
- At the final stage, the loop is wetted and the knot is tightened with maximum effort. The excess ends of the fishing line are removed.
When tying a knot, the hook should be kept in the eye area so that all the loops formed can be saved.
Bloody knot
This type of knot is used to securely connect two pieces of cord. Moreover, you can connect sections of different thicknesses, but the difference in diameter should not be more than twice. With its help, you can tie a leash made of monofilament fishing line to the braided line.
- Two pieces of fishing line are located next to each other in opposite directions.
- Then take one end and wrap it around the other line 5-6 times.
- This end of the line is wrapped back and pushed between the turns in the opposite direction.
- The second end of the fishing line is taken and the same procedure is performed with it as with the first end. As a result of this, in the center of the two turns (there should be turns of fishing line on the left and right) two ends of the fishing line should peek out, directed in different directions.
- The entire knot, with all the turns, is wetted and by moving the two hands in opposite directions, this knot is tightened. Excess line is removed.
The number of turns depends on the thickness of the fishing line. For a braided fishing line, 2-3 turns will be sufficient, for a regular fishing line with a diameter of 0.3 mm or more - 4 turns, for a regular fishing line less than 0.3 mm, 5 turns are enough, for a fishing line with a diameter of less than 0.15 mm, this number of turns can equal 6.
How is this type of knot tied?
The Albright knot is quite interesting, but it is easy to tie. Before you do this, you need to know a few facts about it:
- Before tying anything with this knot, you need to select two types of fishing line. But they must differ by two sizes.
- Next, you need to fold one or another fishing line in half. It must extend ten centimeters from a certain bend.
- Next you need to thread the resulting loop and wrap the end around it about six times. If your fishing line is thick, then you need to do this several times more.
- After you complete these procedures, you need to thread the same loop several times with a thin fishing line.
- The last stage is tightening the loop.
The Double Albright fishing hub has a competitor in its area. But these units can compete only in a fluorocarbon connection or in connection with a fishing line. It is also worth noting that Albright’s competitor, the Carrot knot, can only be used when fishing with a spinning rod.
Which node to choose for installation
For editing, many videos recommend three nodes. These are: Klinch, Albright and Blood Knot node. To reduce friction of the units when passing through the rings, it is necessary to use sizing. Add a little superglue to the tied knot. This will give the knot the necessary smoothness. And the debris will not cling as much, and passing through the rings will be better.
Blood Knot
The knot gained its popularity and name in the 15th century. At that time it was made at the end of a whip to punish British sailors in the navy. The strength of this unit is up to 75% . It is advisable to choose diameters that differ by no more than 2 times when tying the cord and fishing line.
Fornication Knot is a simple knot that every fisherman must know.
We wrap one line around the other and make a couple of turns and pull it through the center. We moisten, clamp and the knot is ready. At the same time, we would recommend making 9 turns with the cord, and 6 turns with the fishing line. For better smoothness, add a drop of superglue to the knot.
Albright node
We knit a small loop from the shock leader. We pass the main fishing line or cord through it and make 8-12 turns. We pass the end of the cord through the loop, moisten and tighten the knot. For better smoothness, add a drop of superglue to the Albright assembly.
Clinch Knot
This strong and simple knot is used not only for tying hooks, but also for leader. We make a small loop at the end of the braid, and use a clinch to knit the leader behind it. Before tightening, moisten the line so as not to damage it.
ulov.guru